
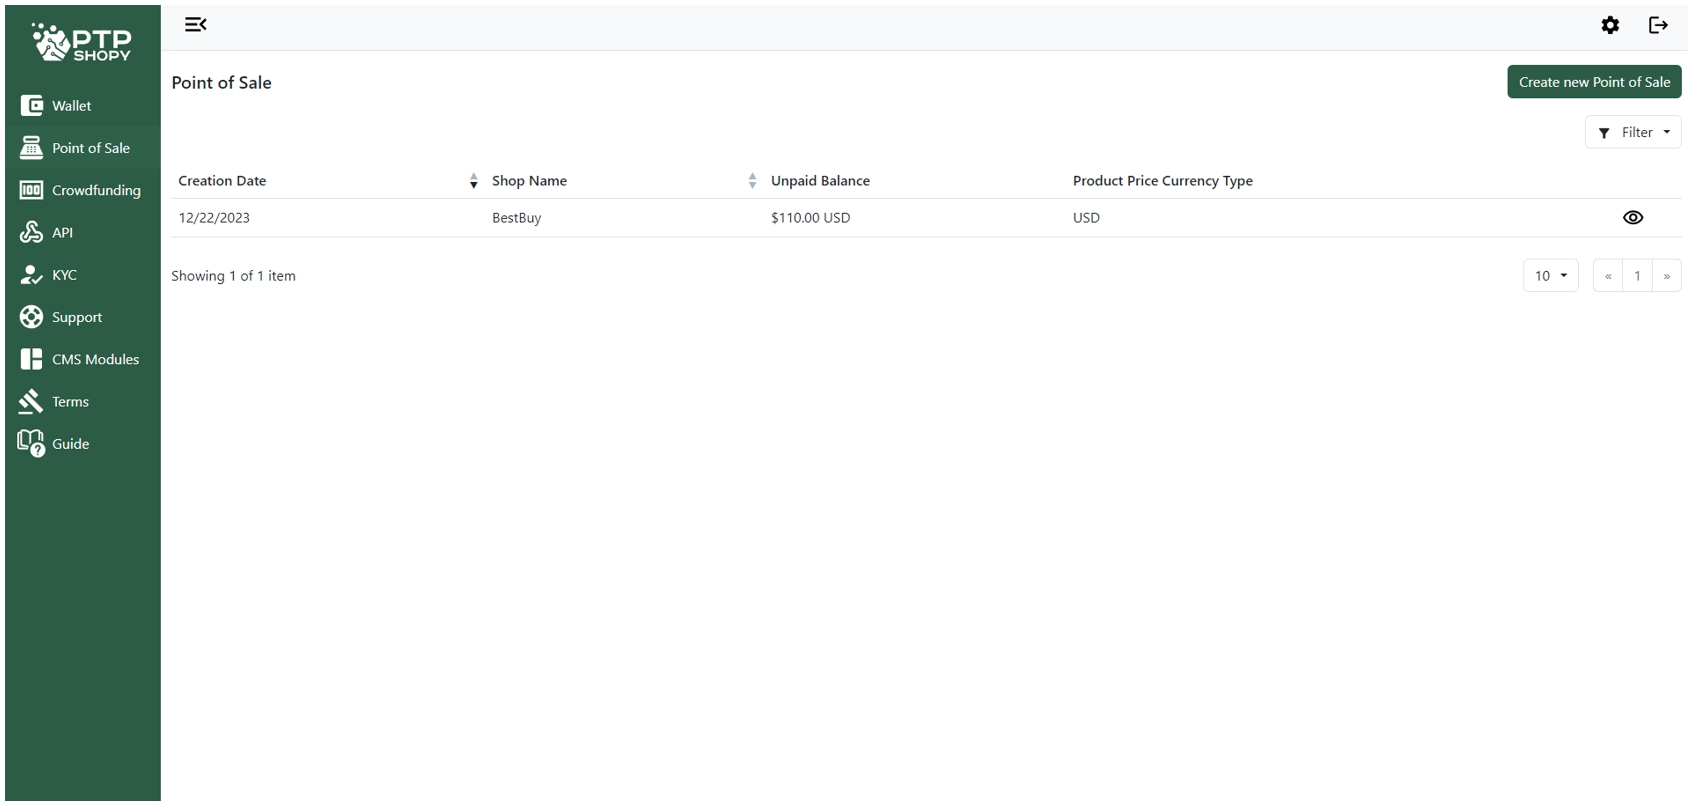
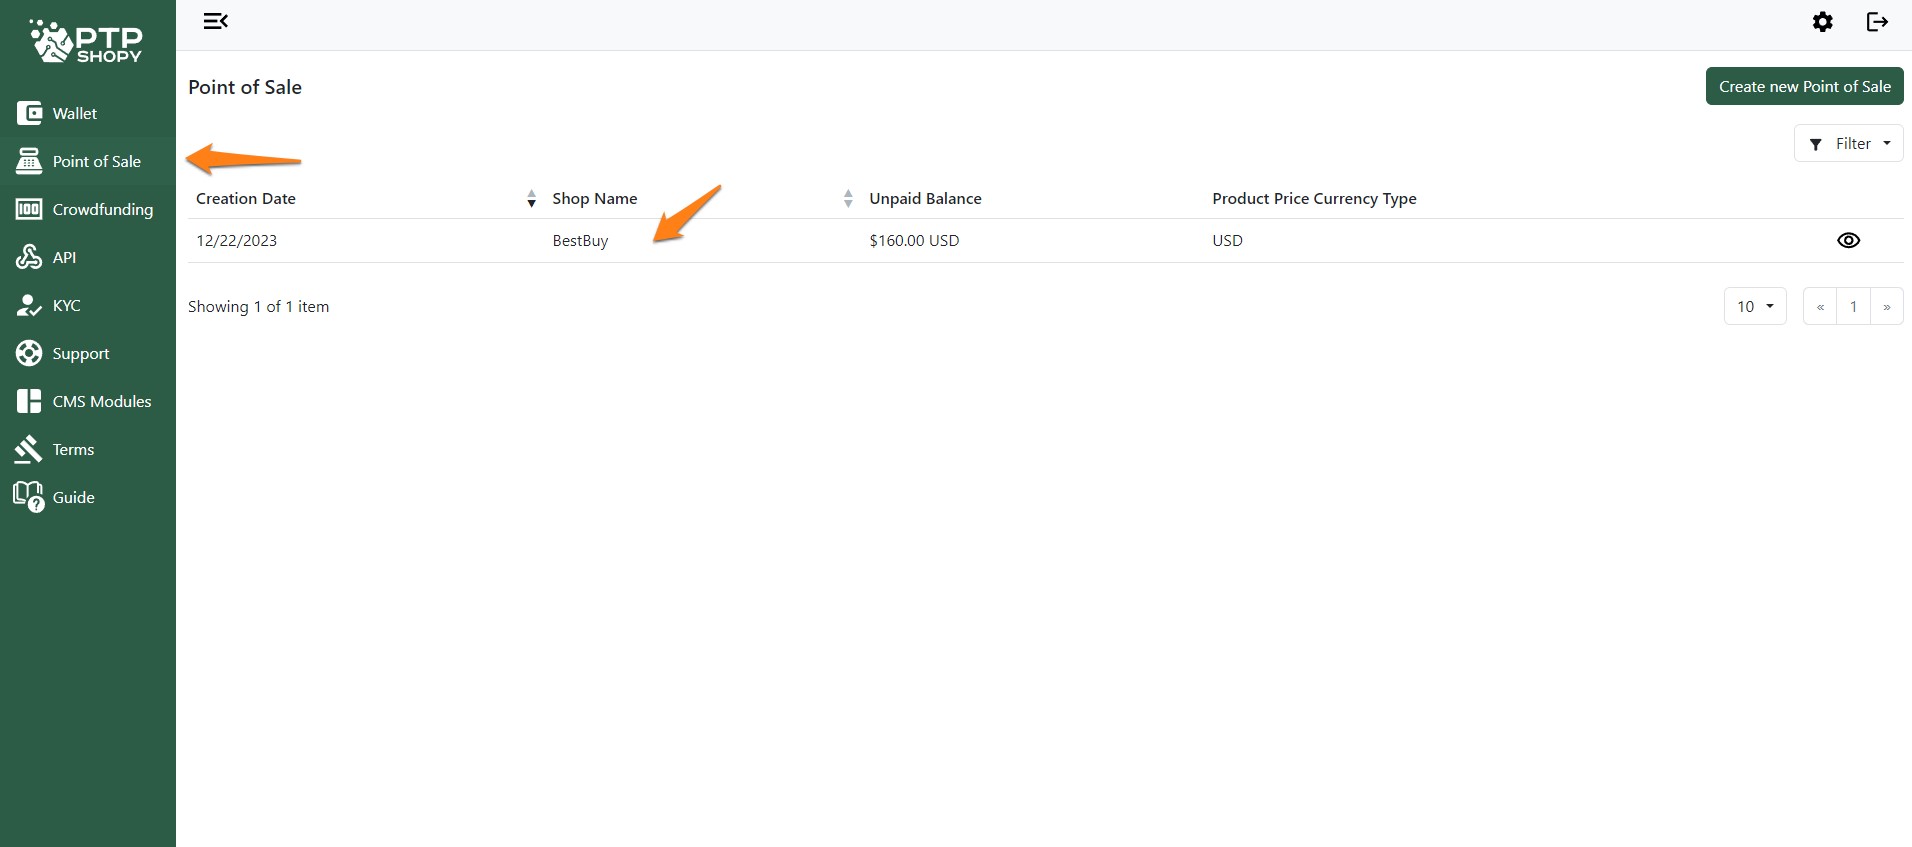
Go to ‘Point of Sale https://merchant.ptpshopy.com/pos and click on your Shop.
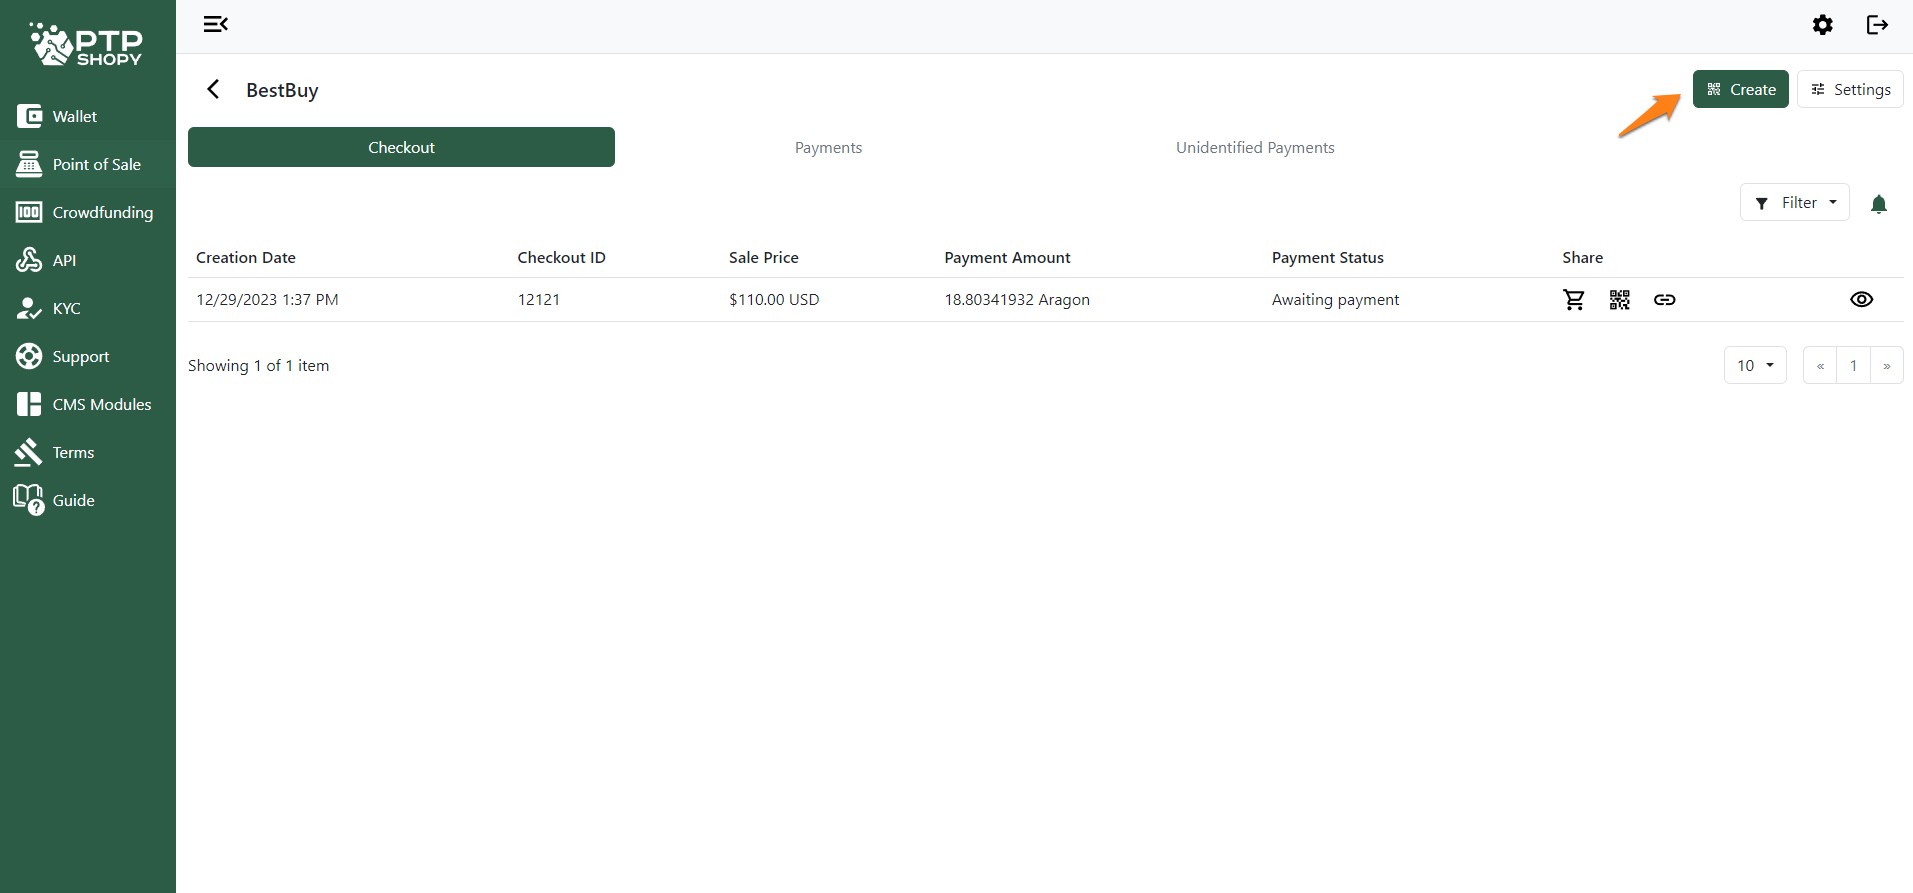
Click the ‘Create’ button at the top right of the screen.
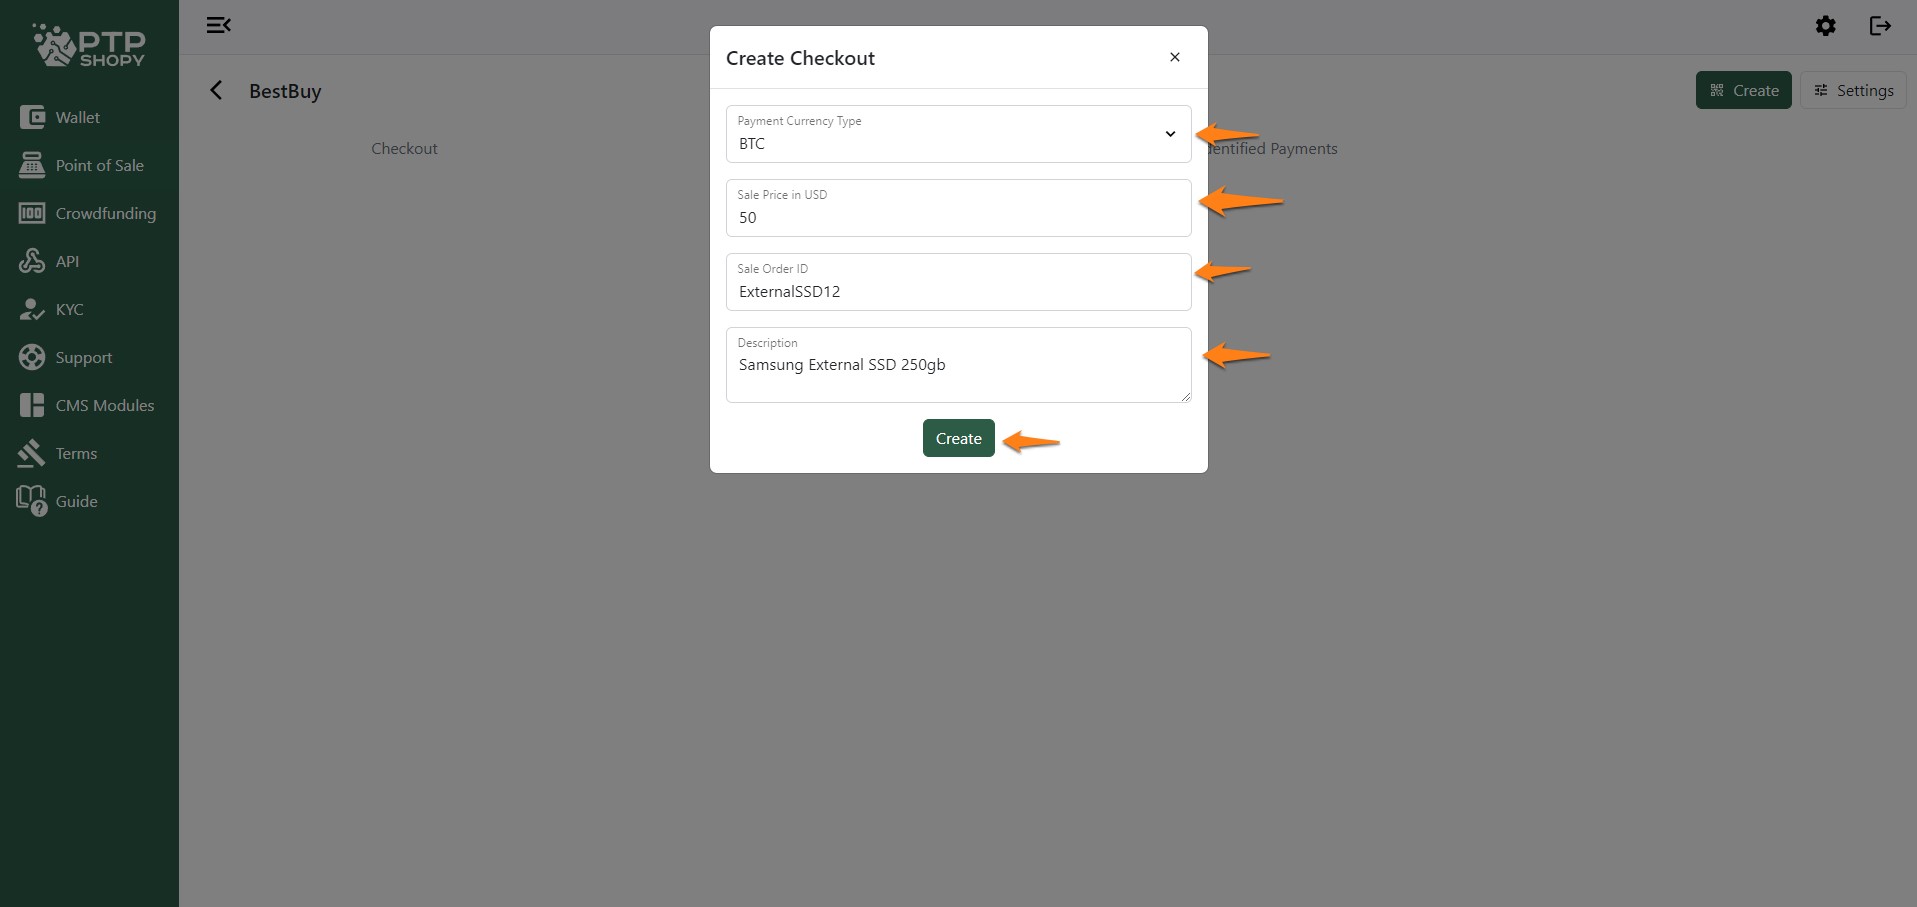
Select your Payment Currency Type. Enter the Sale Price, enter the Sale Order ID (it can be numbers or letters), and then enter a description of the product/service (this is for your own bookkeeping). Click on ‘Create’.
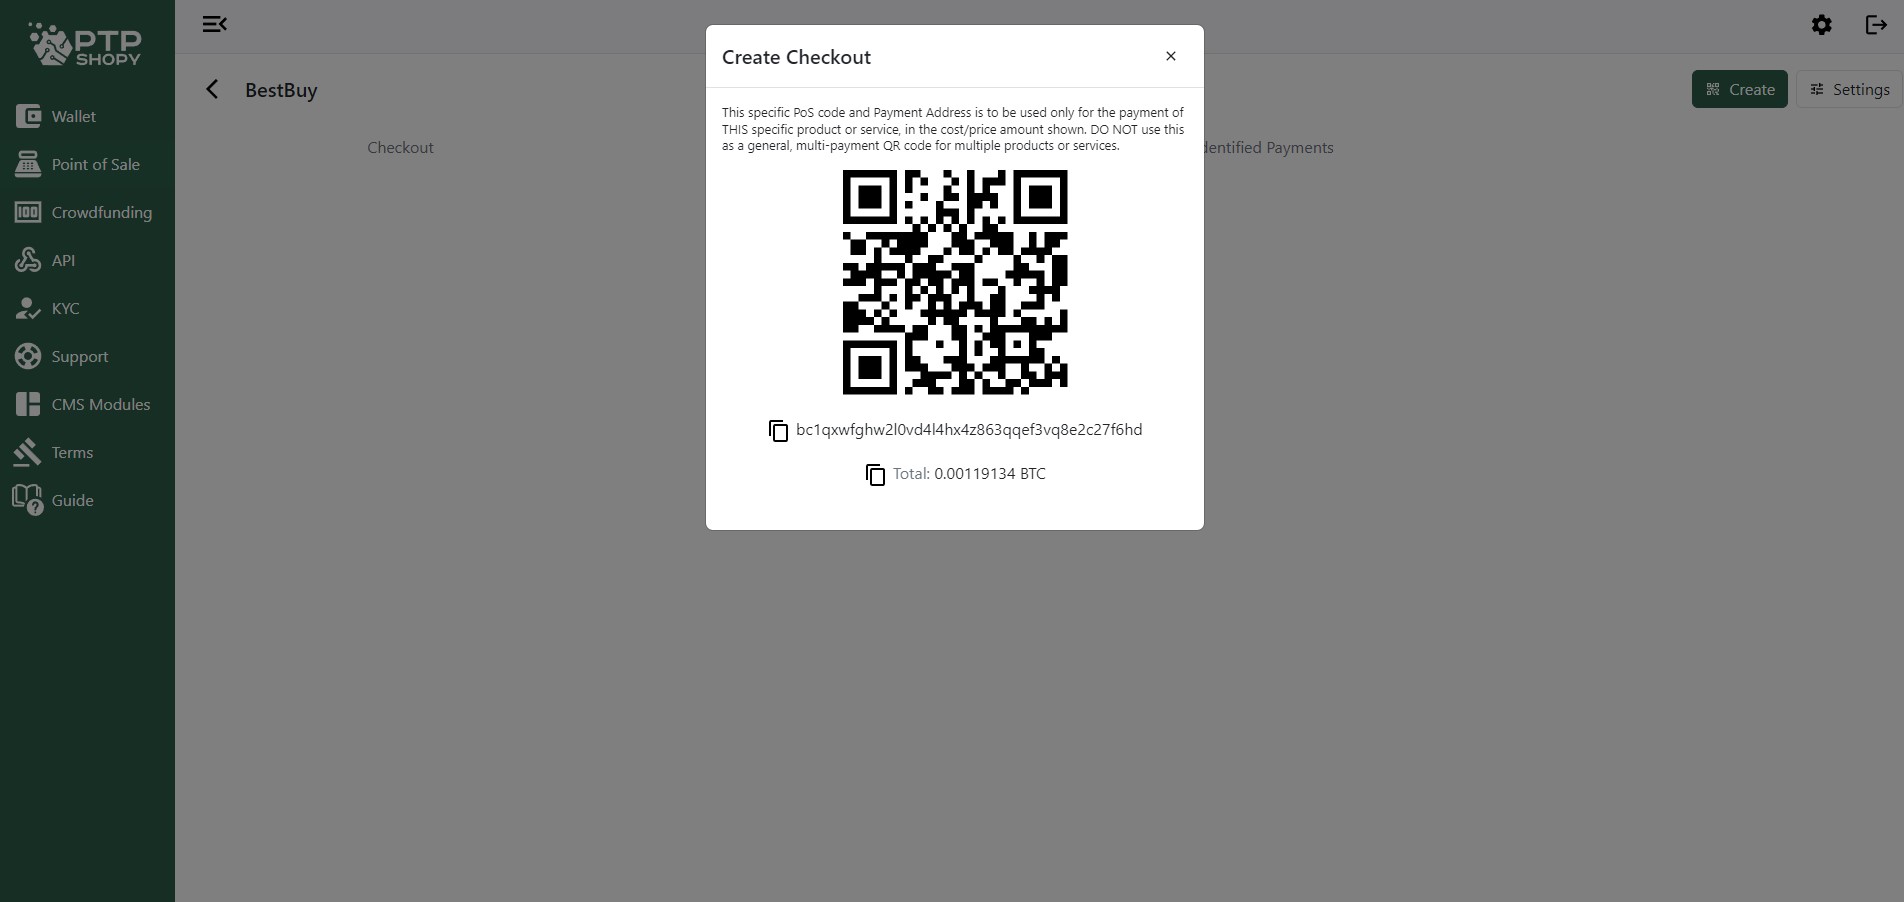
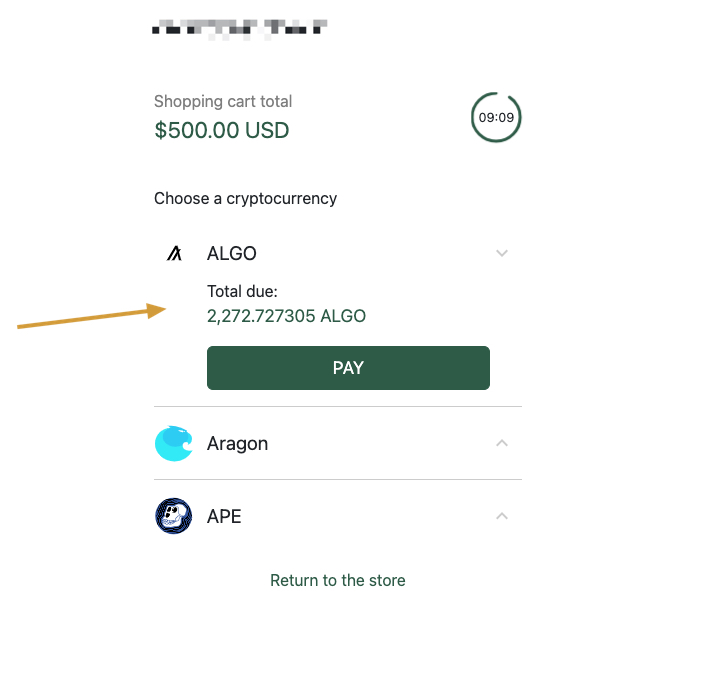
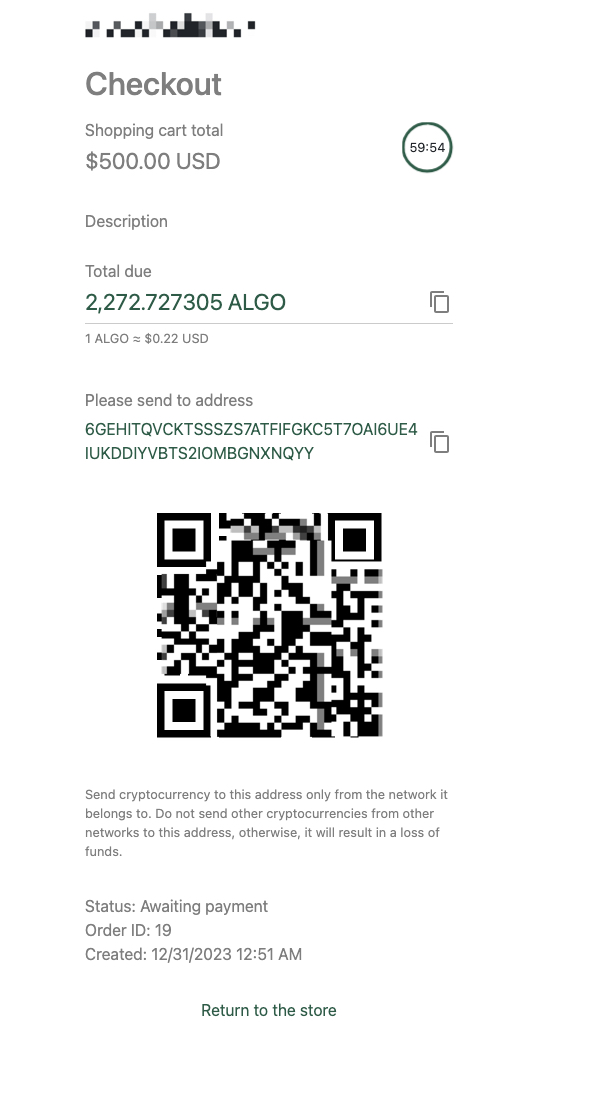
Done! You will now be shown a custom-tailored QR code and a receive address. Show the QR Code to the buyer, or send the receive address with the ‘Total’.
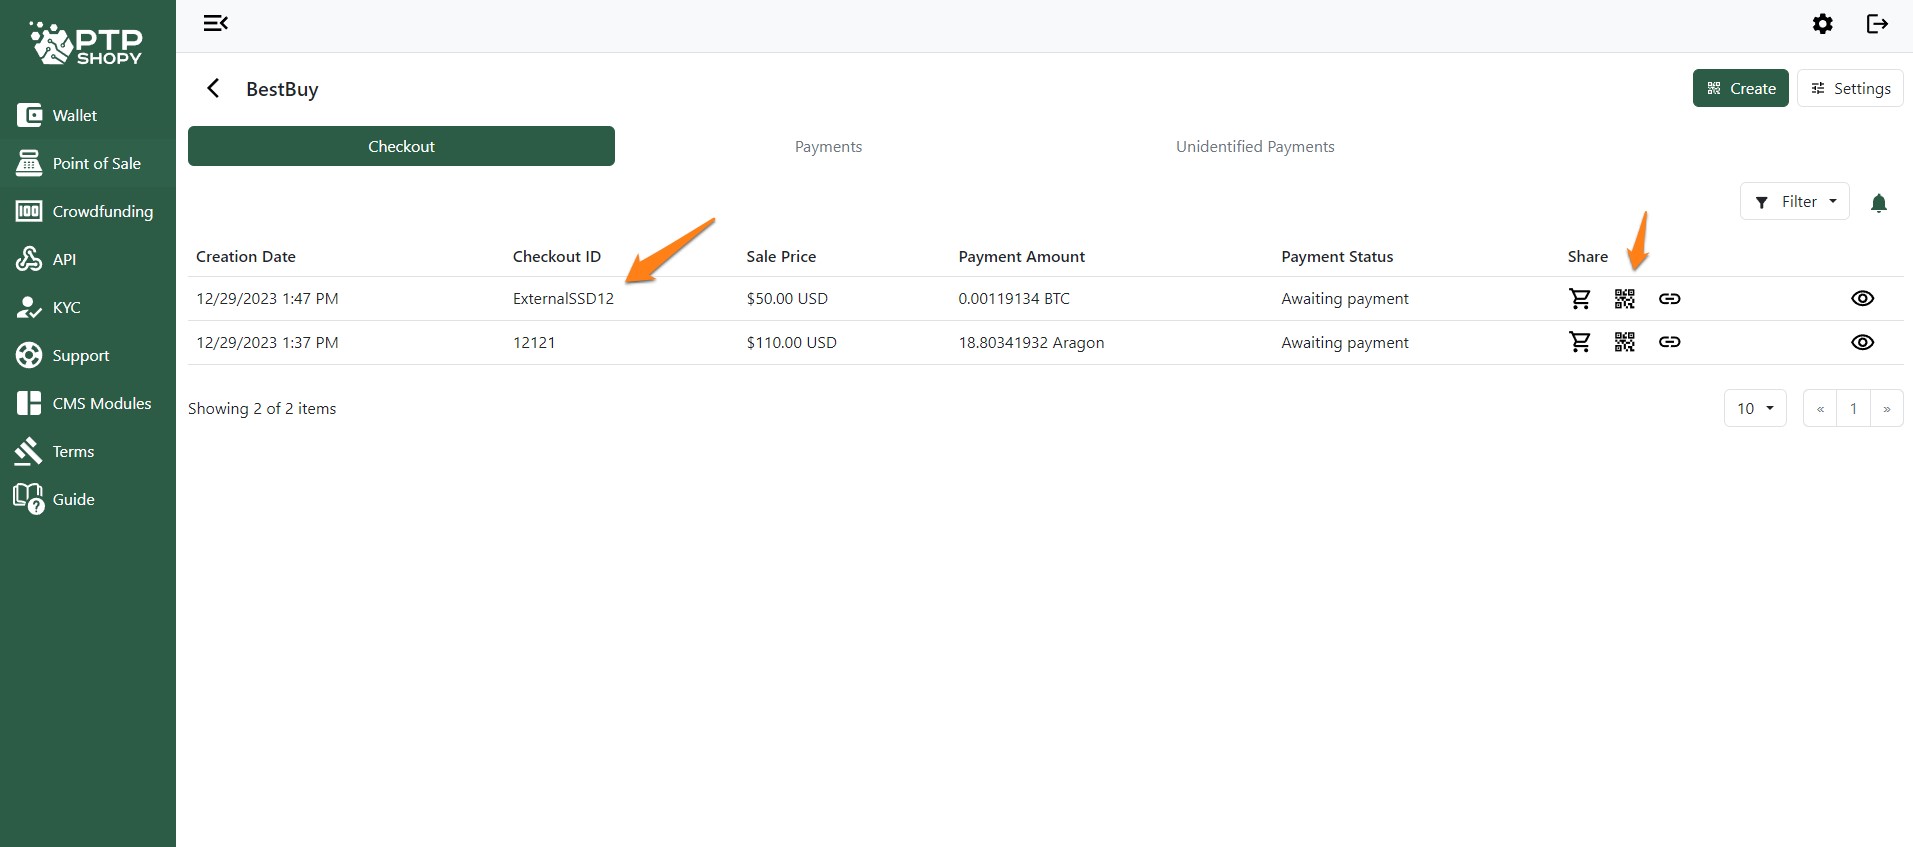
You can open the QR Code from the ‘Checkout’ section. This section displays all invoices made to clients for particular products or services offered by this particular store. If you need to access the QR Code, click on the QR Code button beneath ‘Share’.
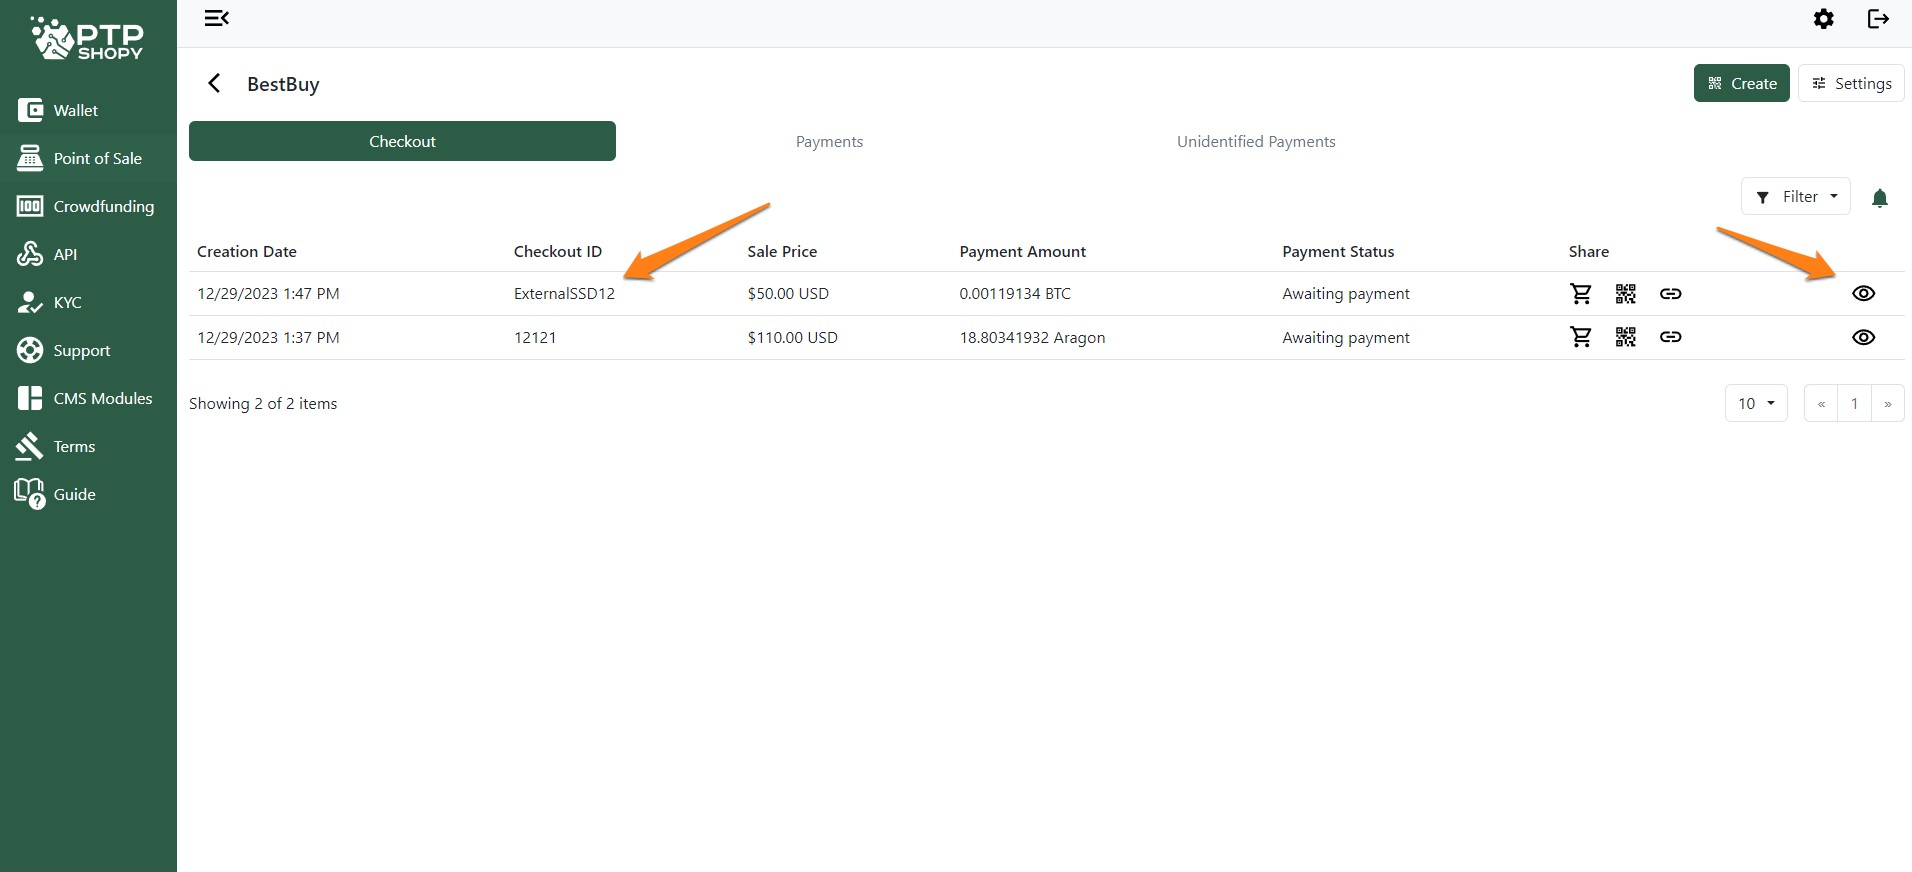
Click on the invoice or click on the ‘eye’ icon found on the right side of the screen.
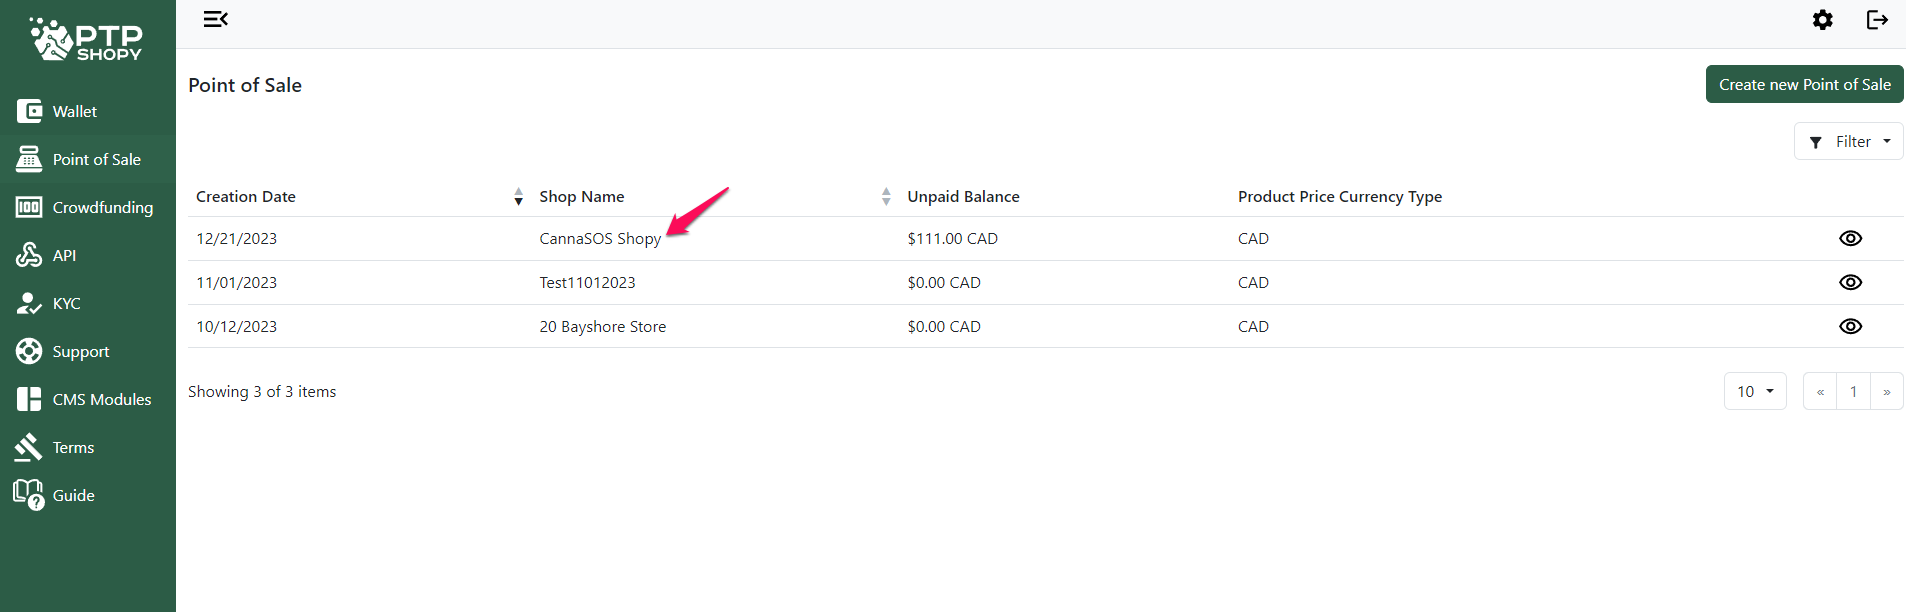
Go to the ‘Point of Sale’ section of your Merchant account https://merchant.ptpshopy.com/pos and select your ‘Shop’.
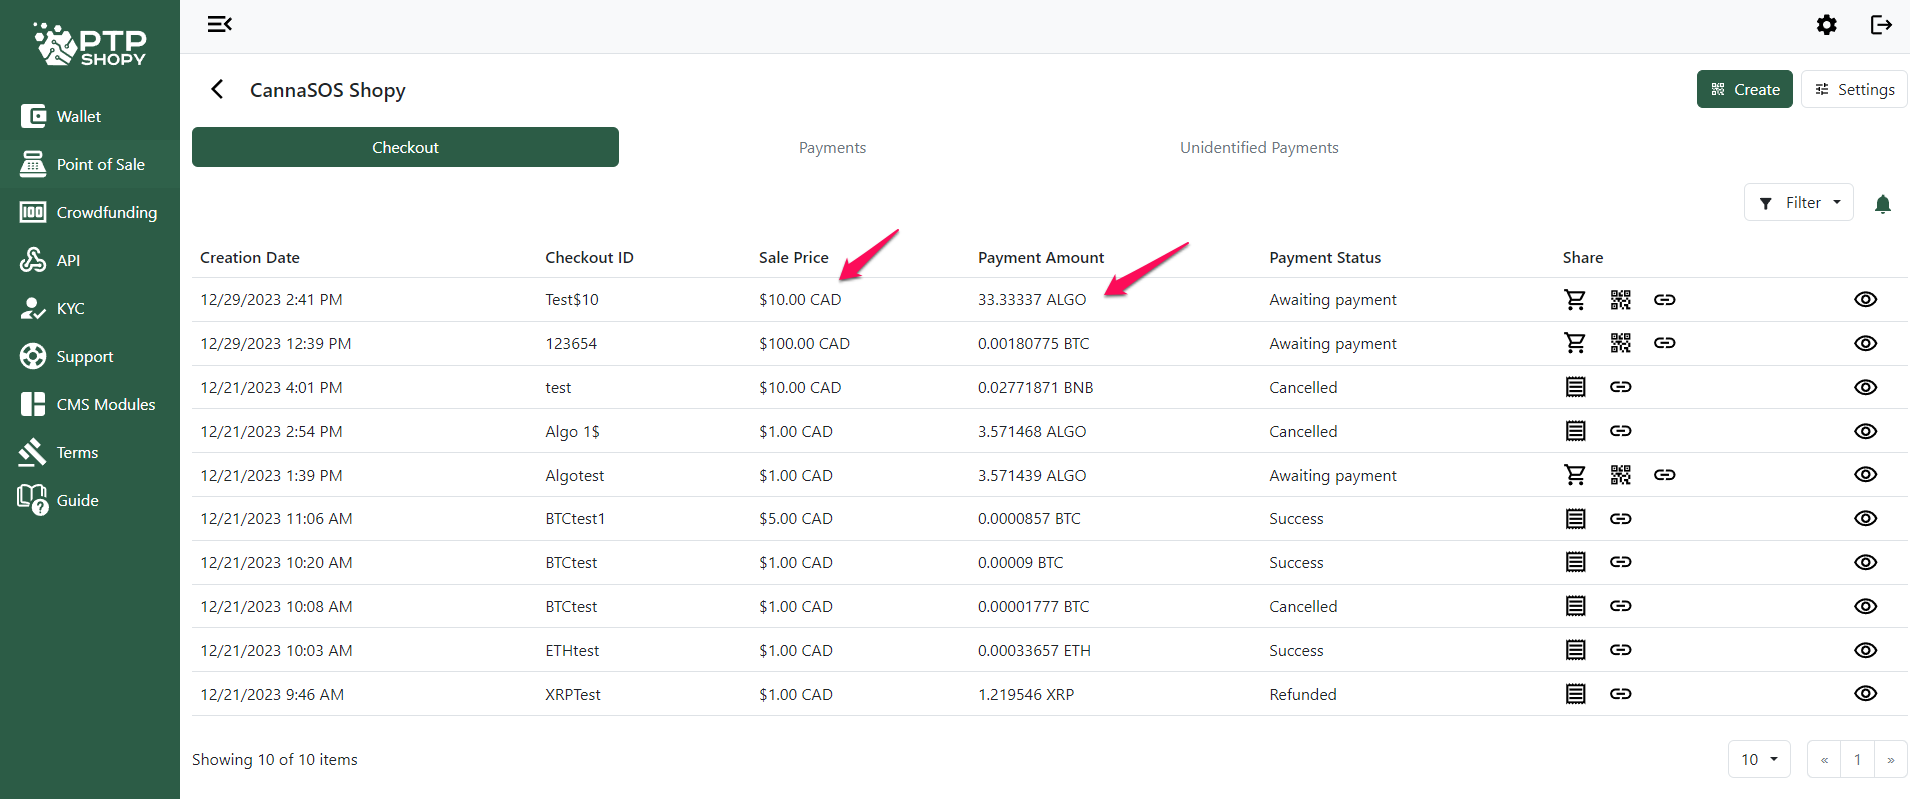
For this example, a Sale Order/Checkout ID for $10 has been created.
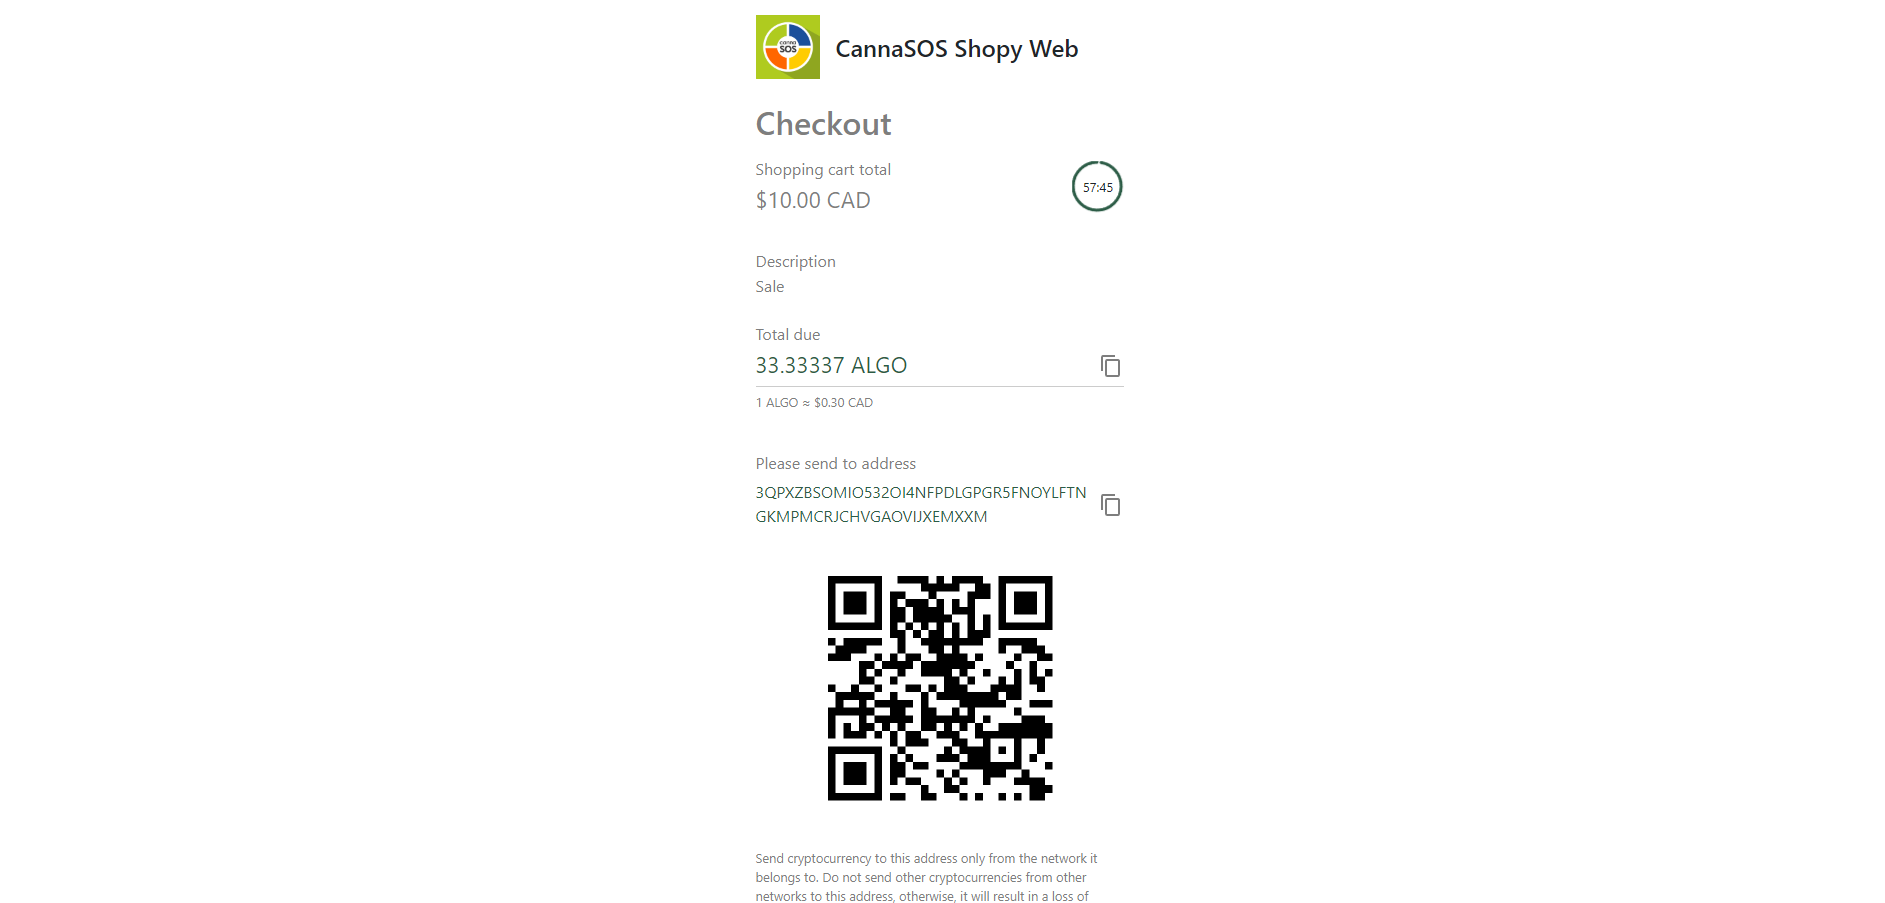
Here is a preview of the example.
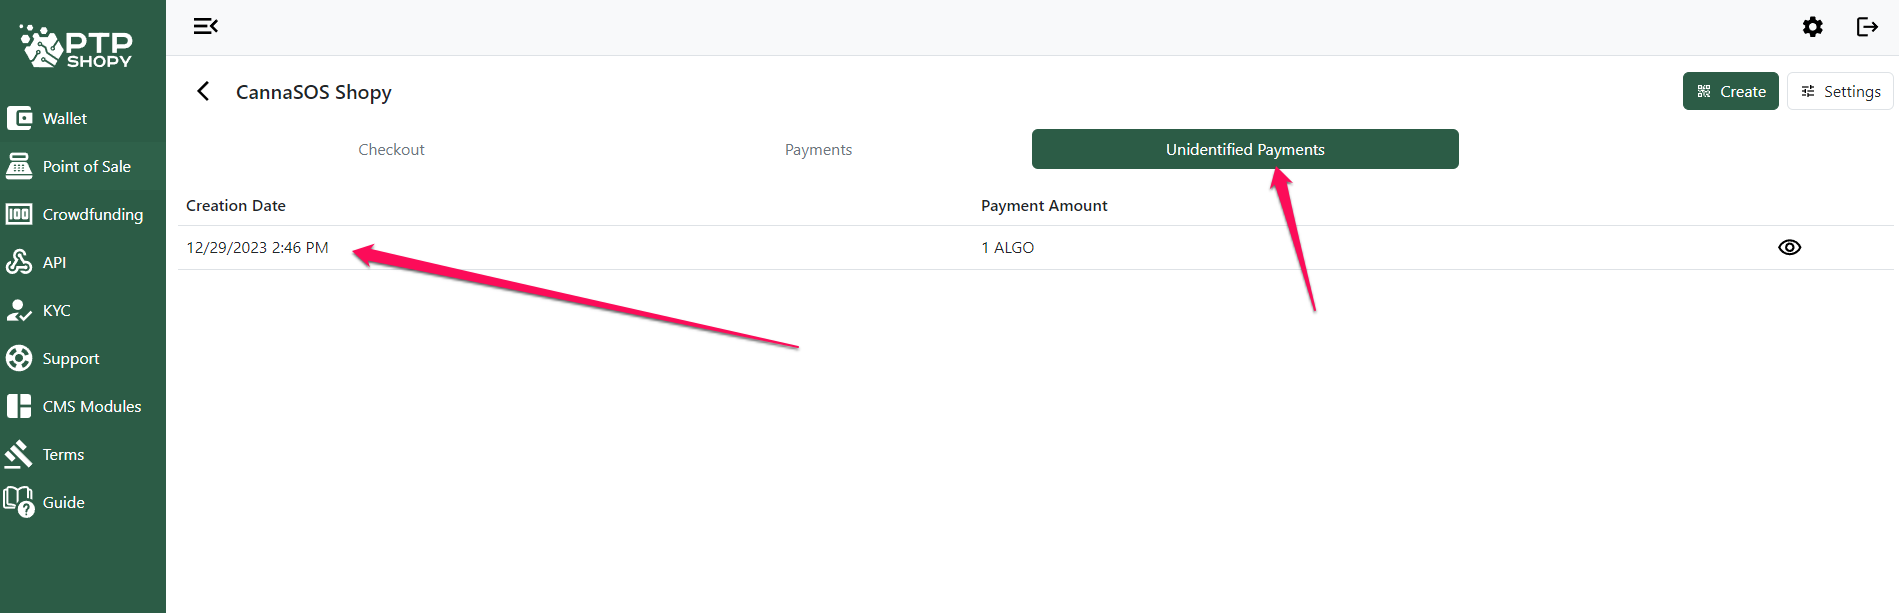
Select ‘Unidentified Payments’ in the sub-menu. As you can see, you have received a partial payment from the buyer for that sale order.
Select the unidentified payment. To do so, click on the payment.
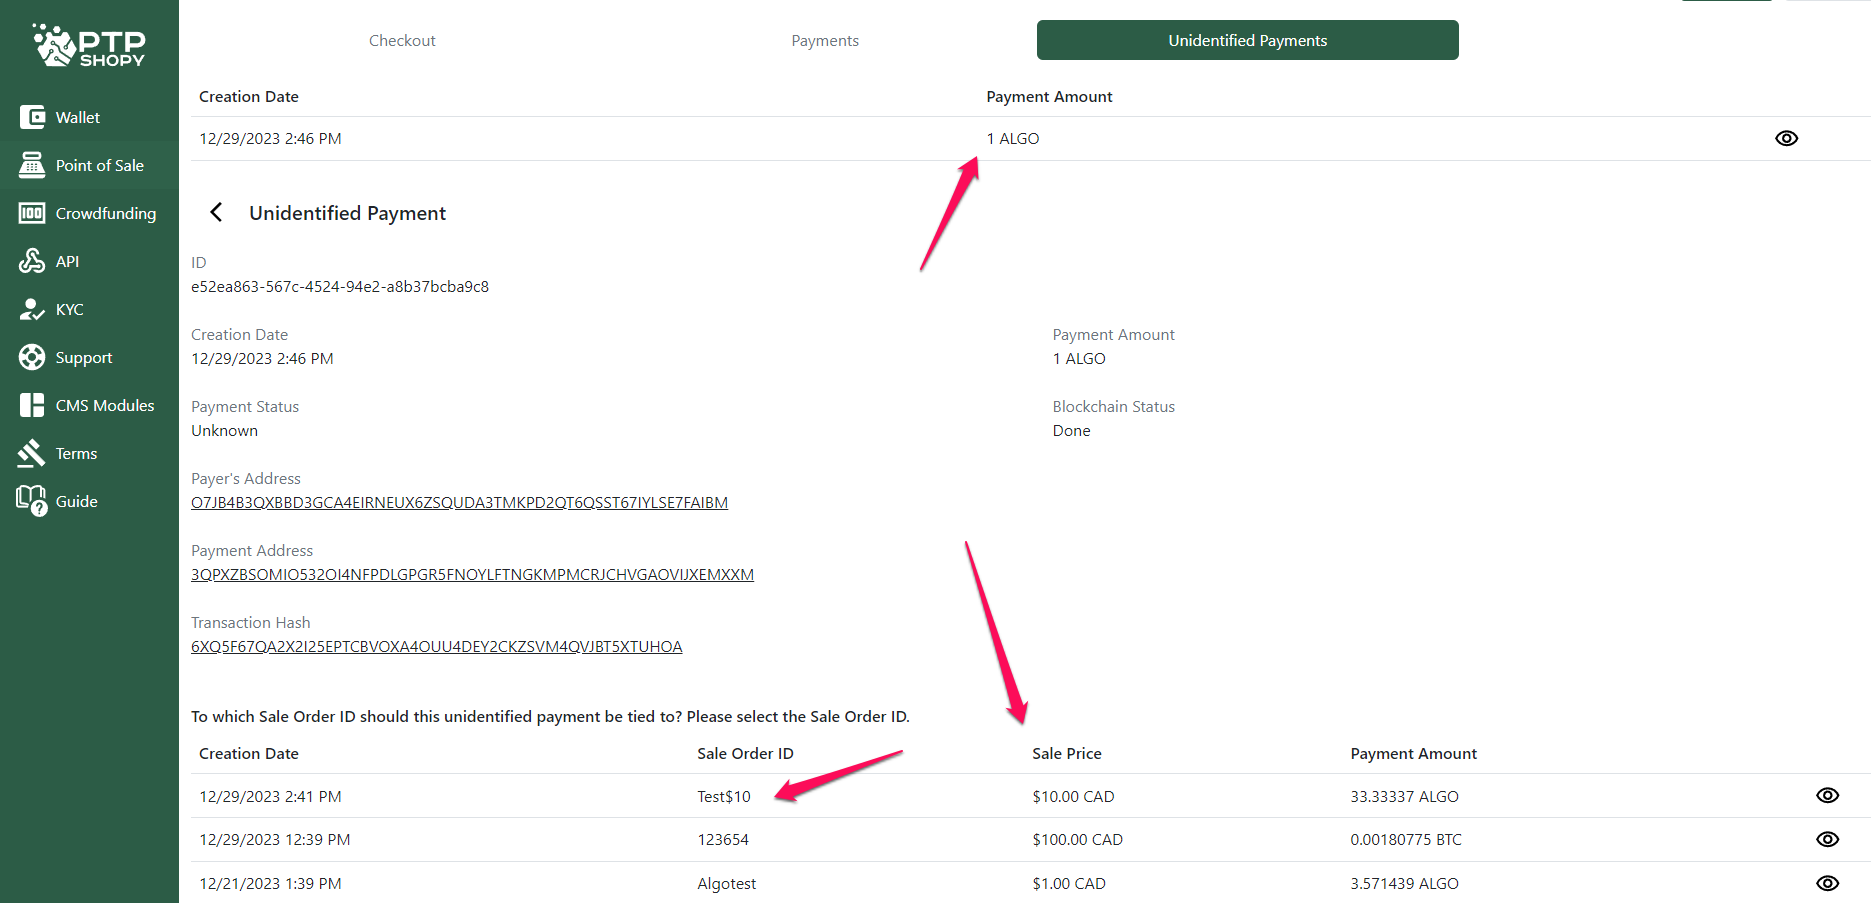
You will see all unpaid ‘Sale Orders’ at the bottom. You can choose which invoice to merge with the received unidentified payment.
Click on the Sale Order.
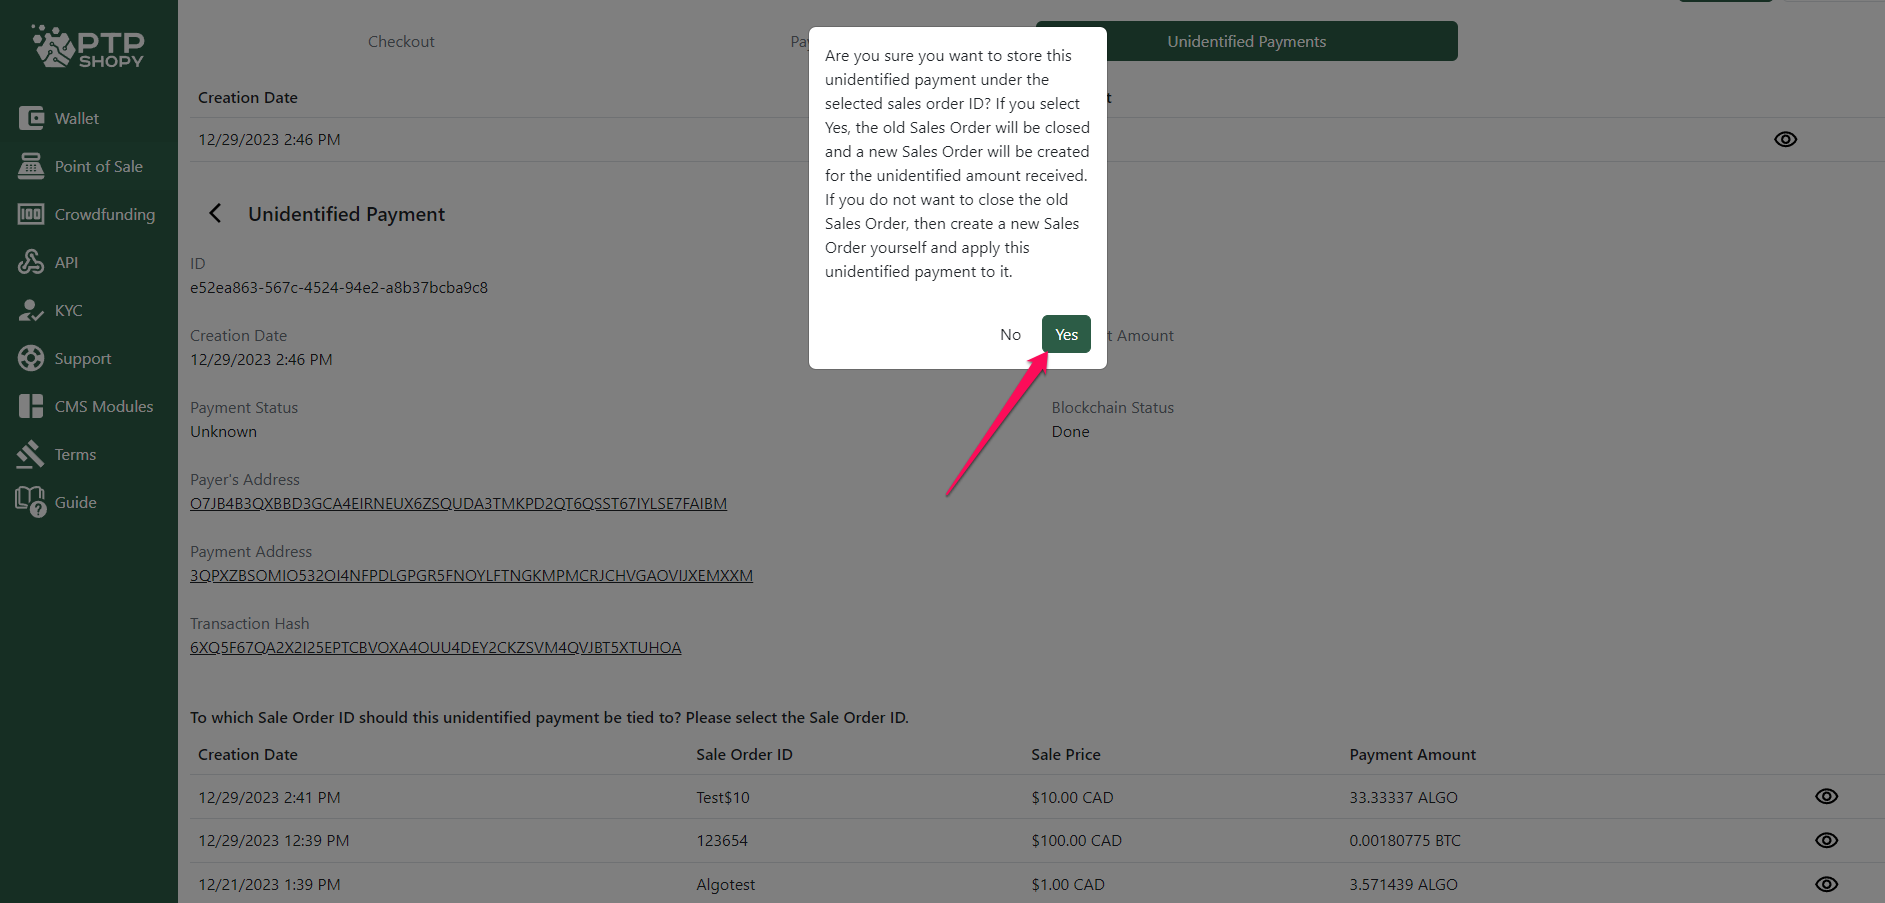
Click on Yes. After that, the unidentified payment will be attributed to this invoice, which will automatically close. If you need to receive an additional payment from the buyer, then for the difference you need to create a new ‘Sale Order’/’Checkout ID’ that needs to be sent to the buyer.
In addition, if you initially do not approve of the partial unidentified payment that you received, you can return the payment back to the customer by clicking on the Sale Order and selecting ‘Refund’.
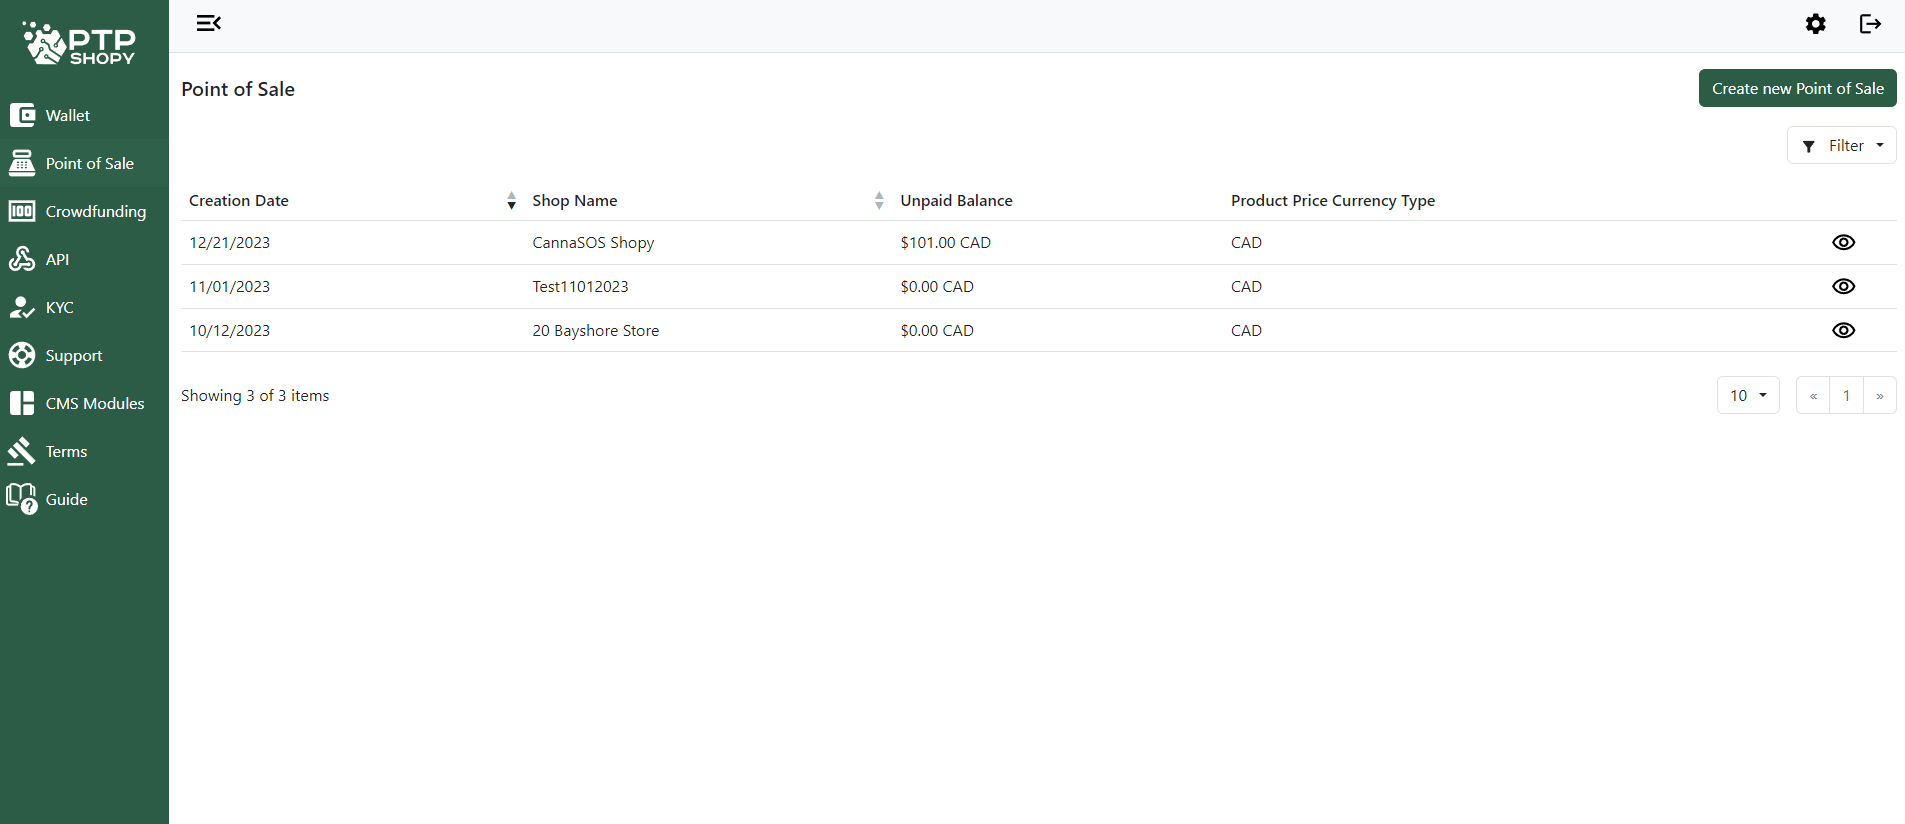
Go to the ‘Point of Sale’ module https://merchant.ptpshopy.com/pos and select your Shop.
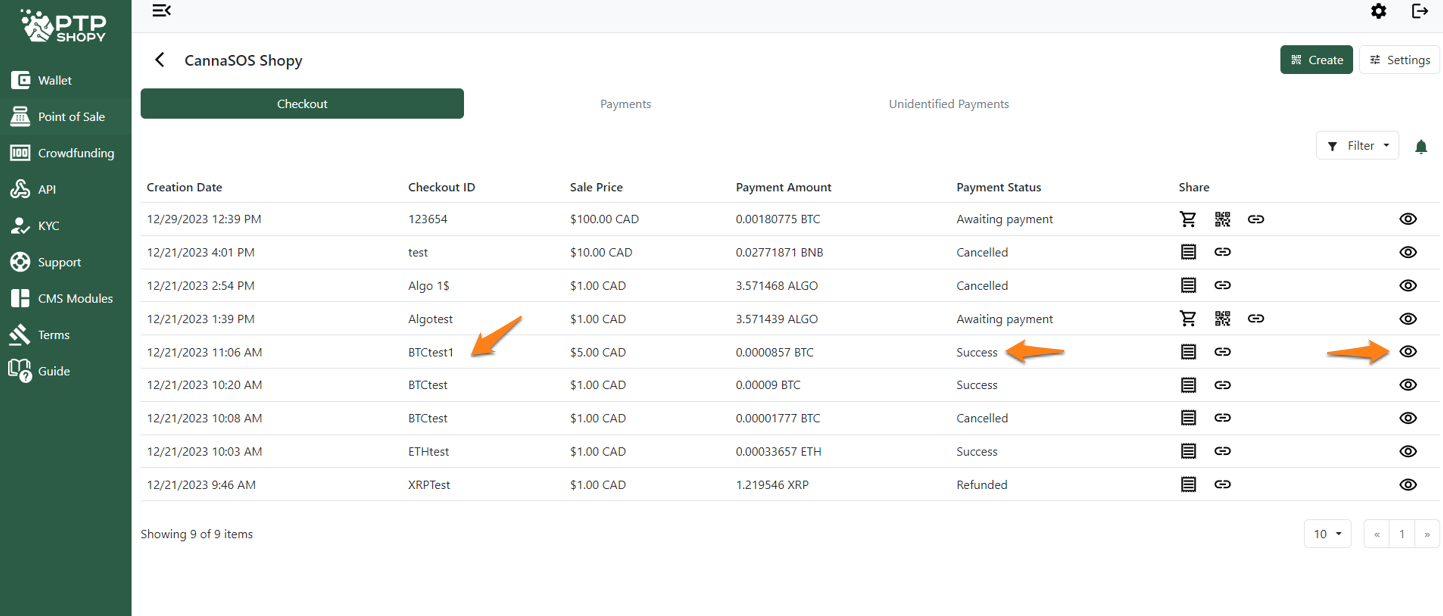
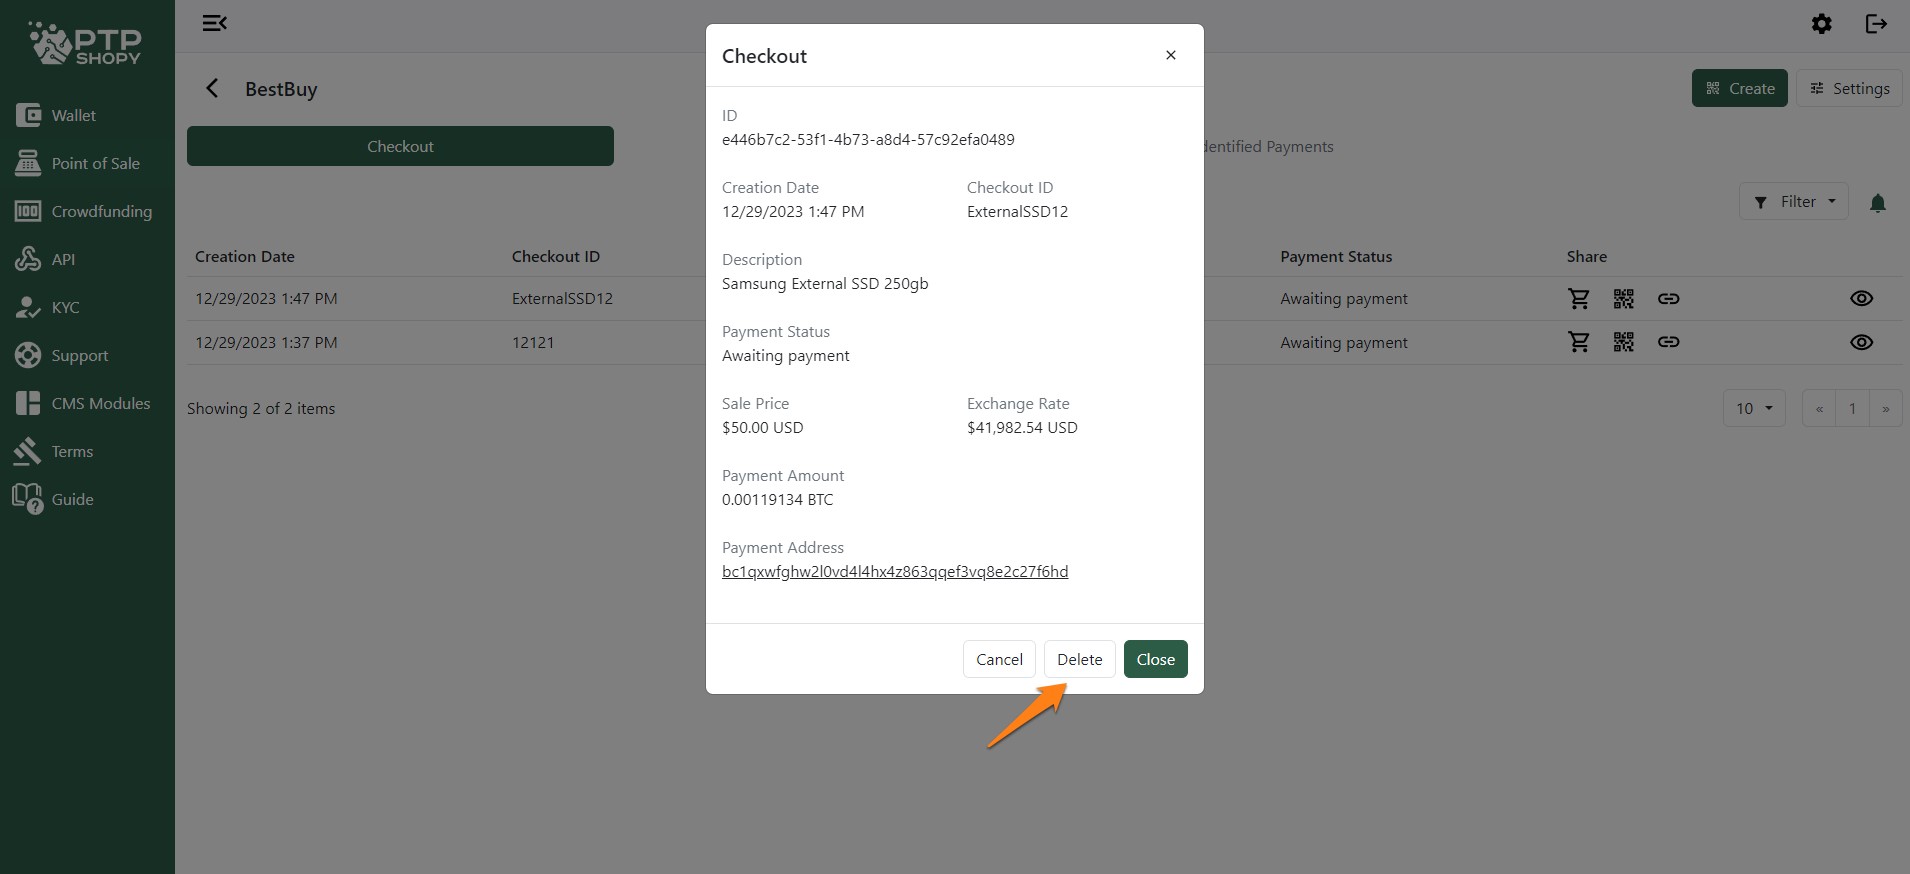
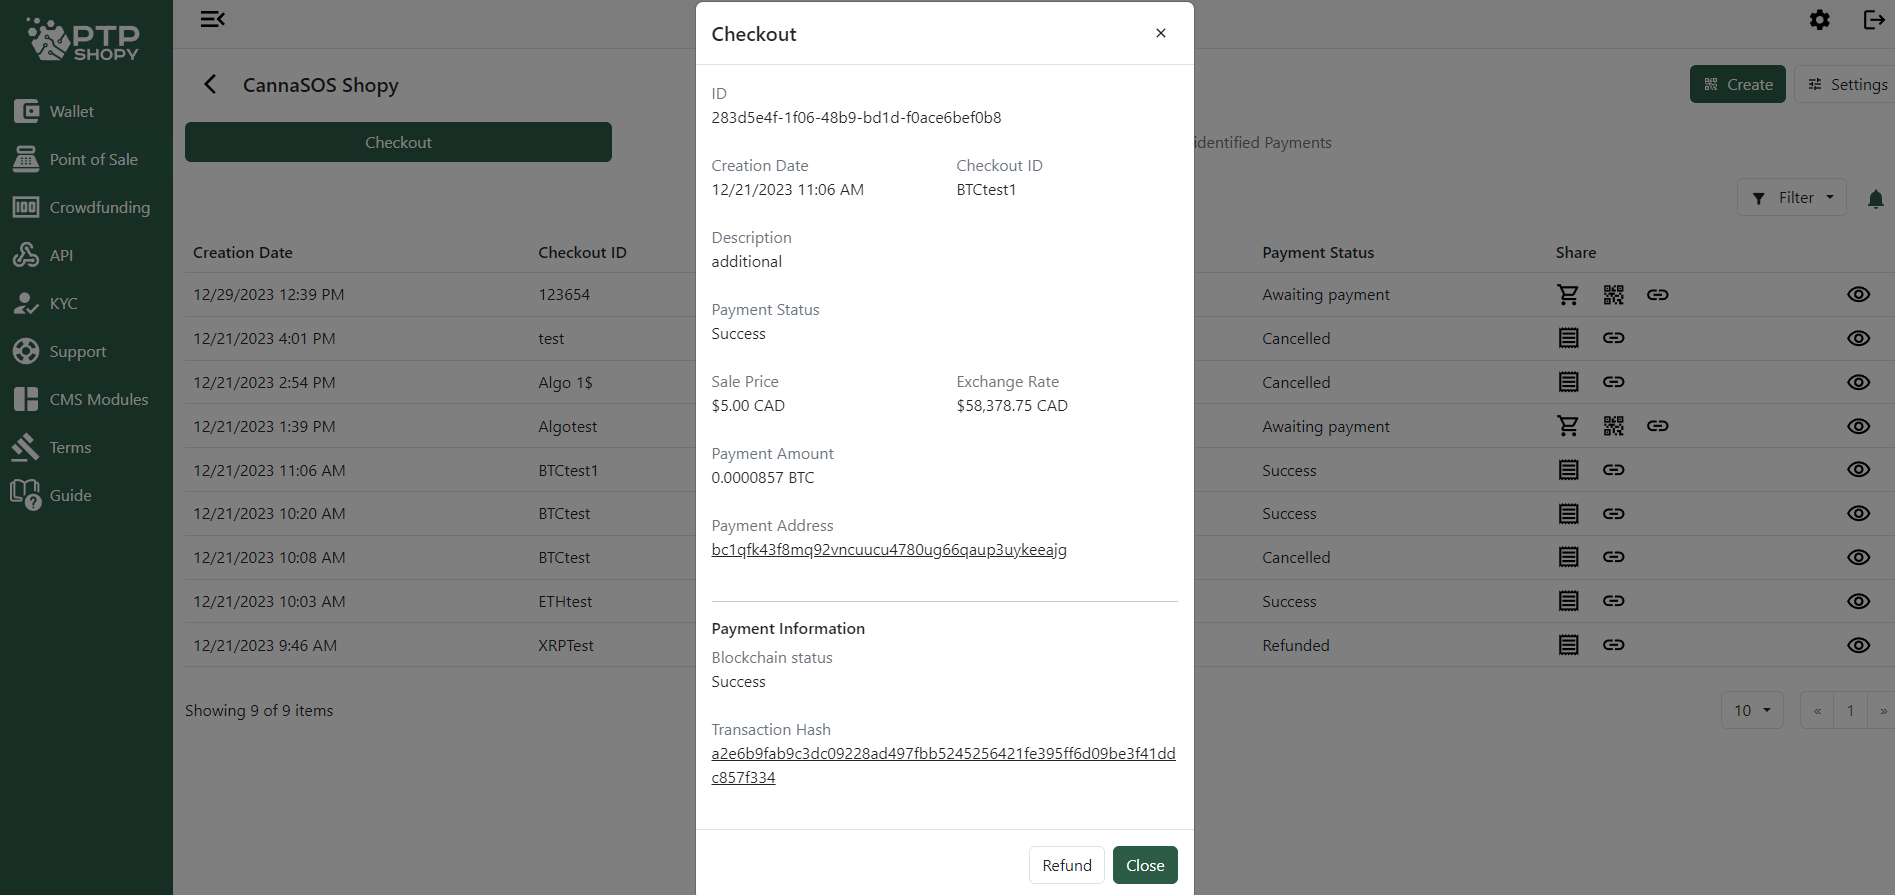
Once you’ve selected your Shop, select the Checkout ID/invoice with the payment status set as – ‘Success’.
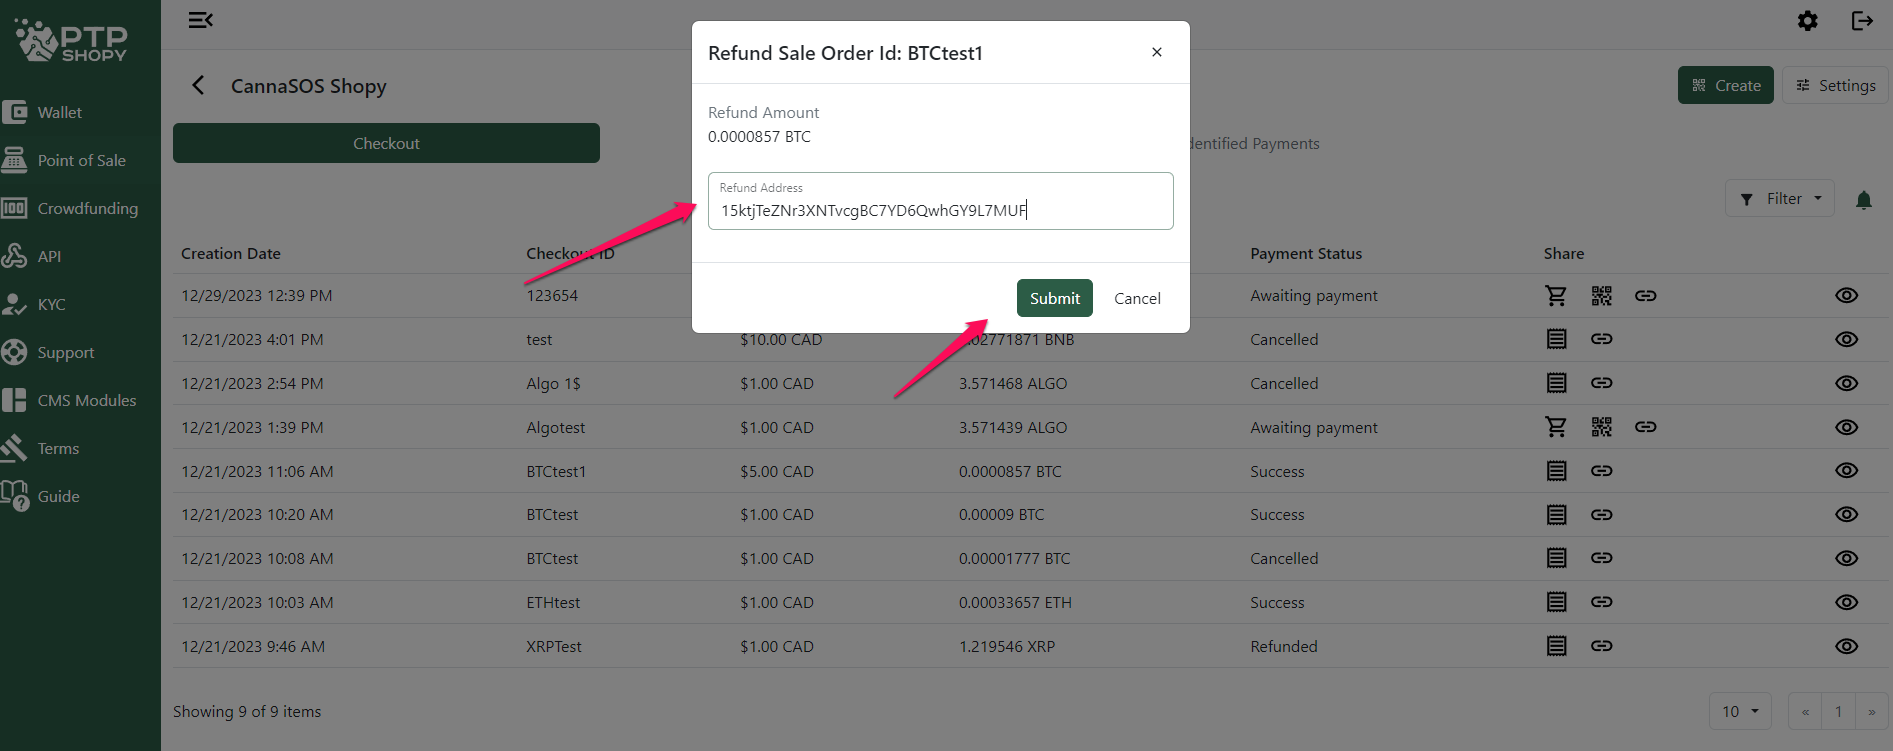
If you need to change the refund address, enter the receive address and click the ‘Submit’ button. Keep in mind that the new receive address needs to be of the same currency type. If you are making a BTC refund, but the user provided an ETH receive address, clicking on ‘Submit’ would lead to a loss of funds.
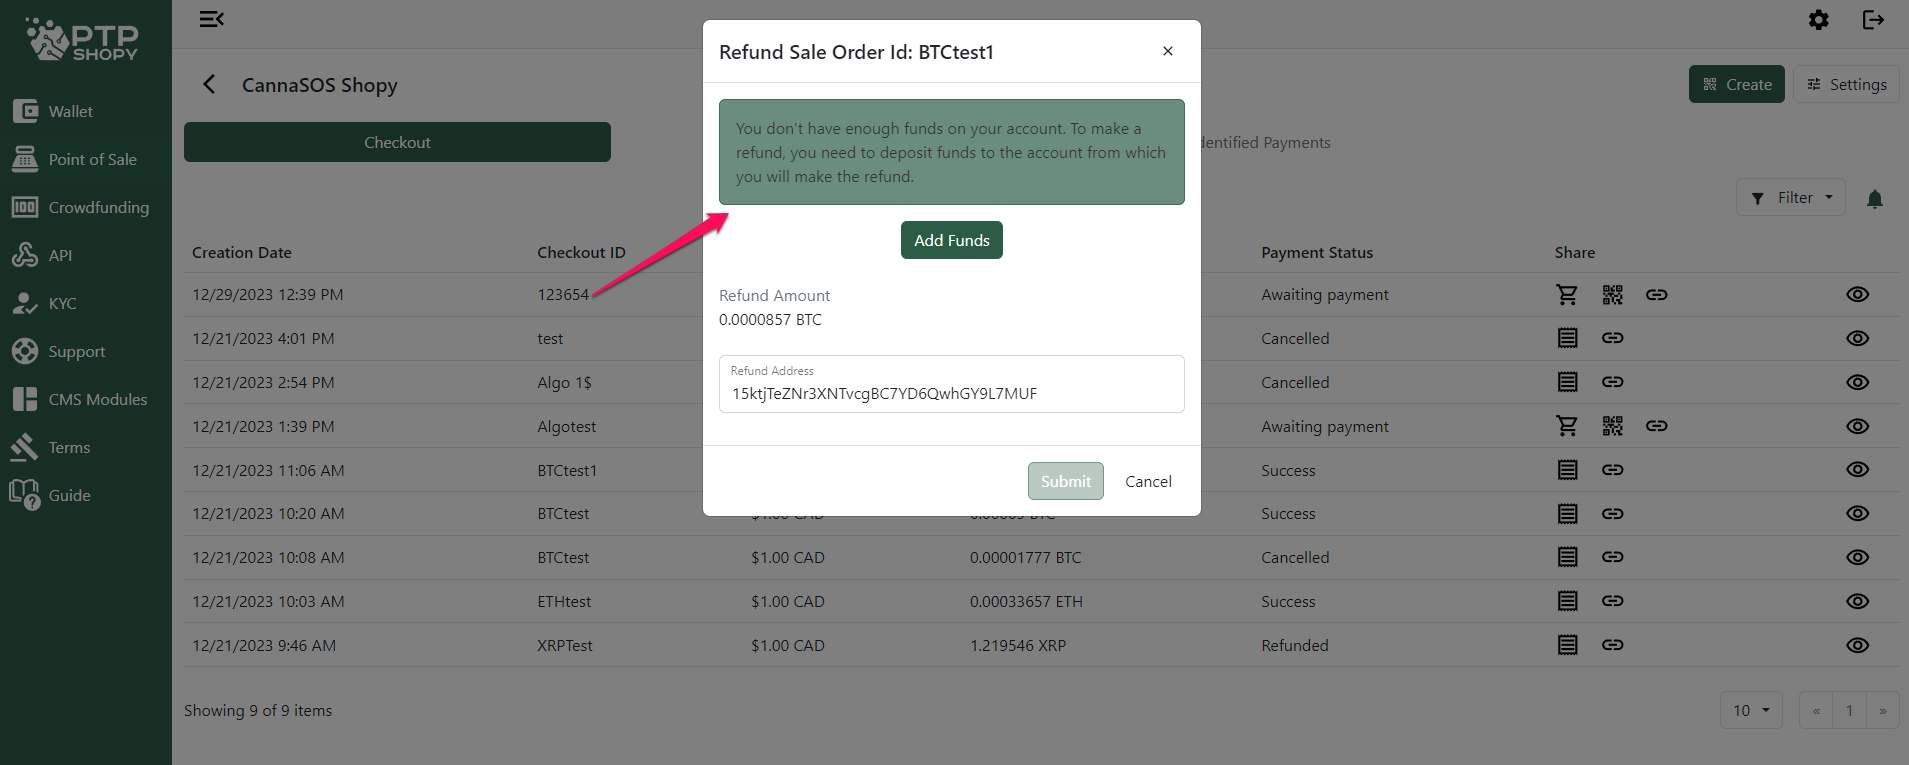
If you have already withdrawn this currency to a third-party wallet, and do not have a sufficient amount of funds in your PTPShopy Wallet account to make the refund, you need to first deposit the required amount of currency to your PTPShopy wallet – and then attempt the refund.

After a successful refund, the status would have changed.
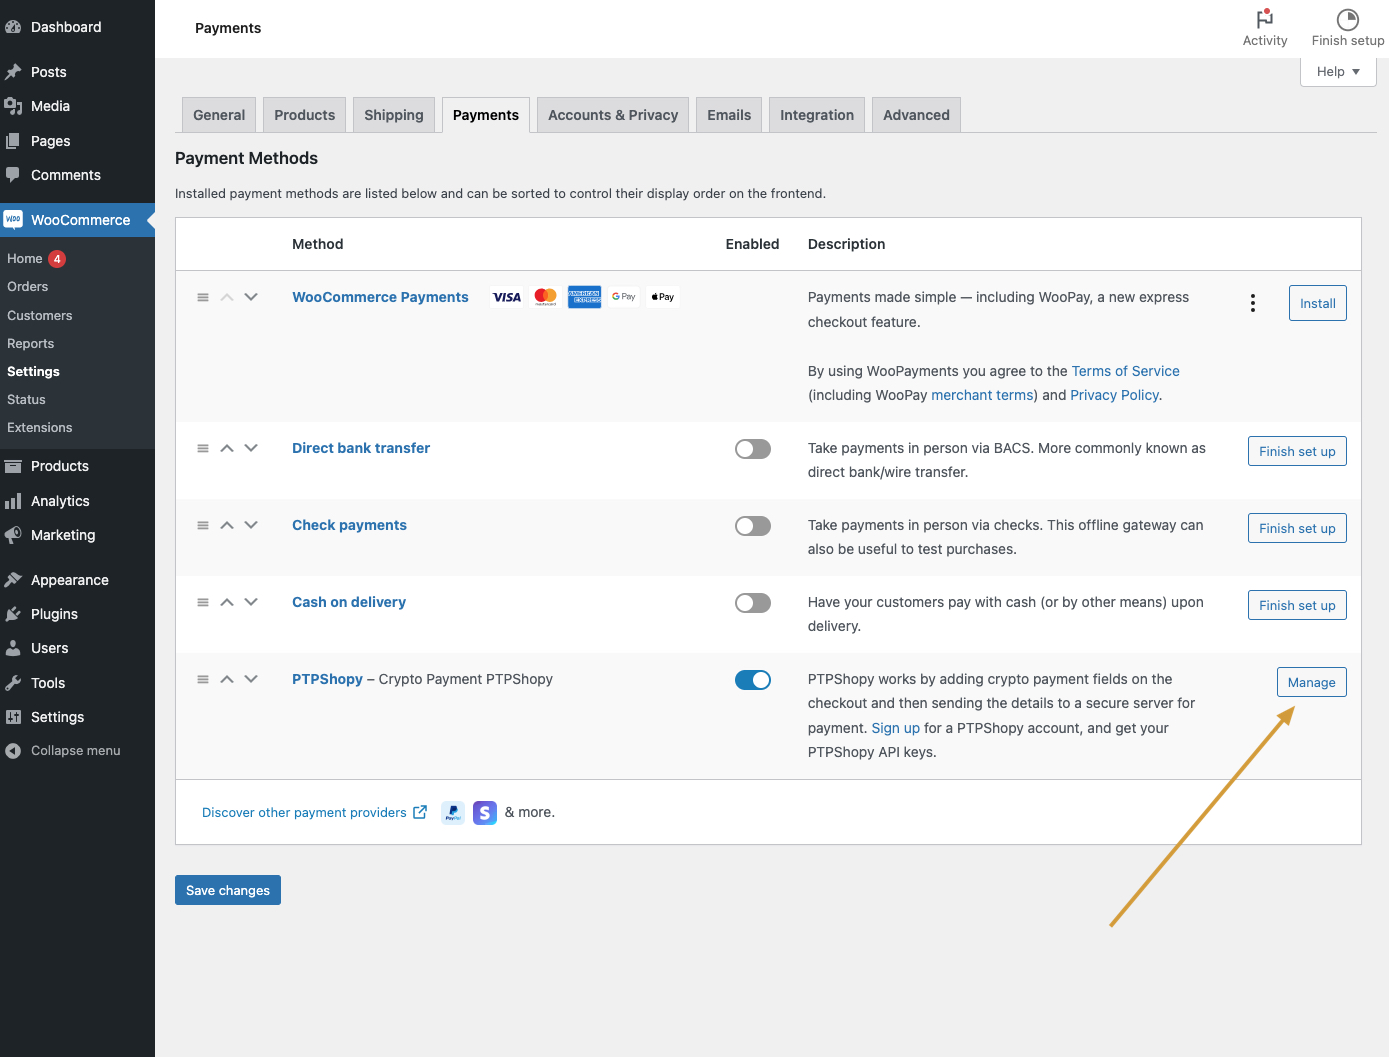
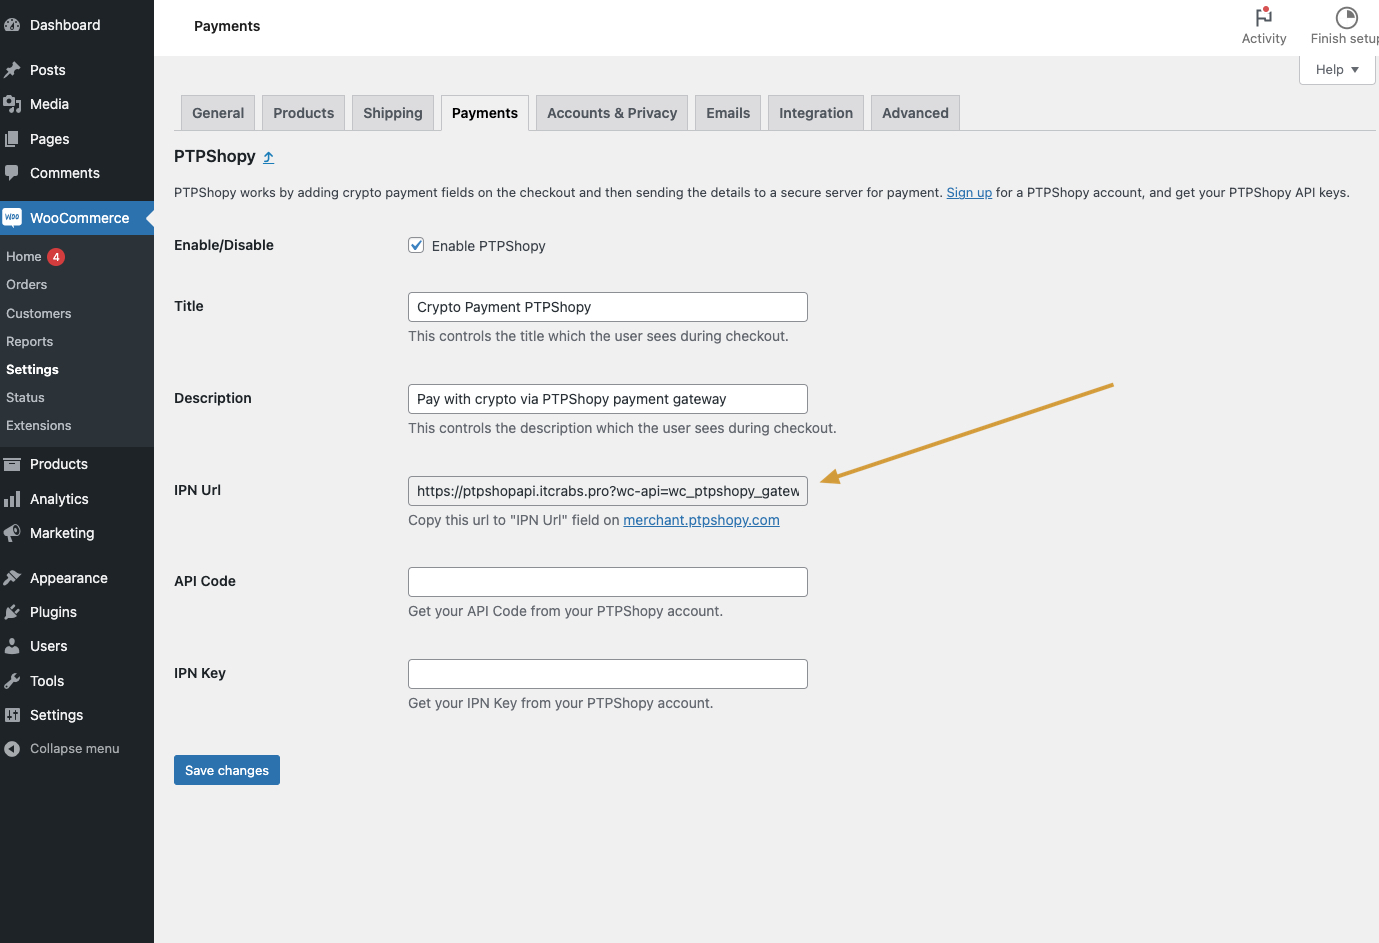
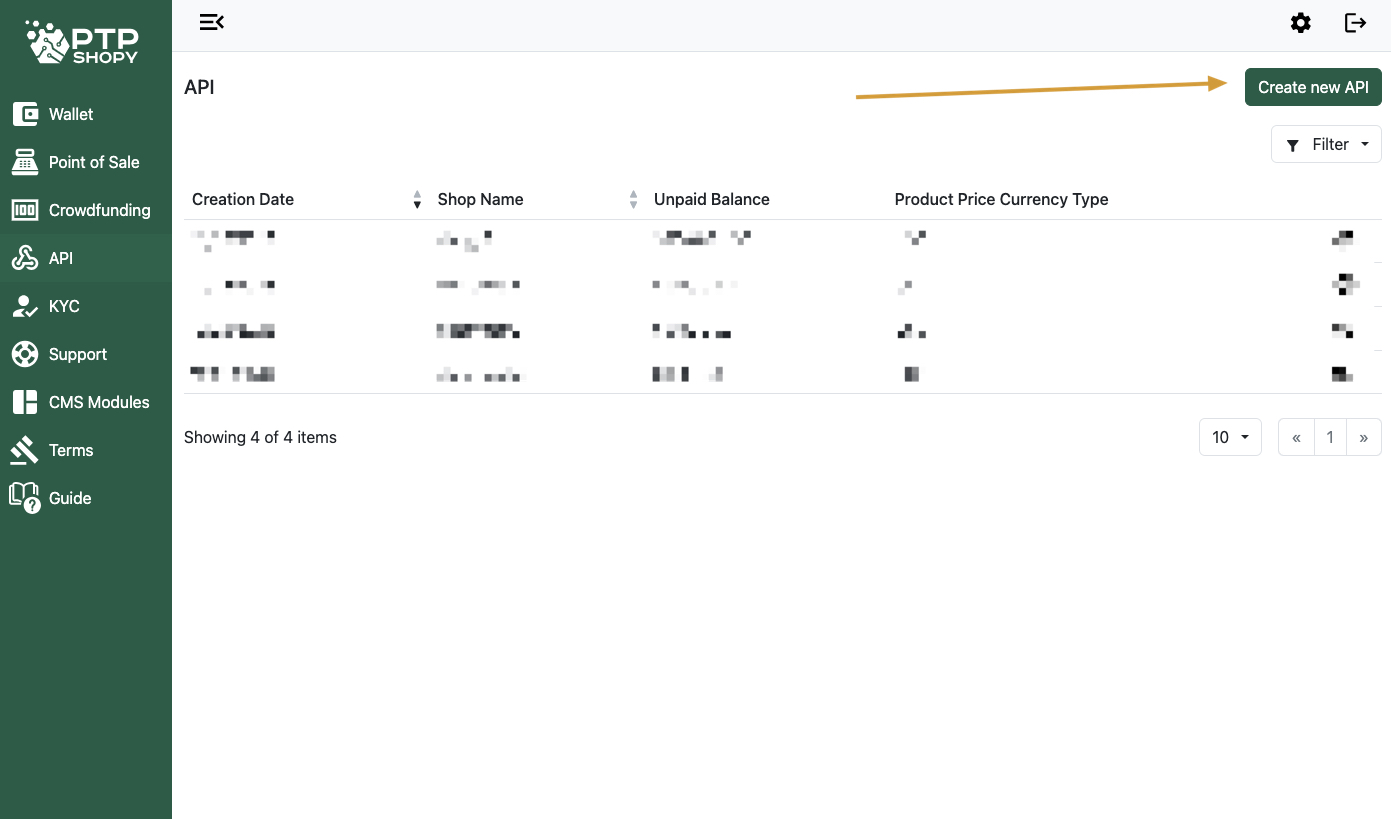
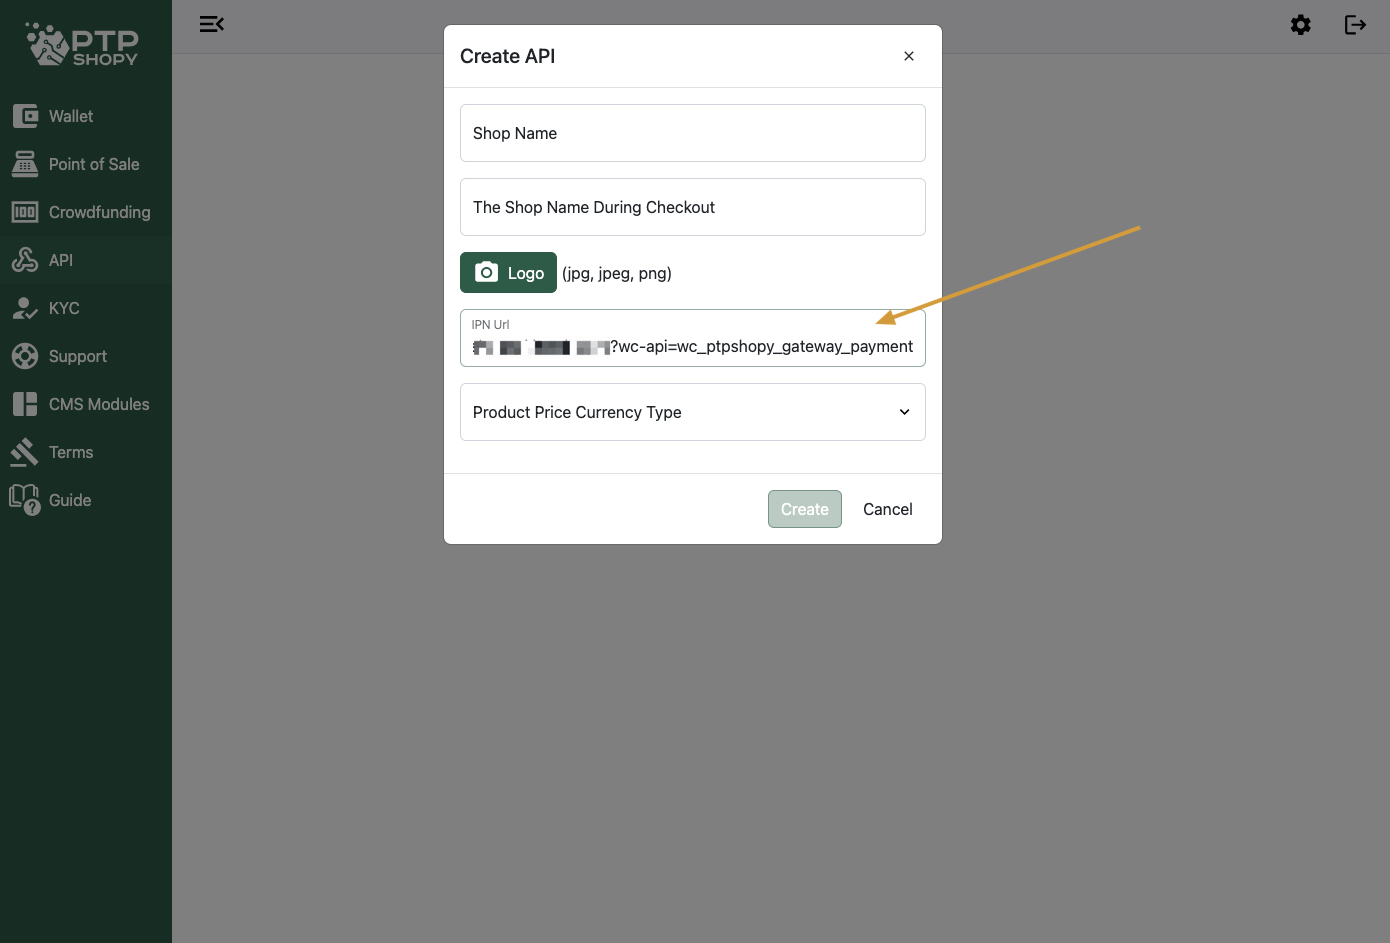
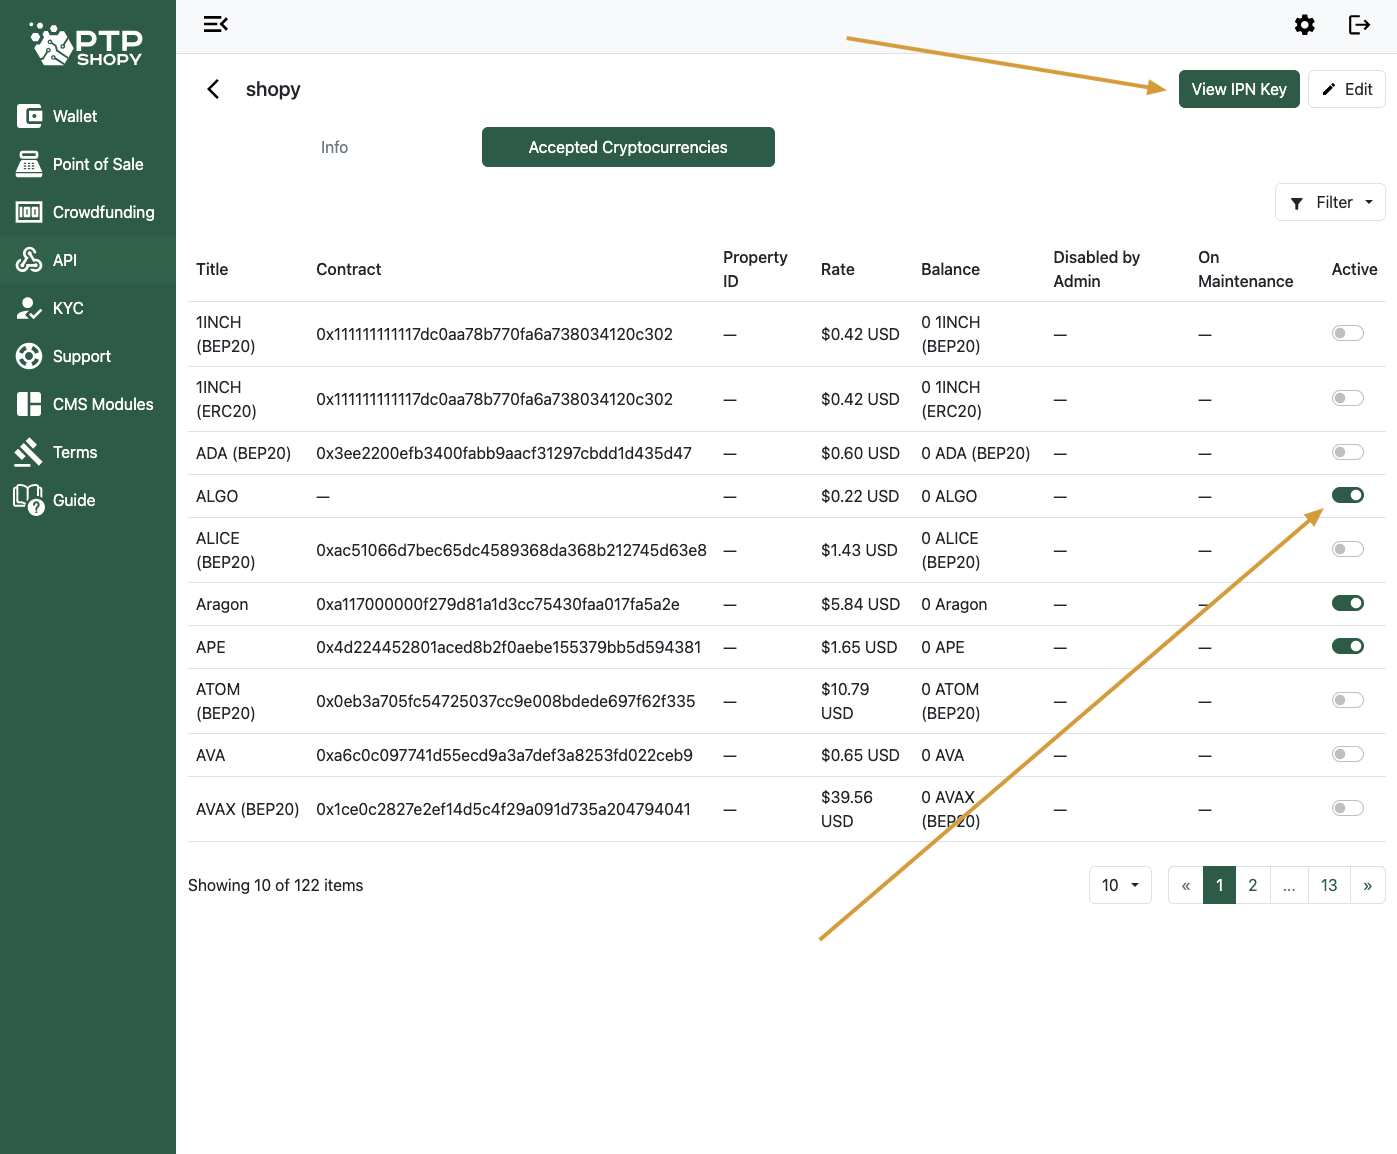
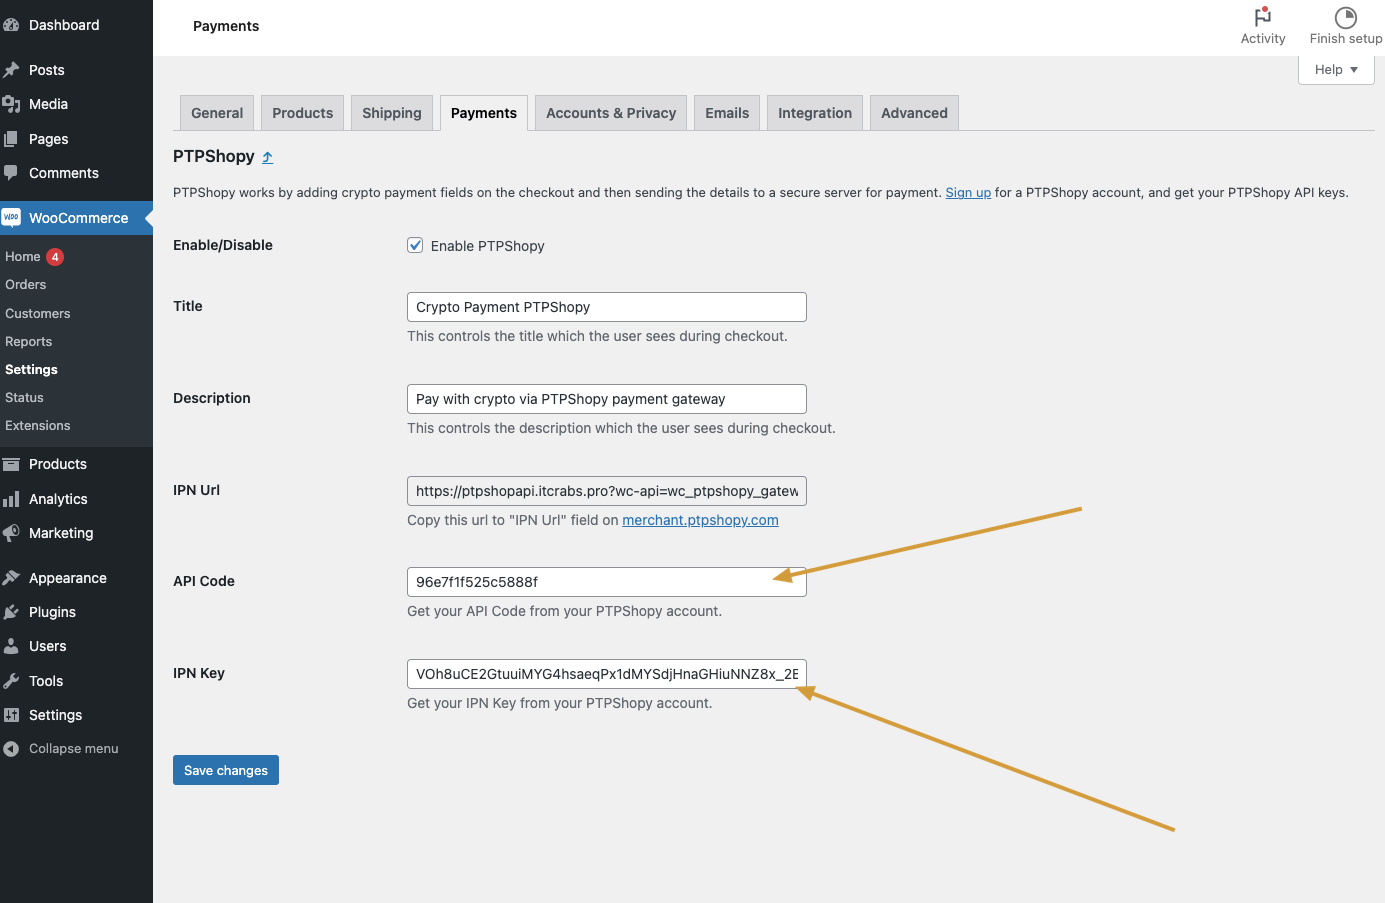
How to Setup Your API on Woocommerce
Go to ‘Merchant Tools https://ptpshopy.com/merchant-tools/ and click on your Download.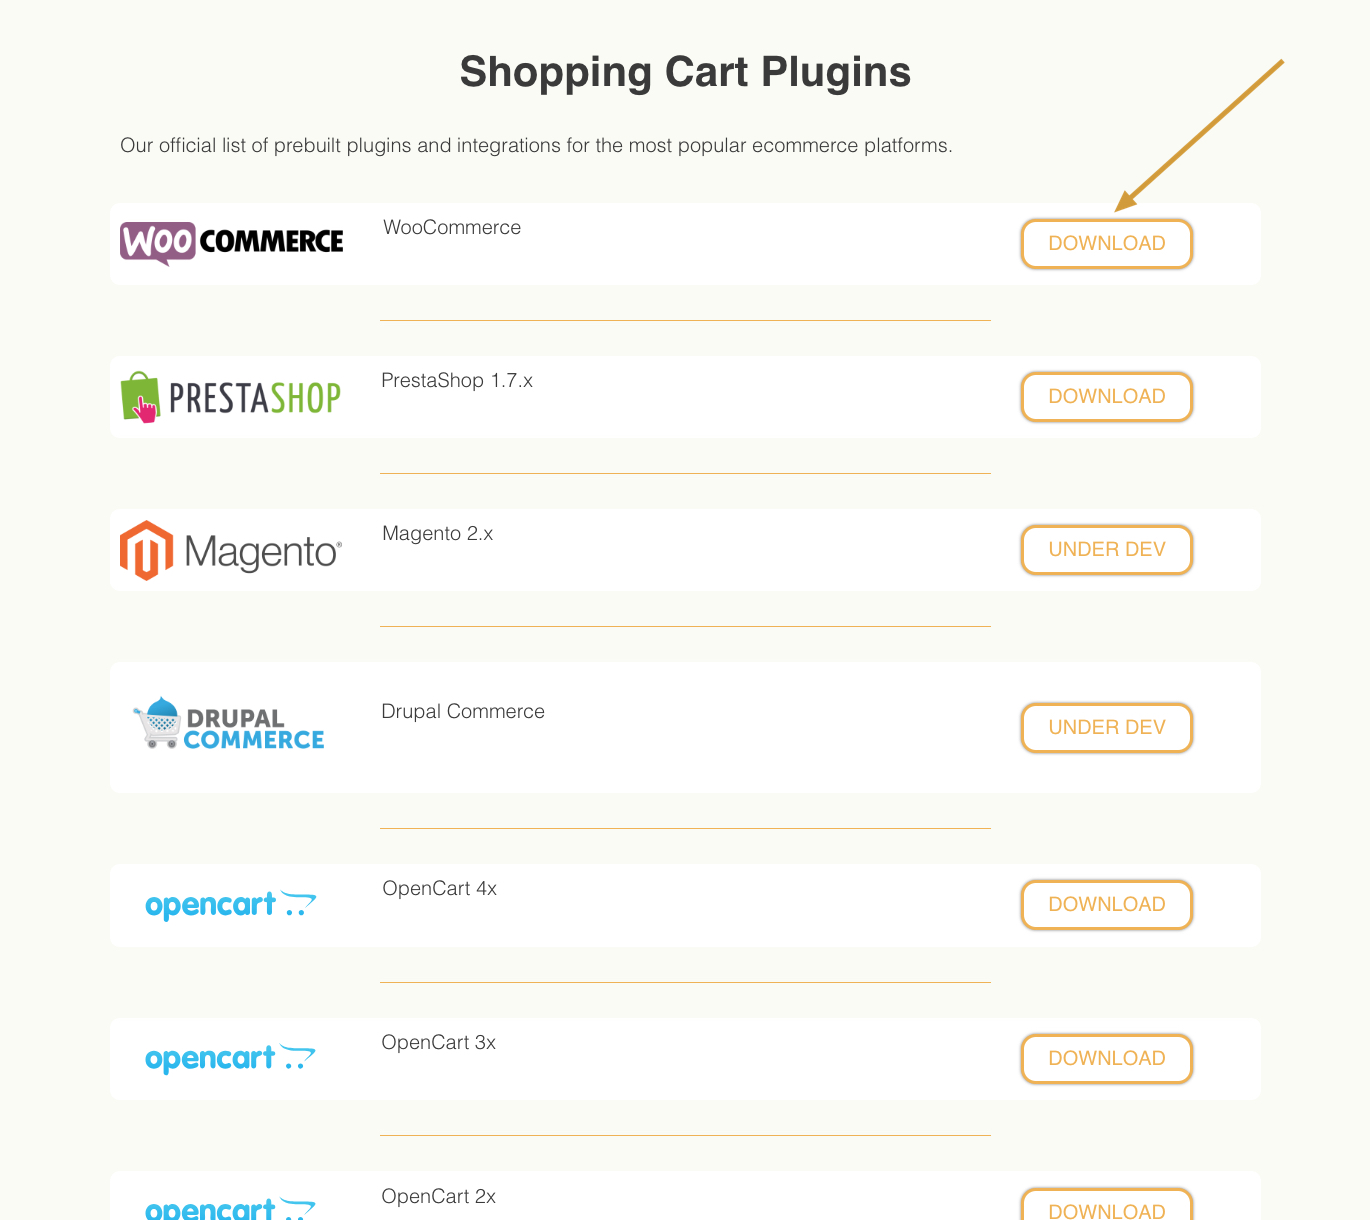 Step 2
 Step 3
 Step 4
 Step 5
 Step 6
 Step 7
 Step 8
 Step 9
 Step 10
 Step 11
 Step 12
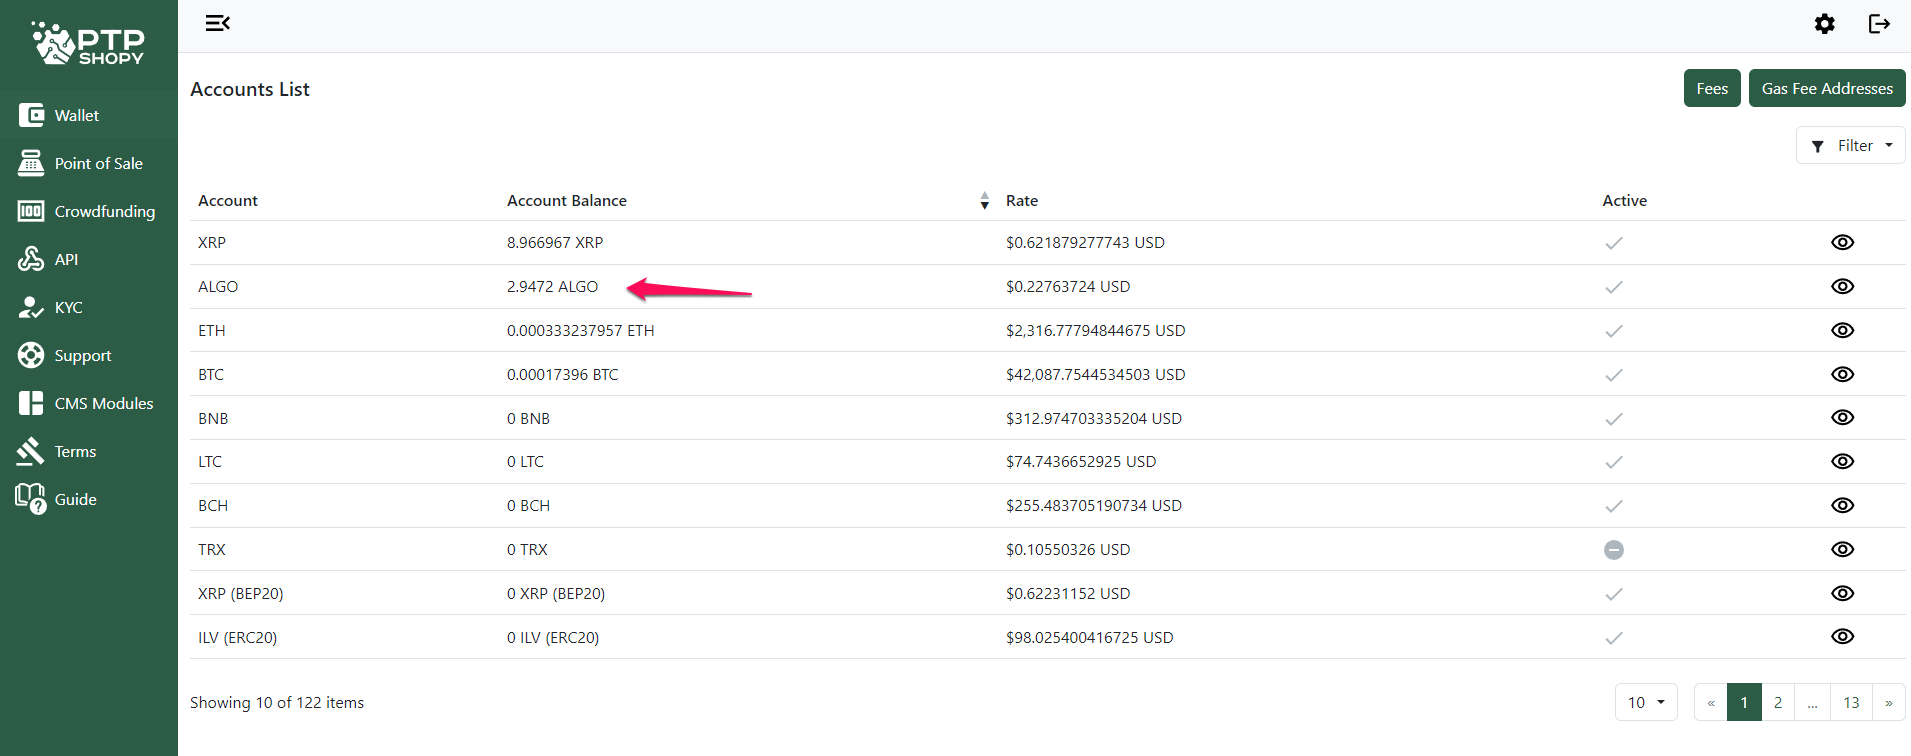
Go to the ‘Wallet’ https://merchant.ptpshopy.com/wallet and click on the currency you want to withdraw.
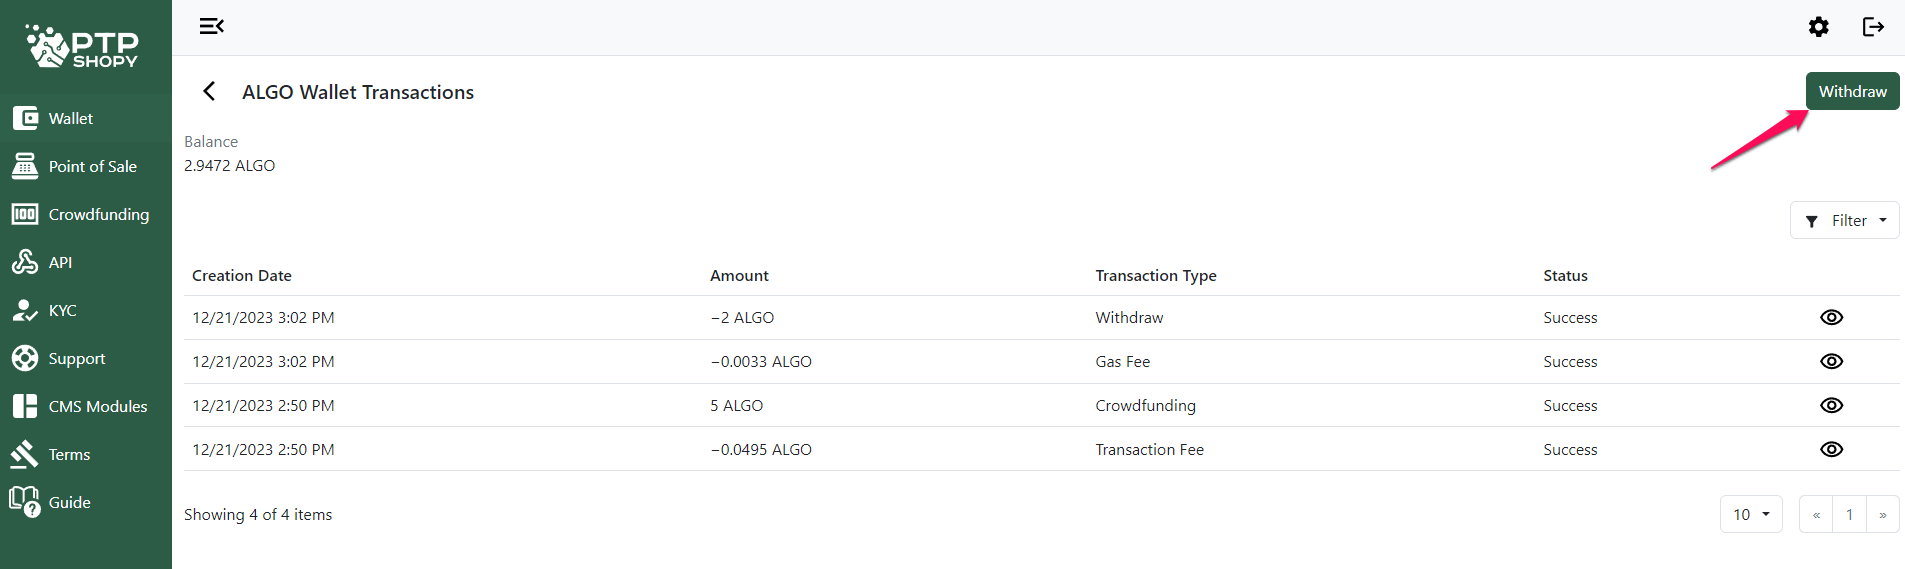
Click the ‘Withdraw’ button, located at the top right of the screen.
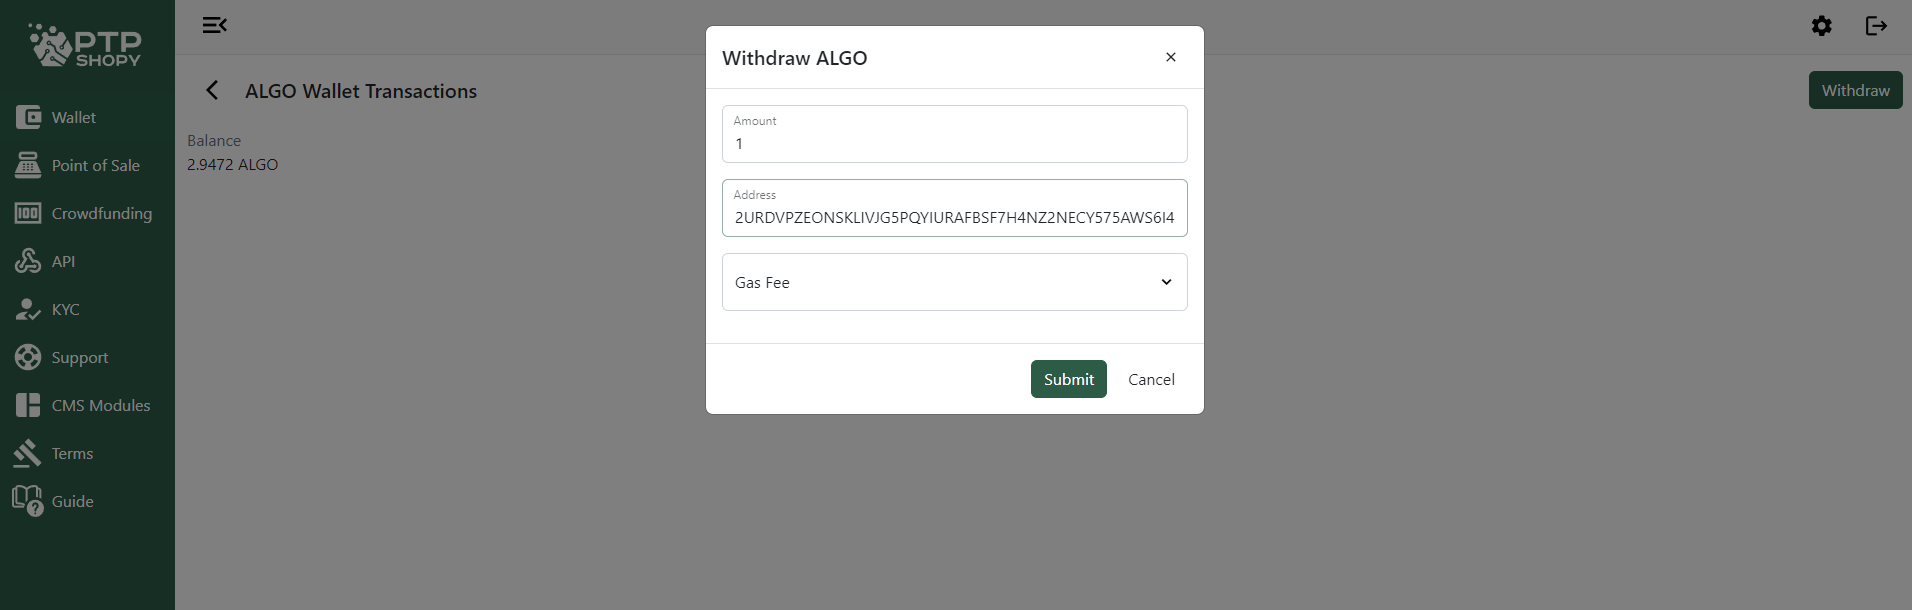
Input the amount you want to withdraw and enter the recipient’s address. Note, that you need to enter the receive address of the same currency type. As an example, if you are withdrawing ALGO, you need to enter an ALGO receive address. Otherwise, you risk losing your funds in the decentralized blockchain.
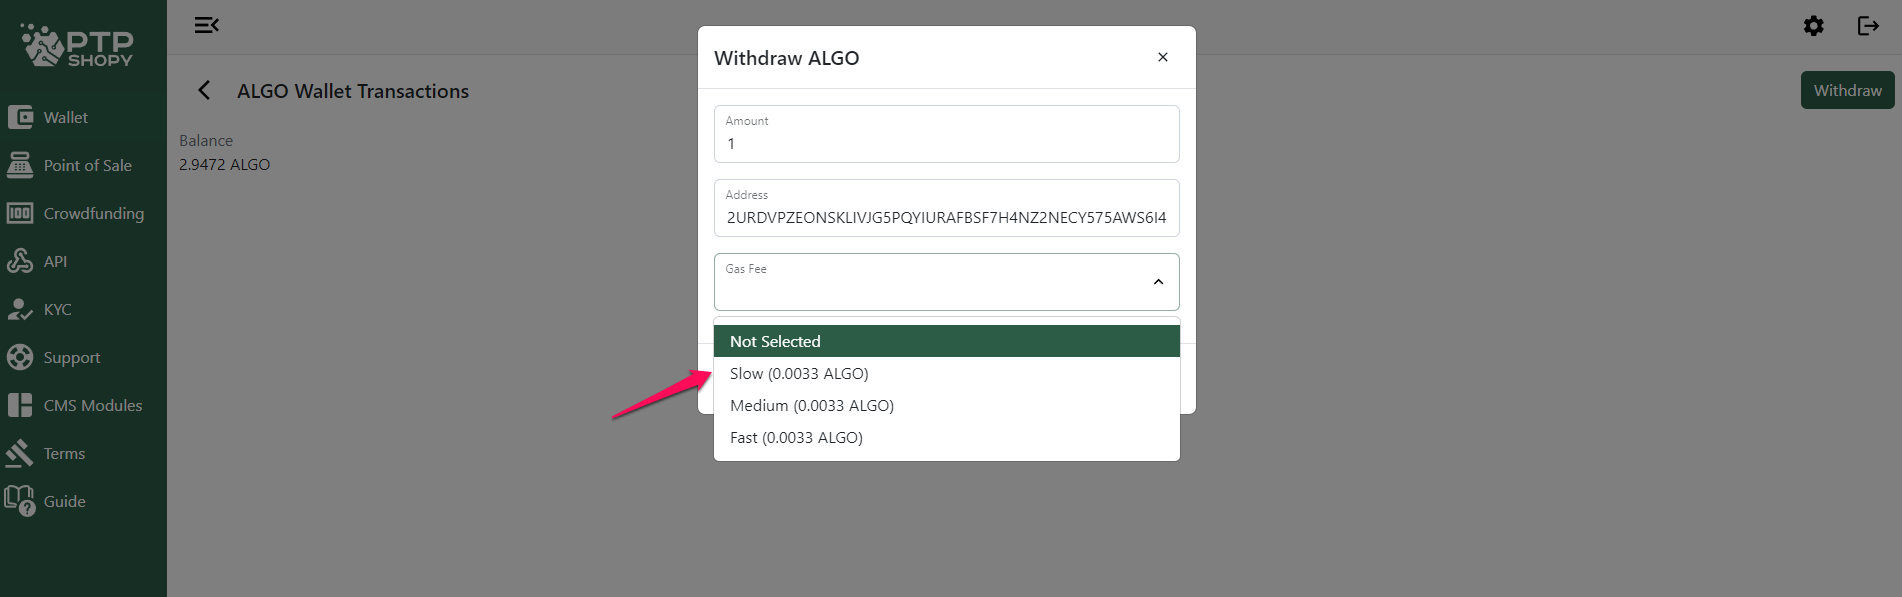
Select ‘Gas Fee’ and choose your preferred fee.
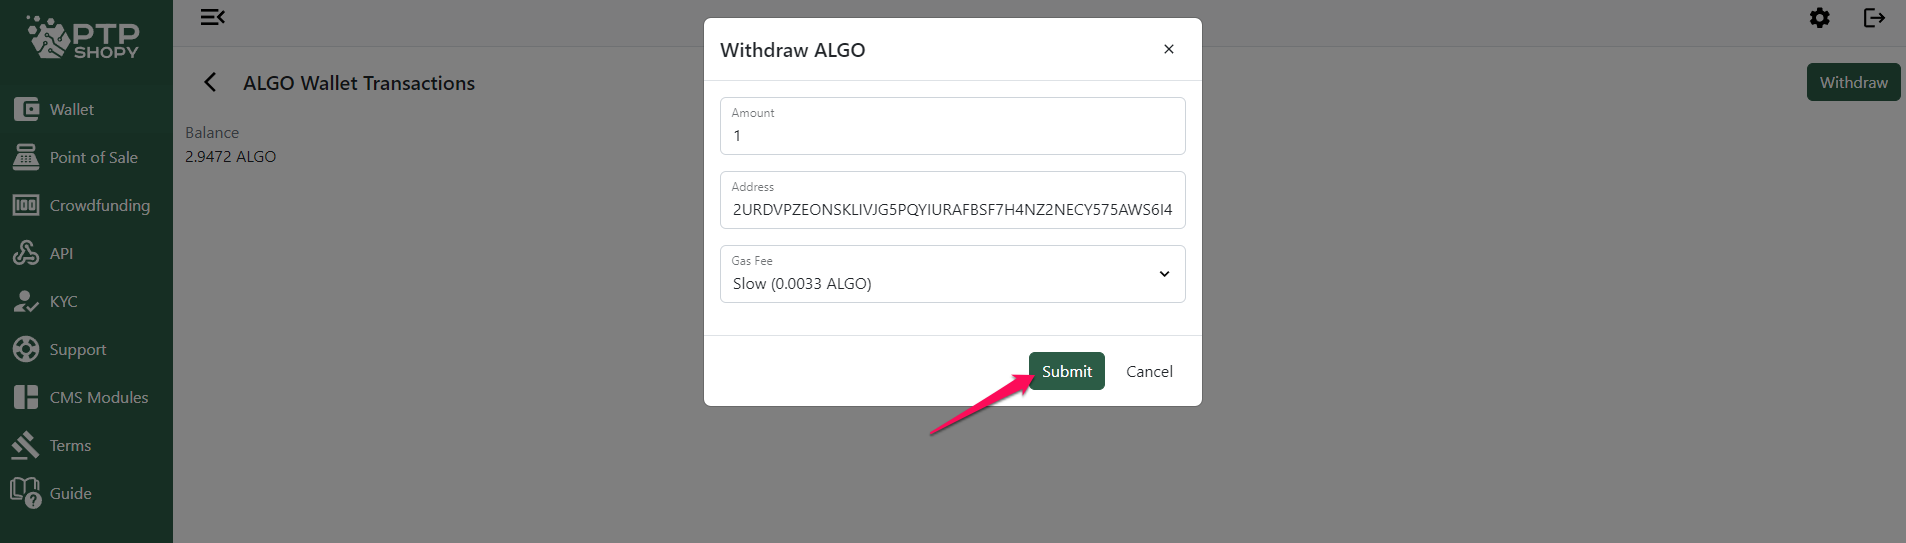
Click the ‘Submit’ button
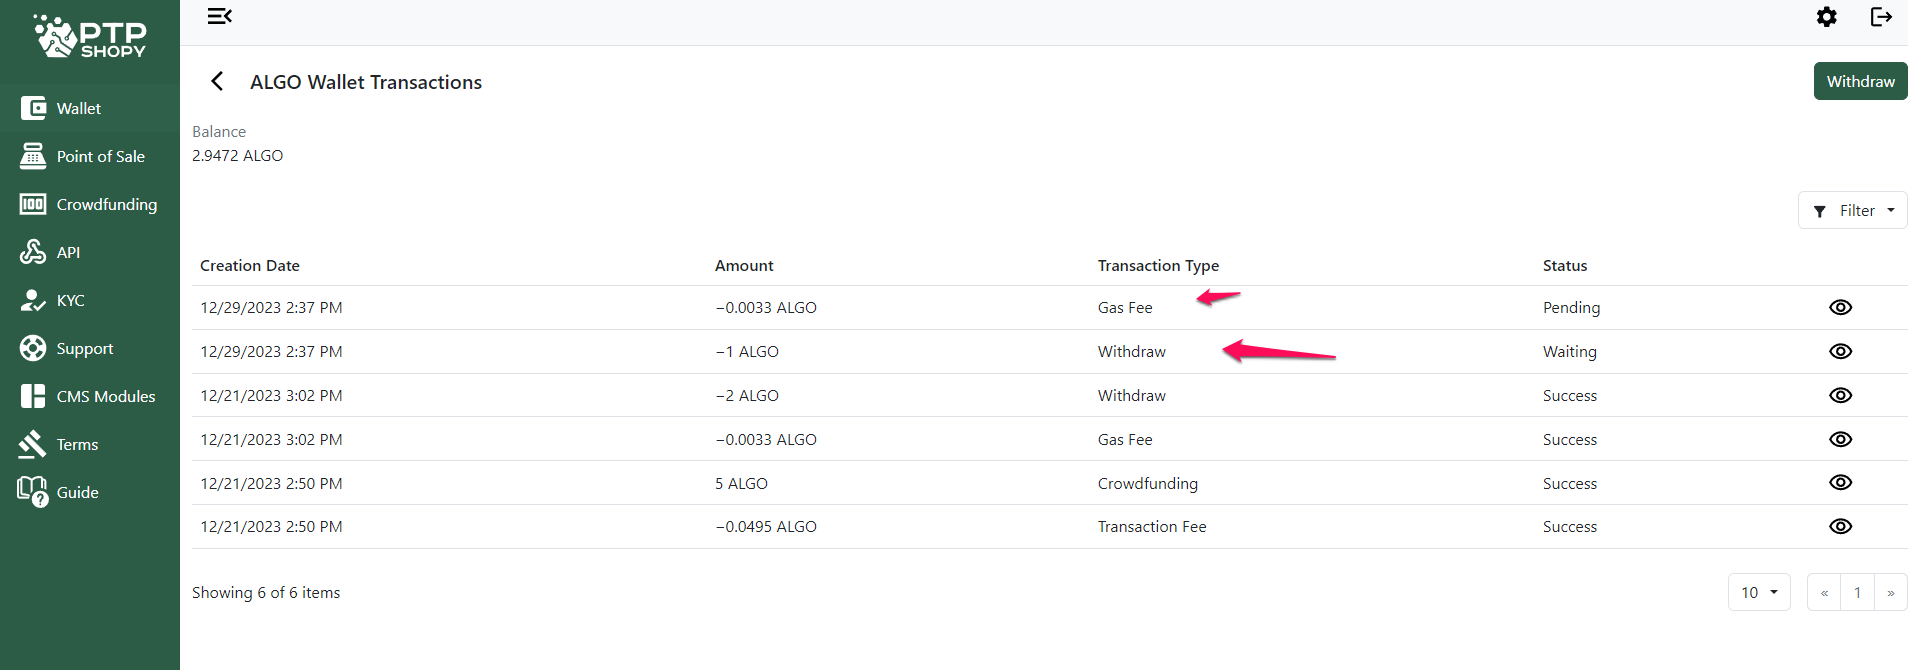
Here you can see the withdrawal alongside the gas fee being deducted from your balance.
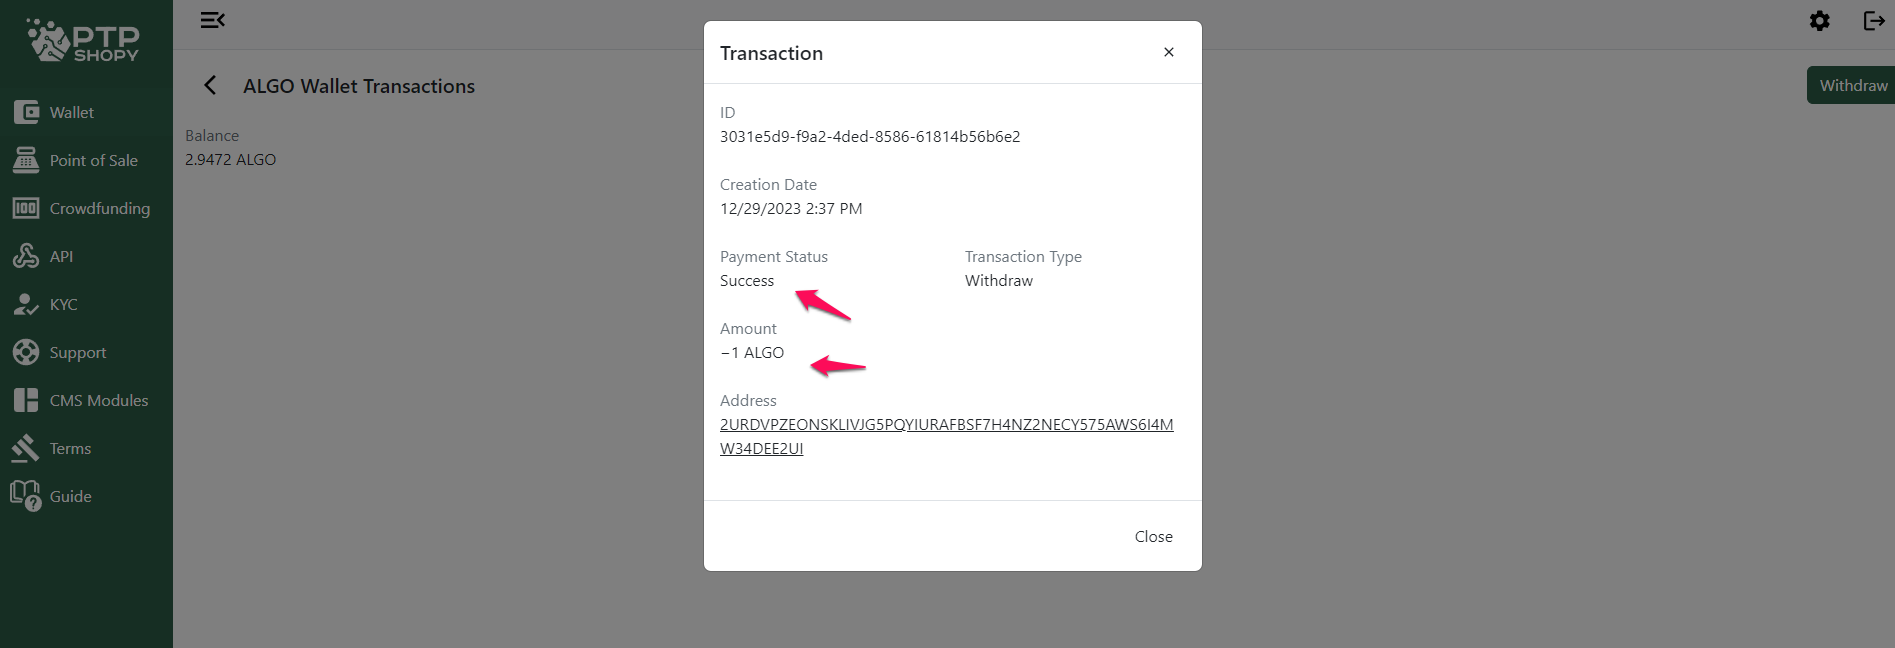
Success! The withdrawal has been sent to the required address. Receival times depend on the gas fee and the protocol. Some withdrawals may take a few minutes while others may take several hours.
If you want to withdraw a token, then:
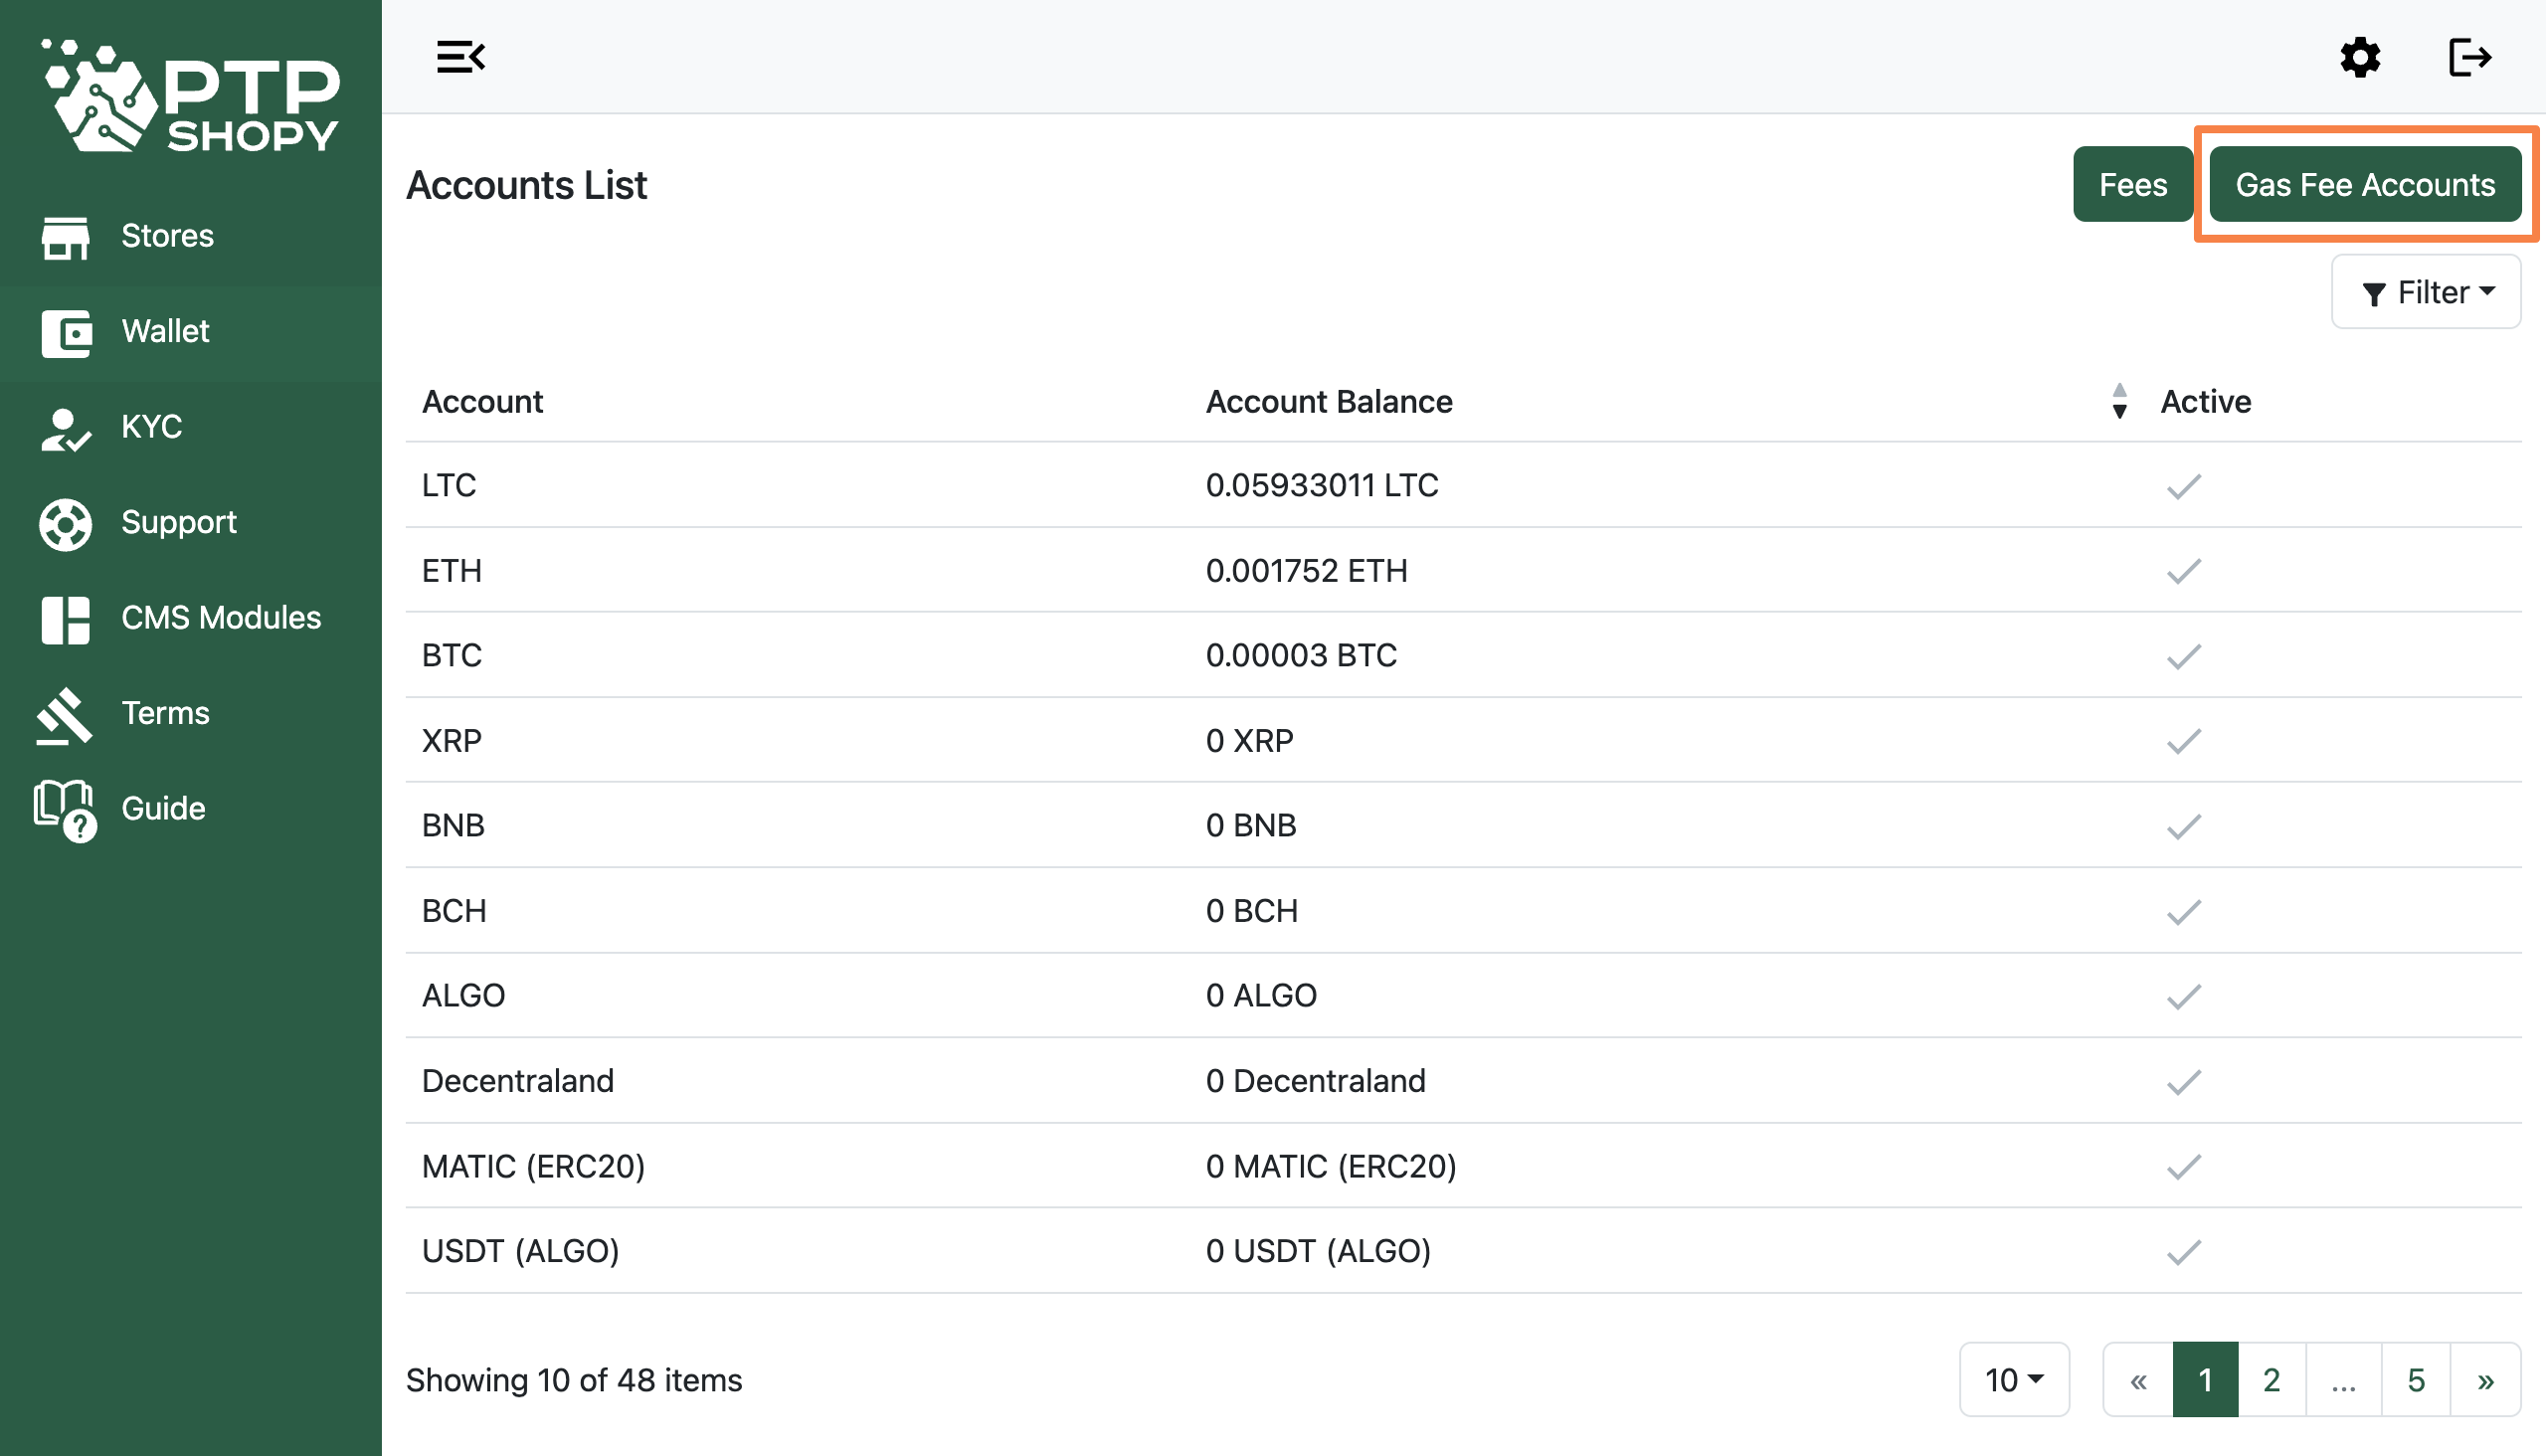
Go to ‘Wallet’ https://merchant.ptpshopy.com/wallet and click on ‘Gas Fee Accounts’
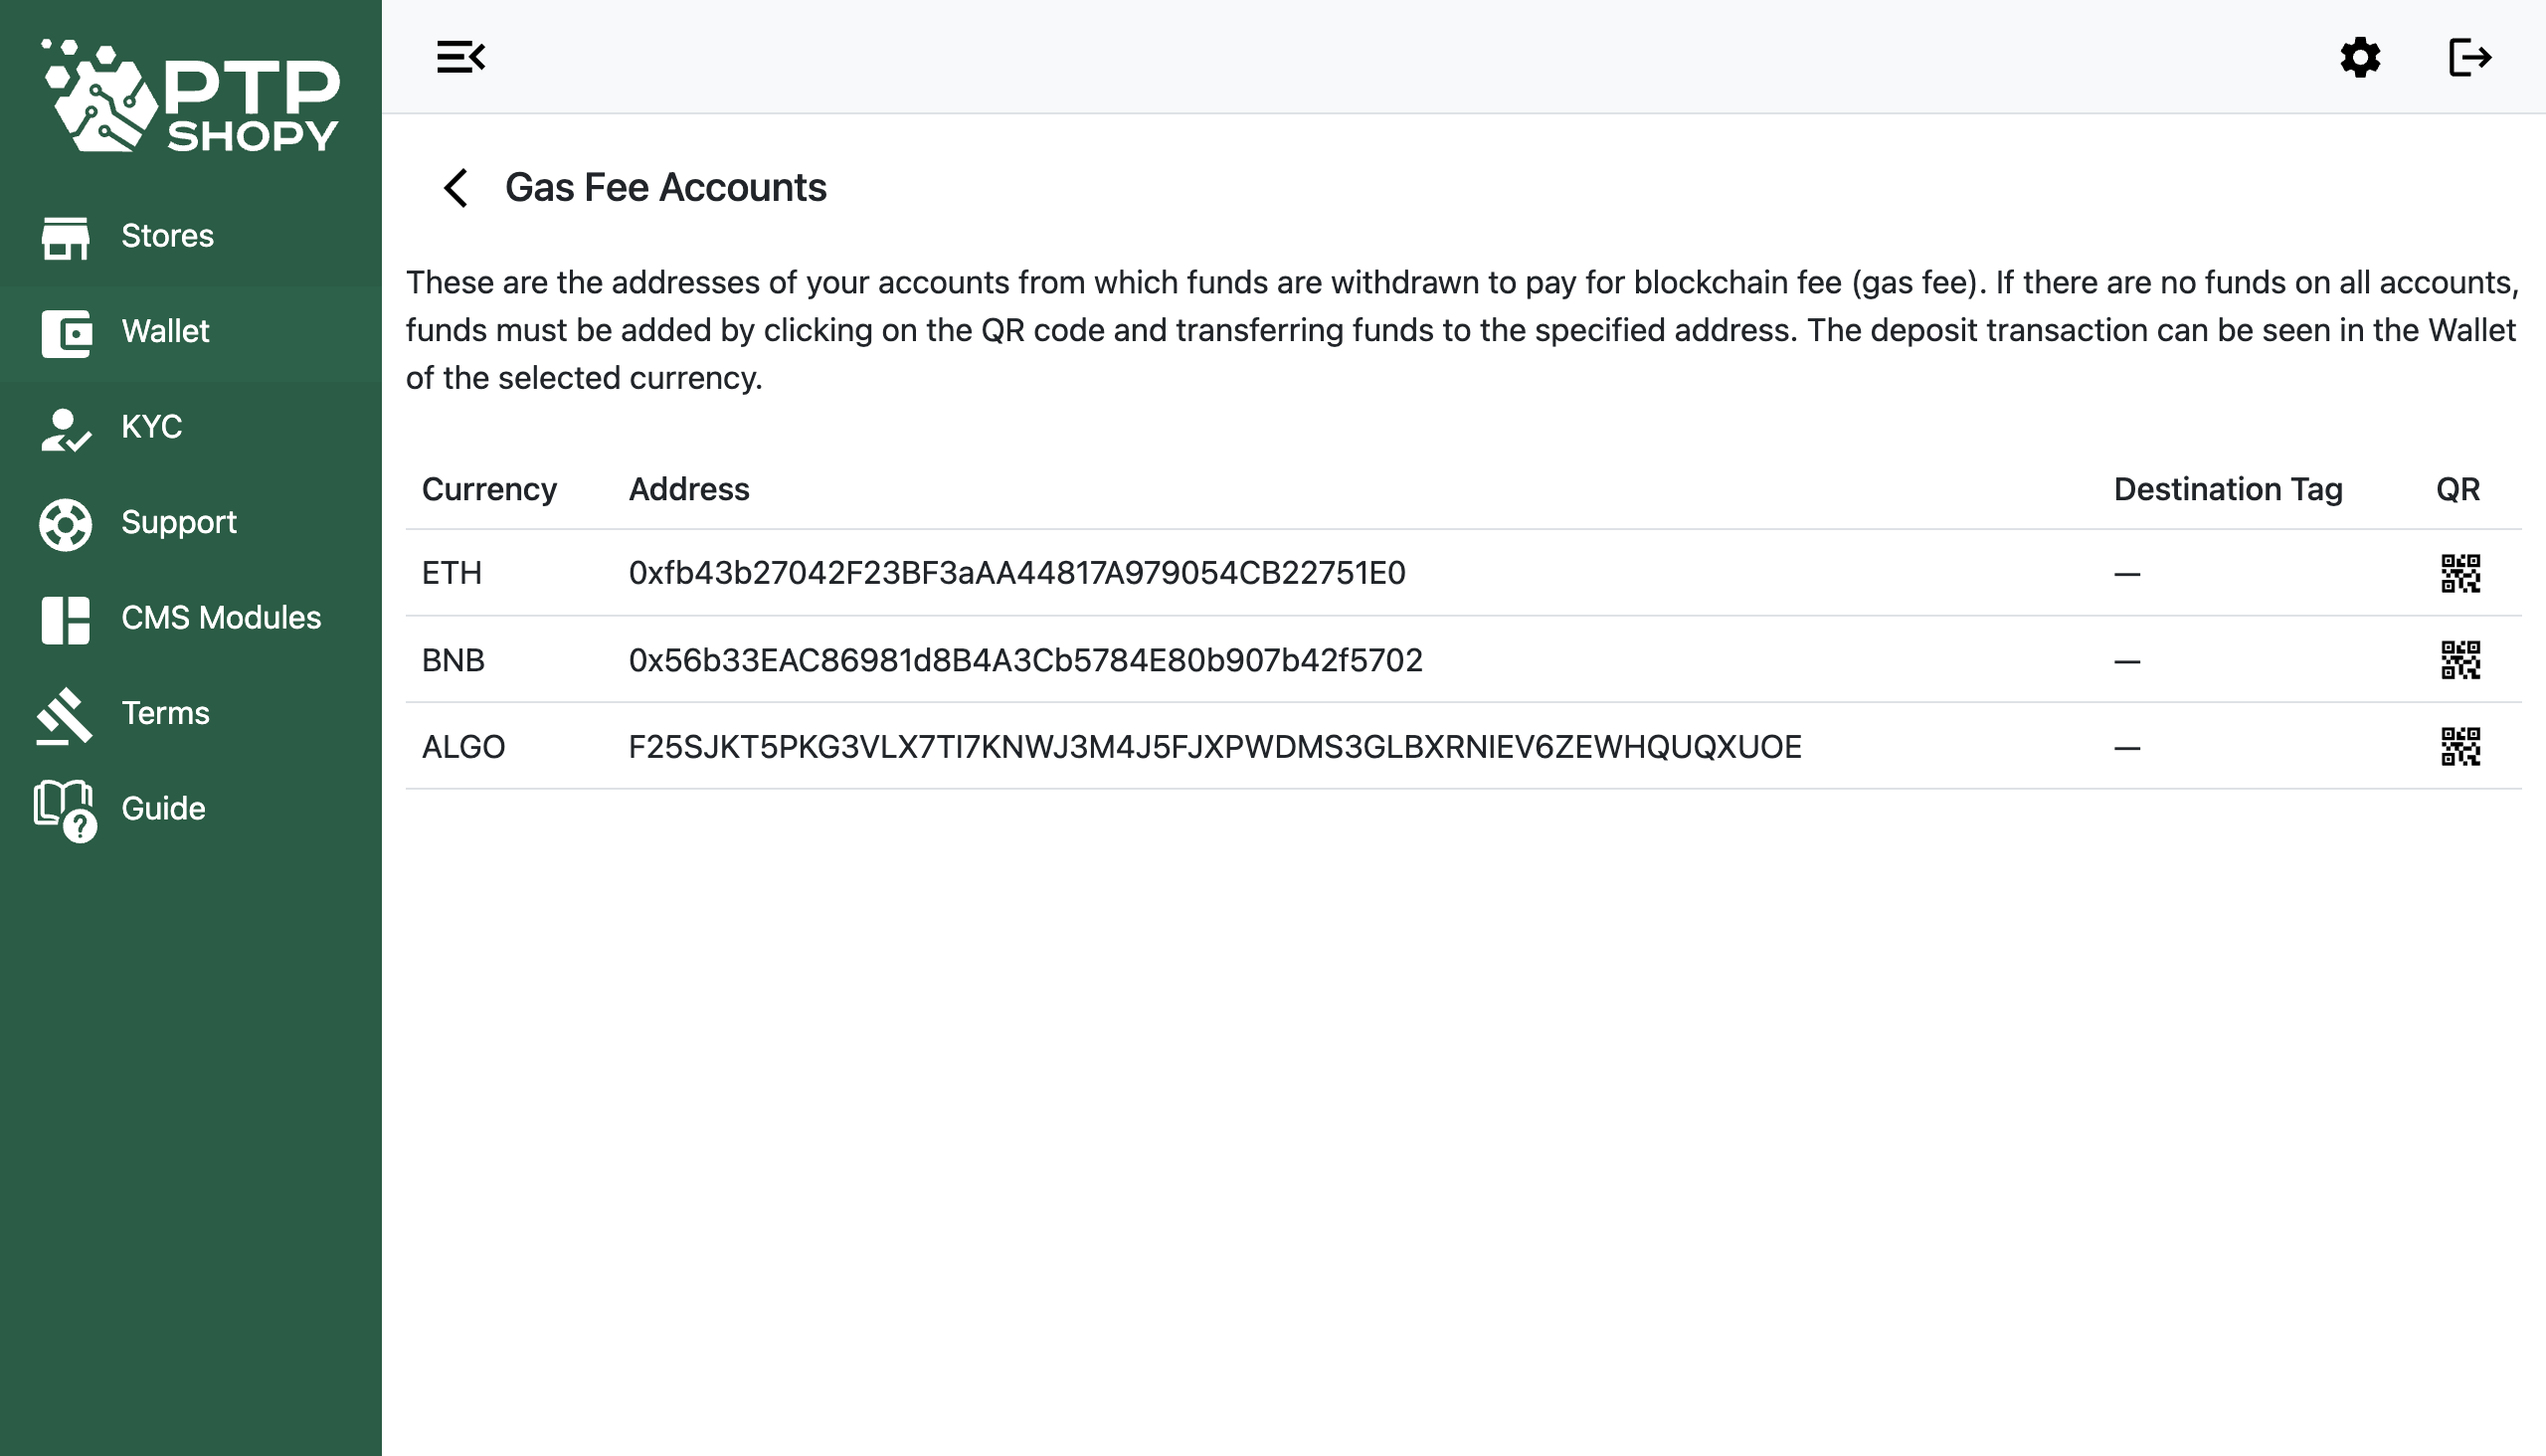
Select the base currency
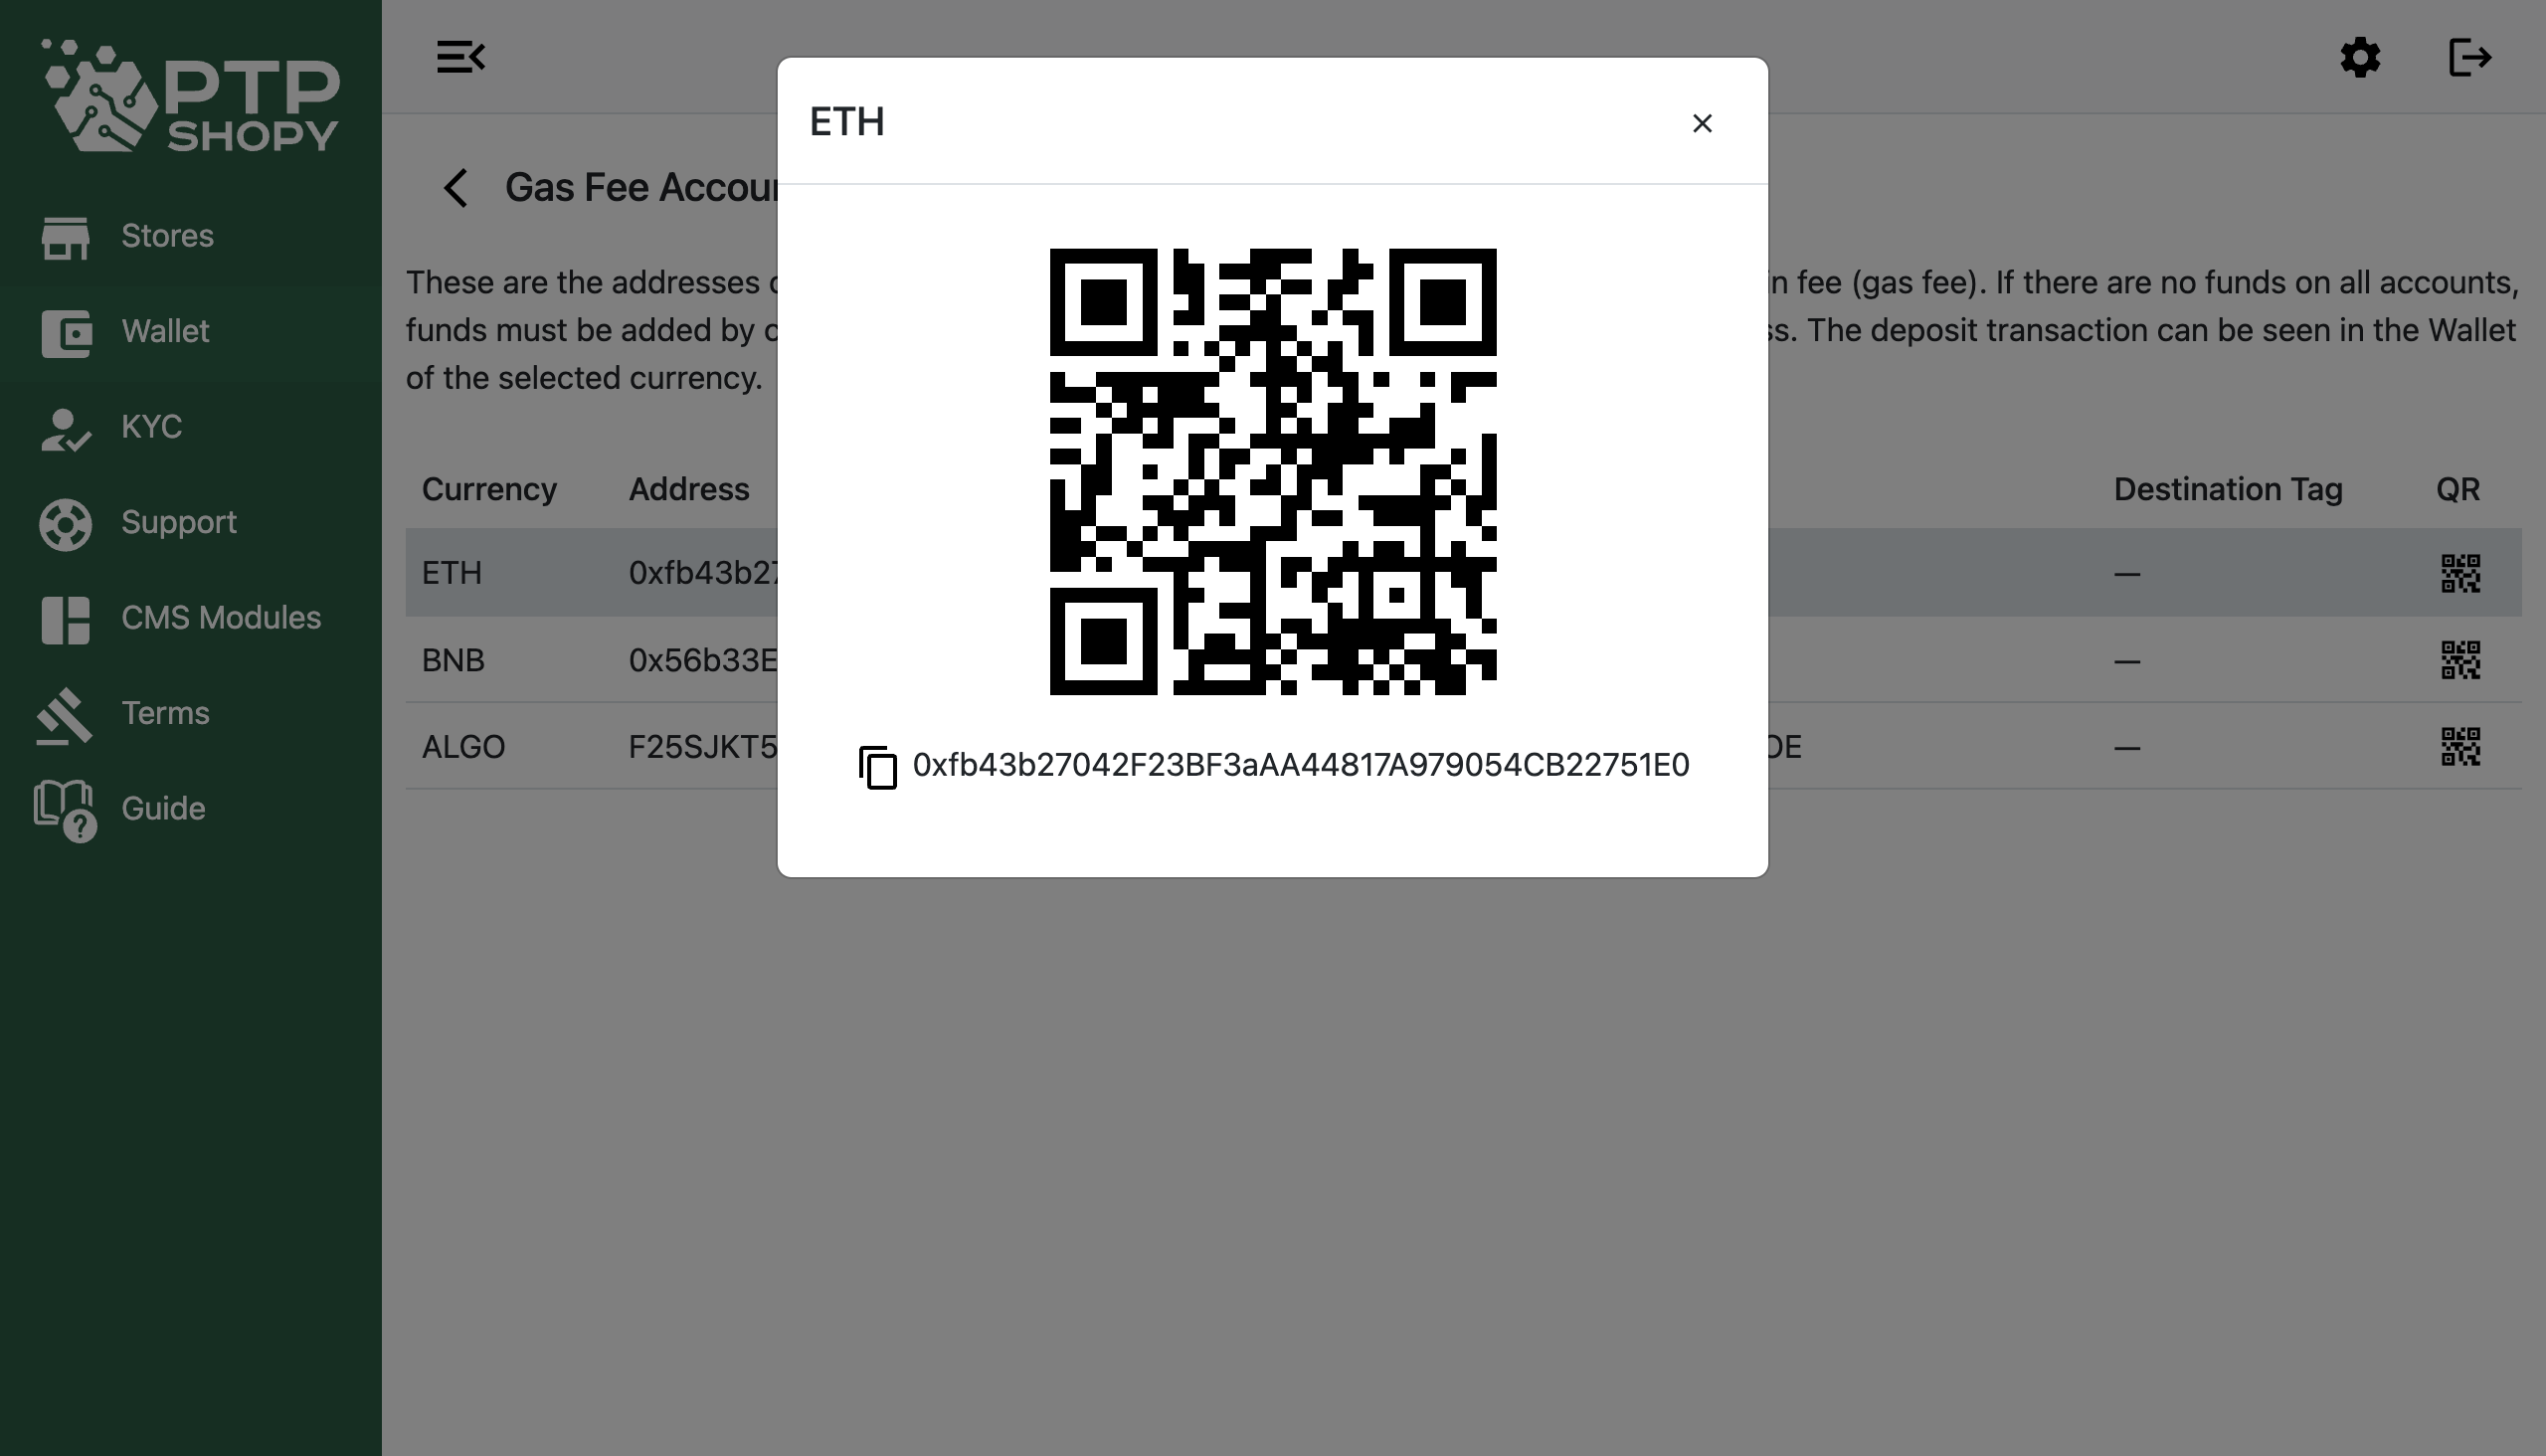
Deposit