
WooCommerce is a popular ecommerce platform that seamlessly integrates with the PTPShopy’s API, allowing your online store to accept cryptocurrency payments easily. To get started with this integration on your WooCommerce website, follow the simple steps below:
1. Locate Merchant Tools
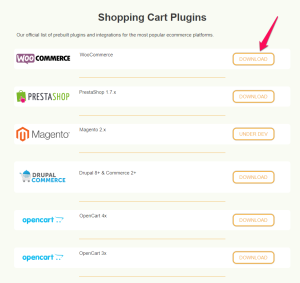
Go to https://ptpshopy.com/merchant-tools/ and click the download button next to the WooCommerce option to download the preset WooCommerce plugin.
2. Integrate the WooCommerce plugin in WordPress
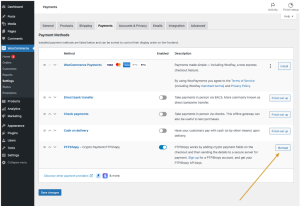
Install the downloaded prebuilt WooCommerce plugin in your WordPress account. After setting it up, navigate to the WooCommerce payments section on your dashboard, where you would find the PTPShopy payment method. Click on “Manage” to continue setting up the crypto gateway payment method.
3. Complete form and Retrieve IPN Url
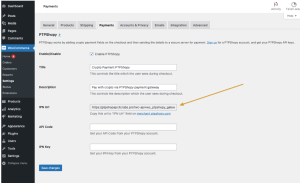
Copy the IPN Url from the ‘IPN url’ field, which is a combination of strings (you will need it later). Finish the form by going to the PTPShopy dashboard to obtain the remaining information. Merchant.ptpshopy.com.
4. Access PTPShopy Dashboard
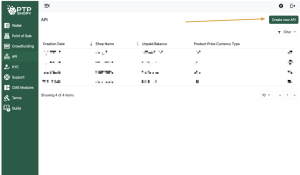
On the PTPShopy merchant dashboard, navigate to API on the side navigation and click on the Create New API button.
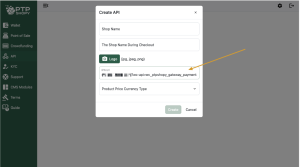
5. Create New API
Enter your shop’s details, such as the name displayed during checkout, logo, website URL, and display currency. Once completed, click on “Create.”
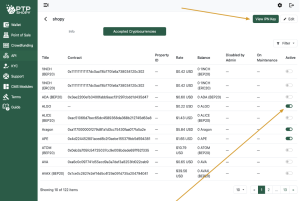
6. Select Accepted Cryptocurrencies
Enable desired cryptocurrencies in the “Accepted Cryptocurrencies” tab. When completed, click on “View IPN Key” to access key details, including the API code and IPN key.
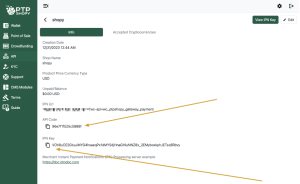
7. Retrieve API Code and IPN key
Copy the API code and IPN key as shown below.
8. Complete the form on WooCommerce Payments
Return to complete the form with the API code and IPN key copied above. Click on ‘save changes’ and you’re done!

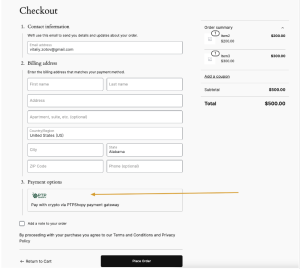
9. Checkout and Pay with Crypto
After you have integrated the PTPShopy crypto gateway into your WooCommerce platform, you can purchase items using it in the same way as you would with other payment methods. To do so, simply load your cart, proceed to checkout, and select the “Pay with crypto via PTPShopy payment gateway” option.
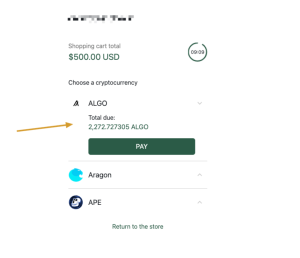
10. Select Cryptocurrency
With PTPShopy, you can receive payments in over 400 cryptocurrencies. For example, the customer below chooses to pay for your product with ALGO, among many others.
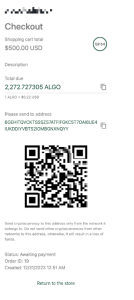
11. View Checkout
The invoice shows your customer the details of their purchase. It includes the amount, cryptocurrency type, receiving address, and QR code, which they can scan to complete the payment.
In conclusion, follow these steps to set up PTPShopy API on WooCommerce for smooth cryptocurrency payments. You can use this guide as a simple template to do the same on other WordPress ecommerce platforms.