PTPShopy’s crowdfunding feature integrates cryptocurrency seamlessly, offering an innovative way to fund your projects. With support for over 400 cryptocurrencies, it provides a secure platform to gather donations for campaigns and programs. This feature is especially beneficial for entrepreneurs and creators seeking support for their initiatives.
Here is a guide on how to use the crowdfunding feature on PTPShopy.
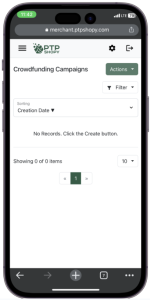
1. Access Crowdfunding Section
To begin, log into your PTPShopy account. Once logged in, find and click on the “Crowdfunding” section.
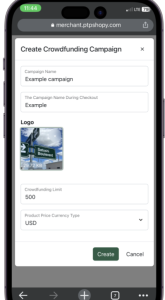
2. Start Your Campaign
Inside the “Crowdfunding” section, select “Create” to start setting up your campaign. Provide your project’s name and a visible campaign name for users to see. Upload an image that represents your campaign. Decide on the fundraising amount and choose a display currency. Click on “Create” once all information is entered to establish your campaign.
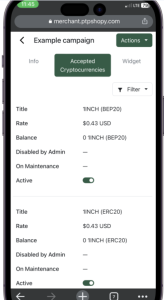
3. Select Accepted Cryptocurrencies
Within the “Accepted Cryptocurrencies” section, choose which currencies you want to receive as donations. Click on “Widget” to obtain the necessary widget for your website.
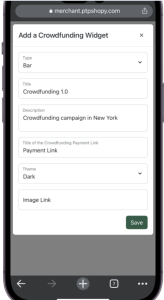
4. Create and Customize the Widget
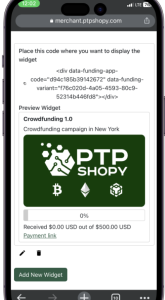
Click on “Add New Widget” and choose your preferred widget type (bar, button, or link). Fill in details for the widget: name, description, payment link title, and select a theme (light or dark). Enter the link to an image for the widget’s appearance by right-clicking and copying the image address.
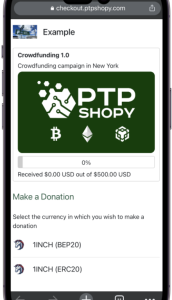
5. Preview and Confirm Widget Information
Save the widget and review its information in the preview screen. Ensure the widget correctly displays the accepted currencies and QR codes for donations.
6. Implement the Widget on Your Website
Access the widget section of your campaign to obtain the required code. Copy and paste this code into the specific area within your website’s body. Additionally, copy the second code and place it where you want the widget to display on your website.