
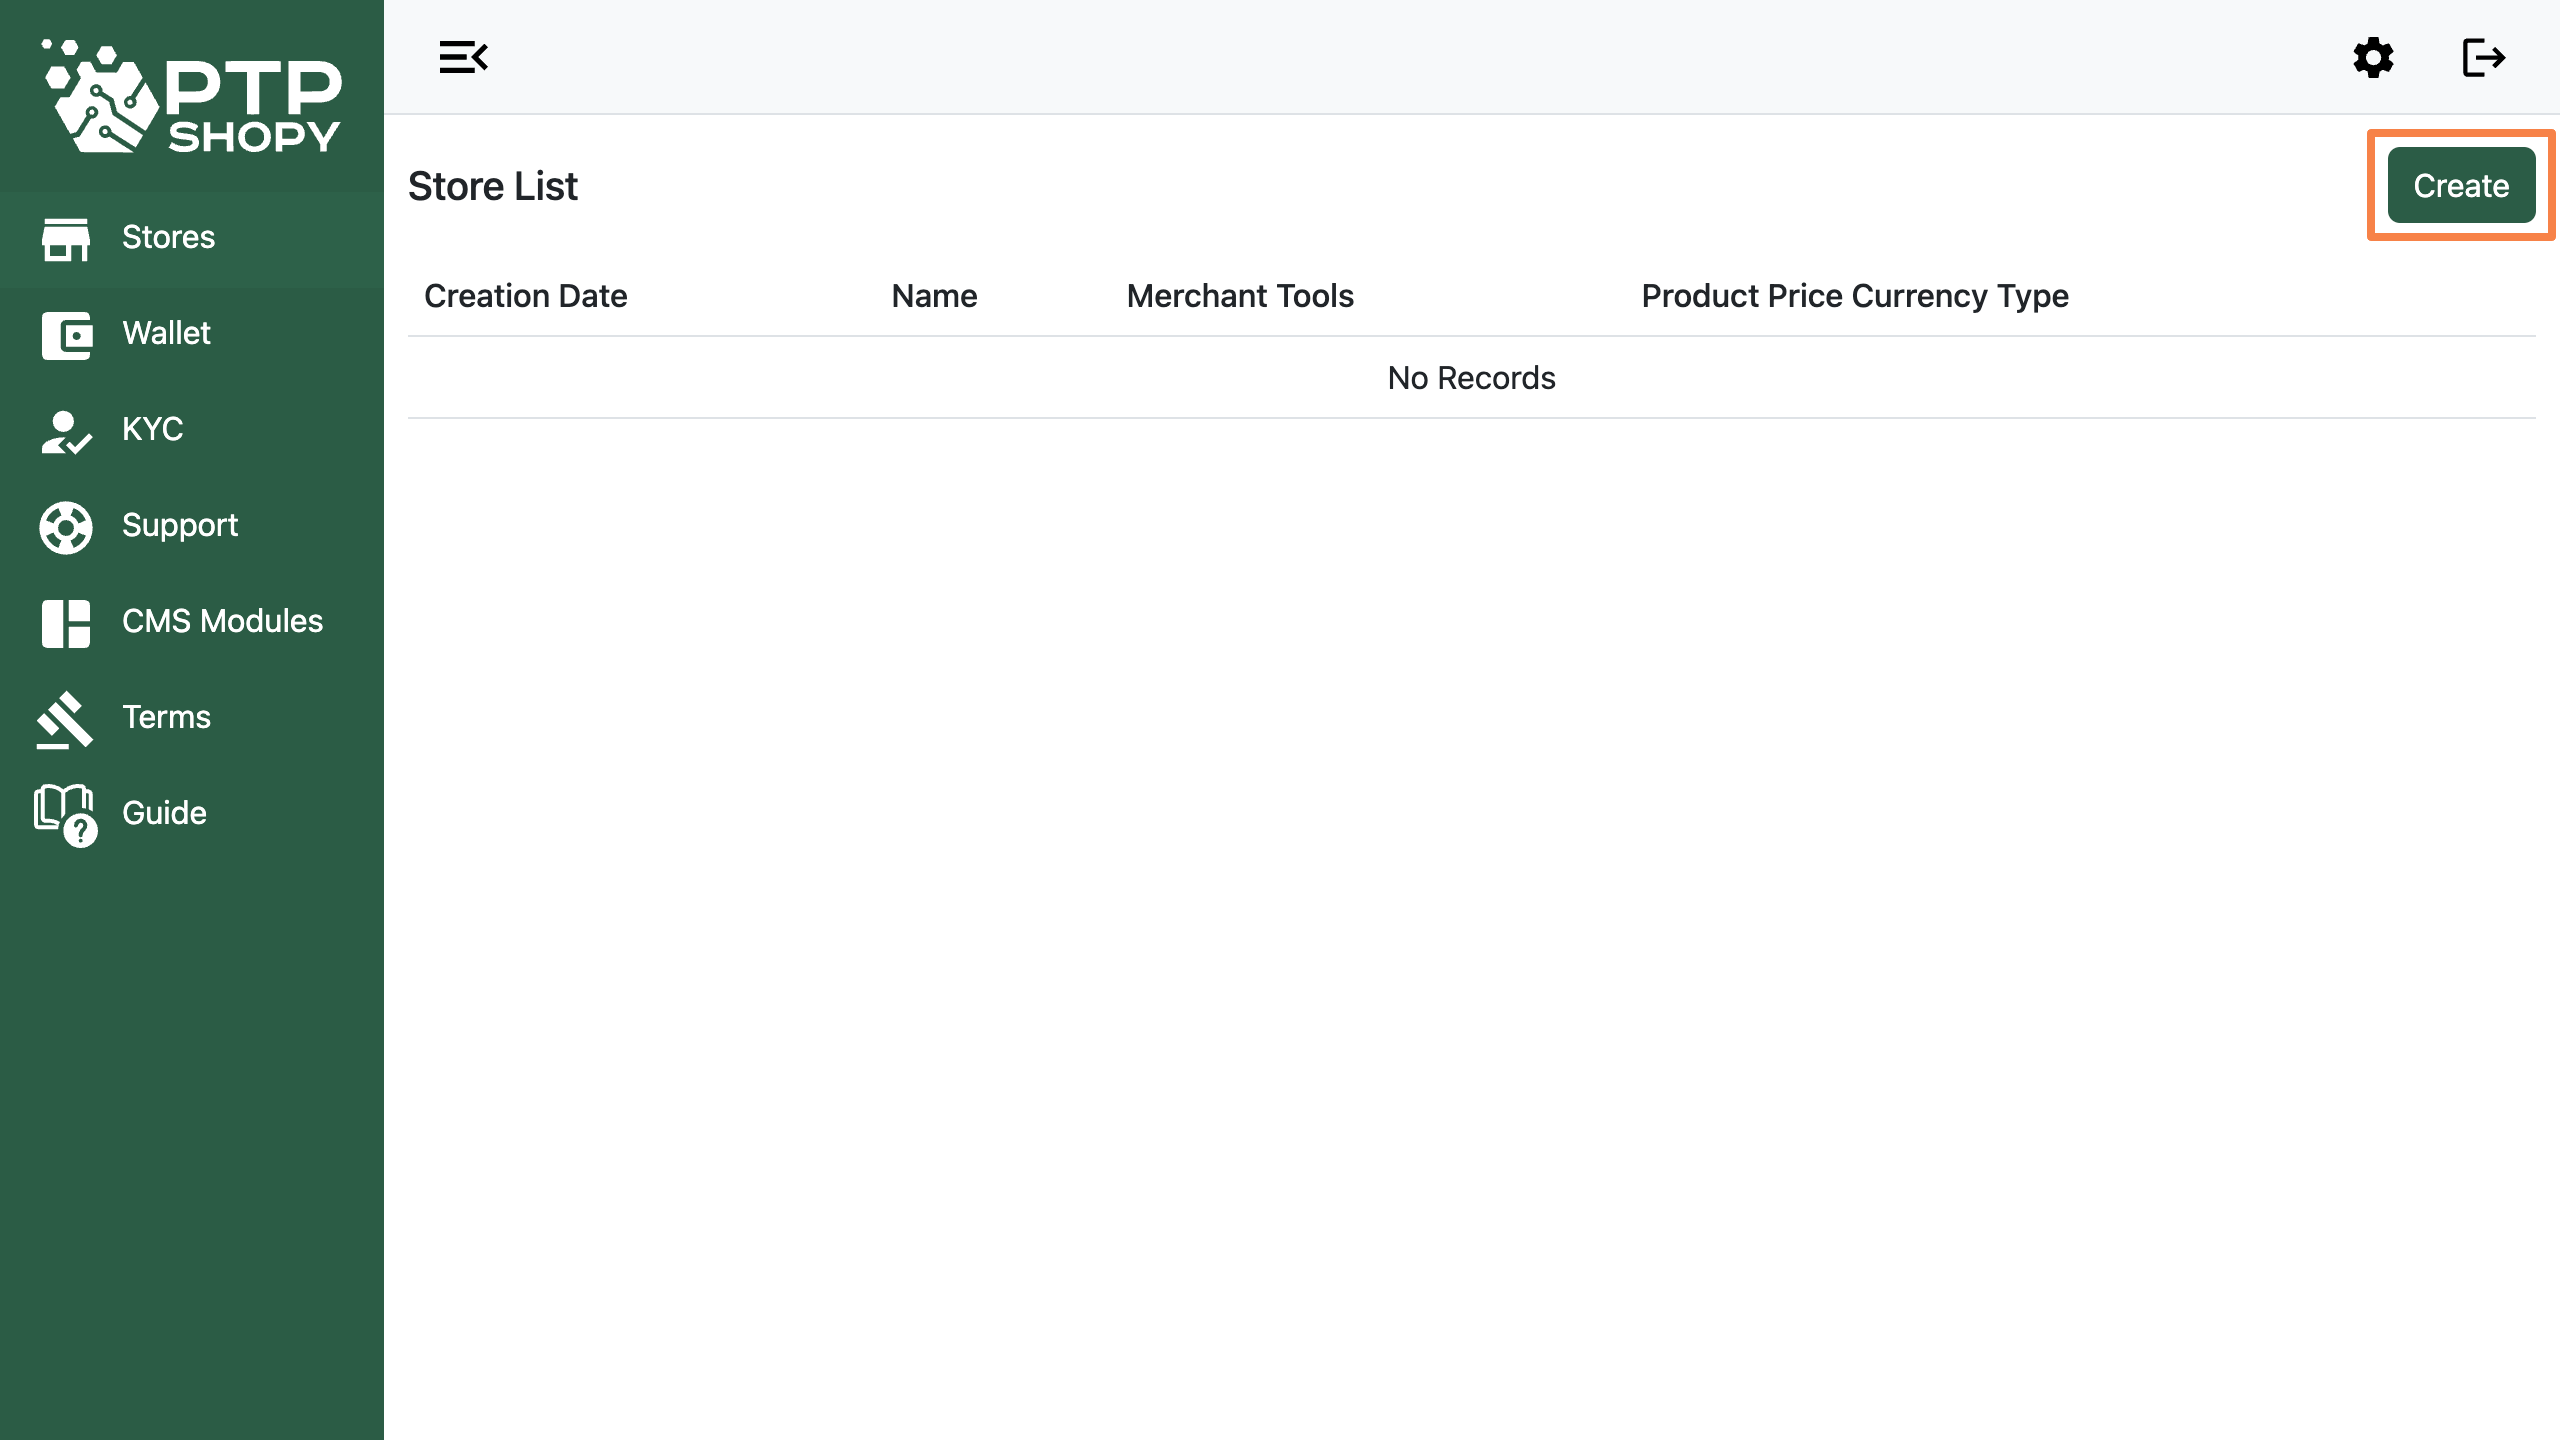
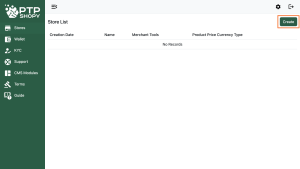
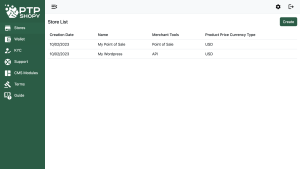
Go to ‘Stores’ https://merchant.ptpshopy.com/stores and click the ‘Create’ button
Or open the url: https://merchant.ptpshopy.com/stores/create
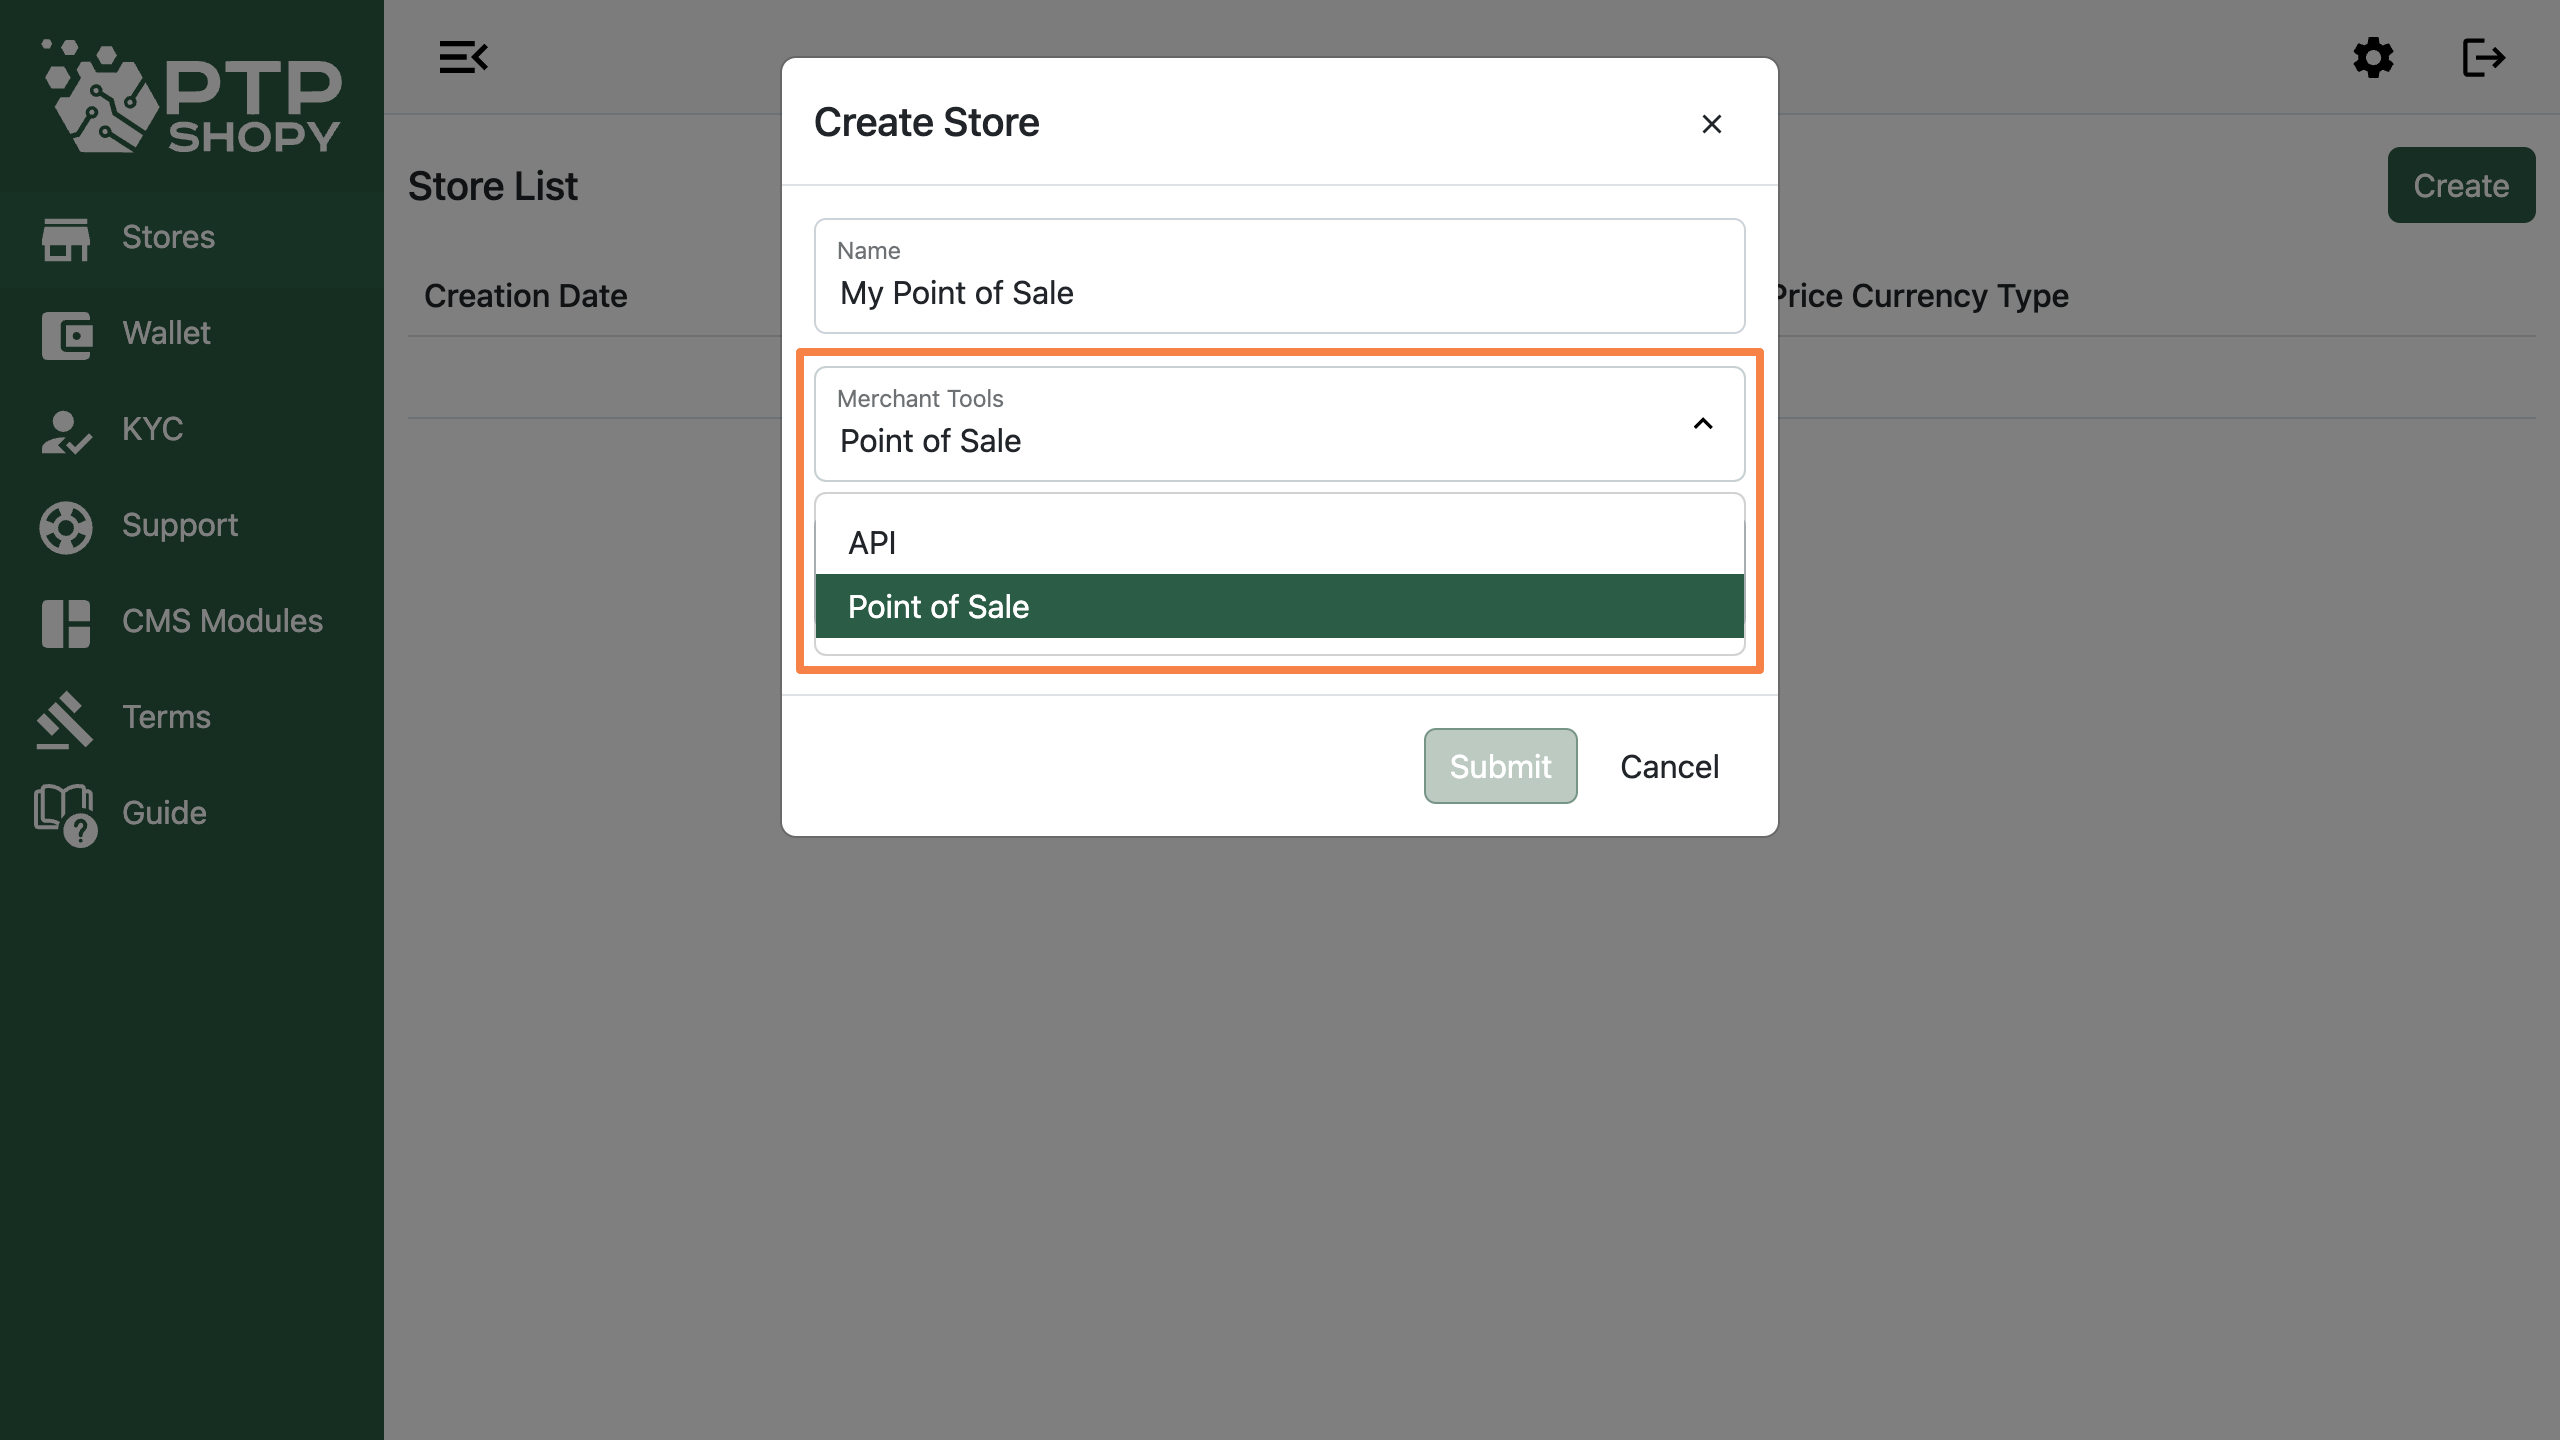
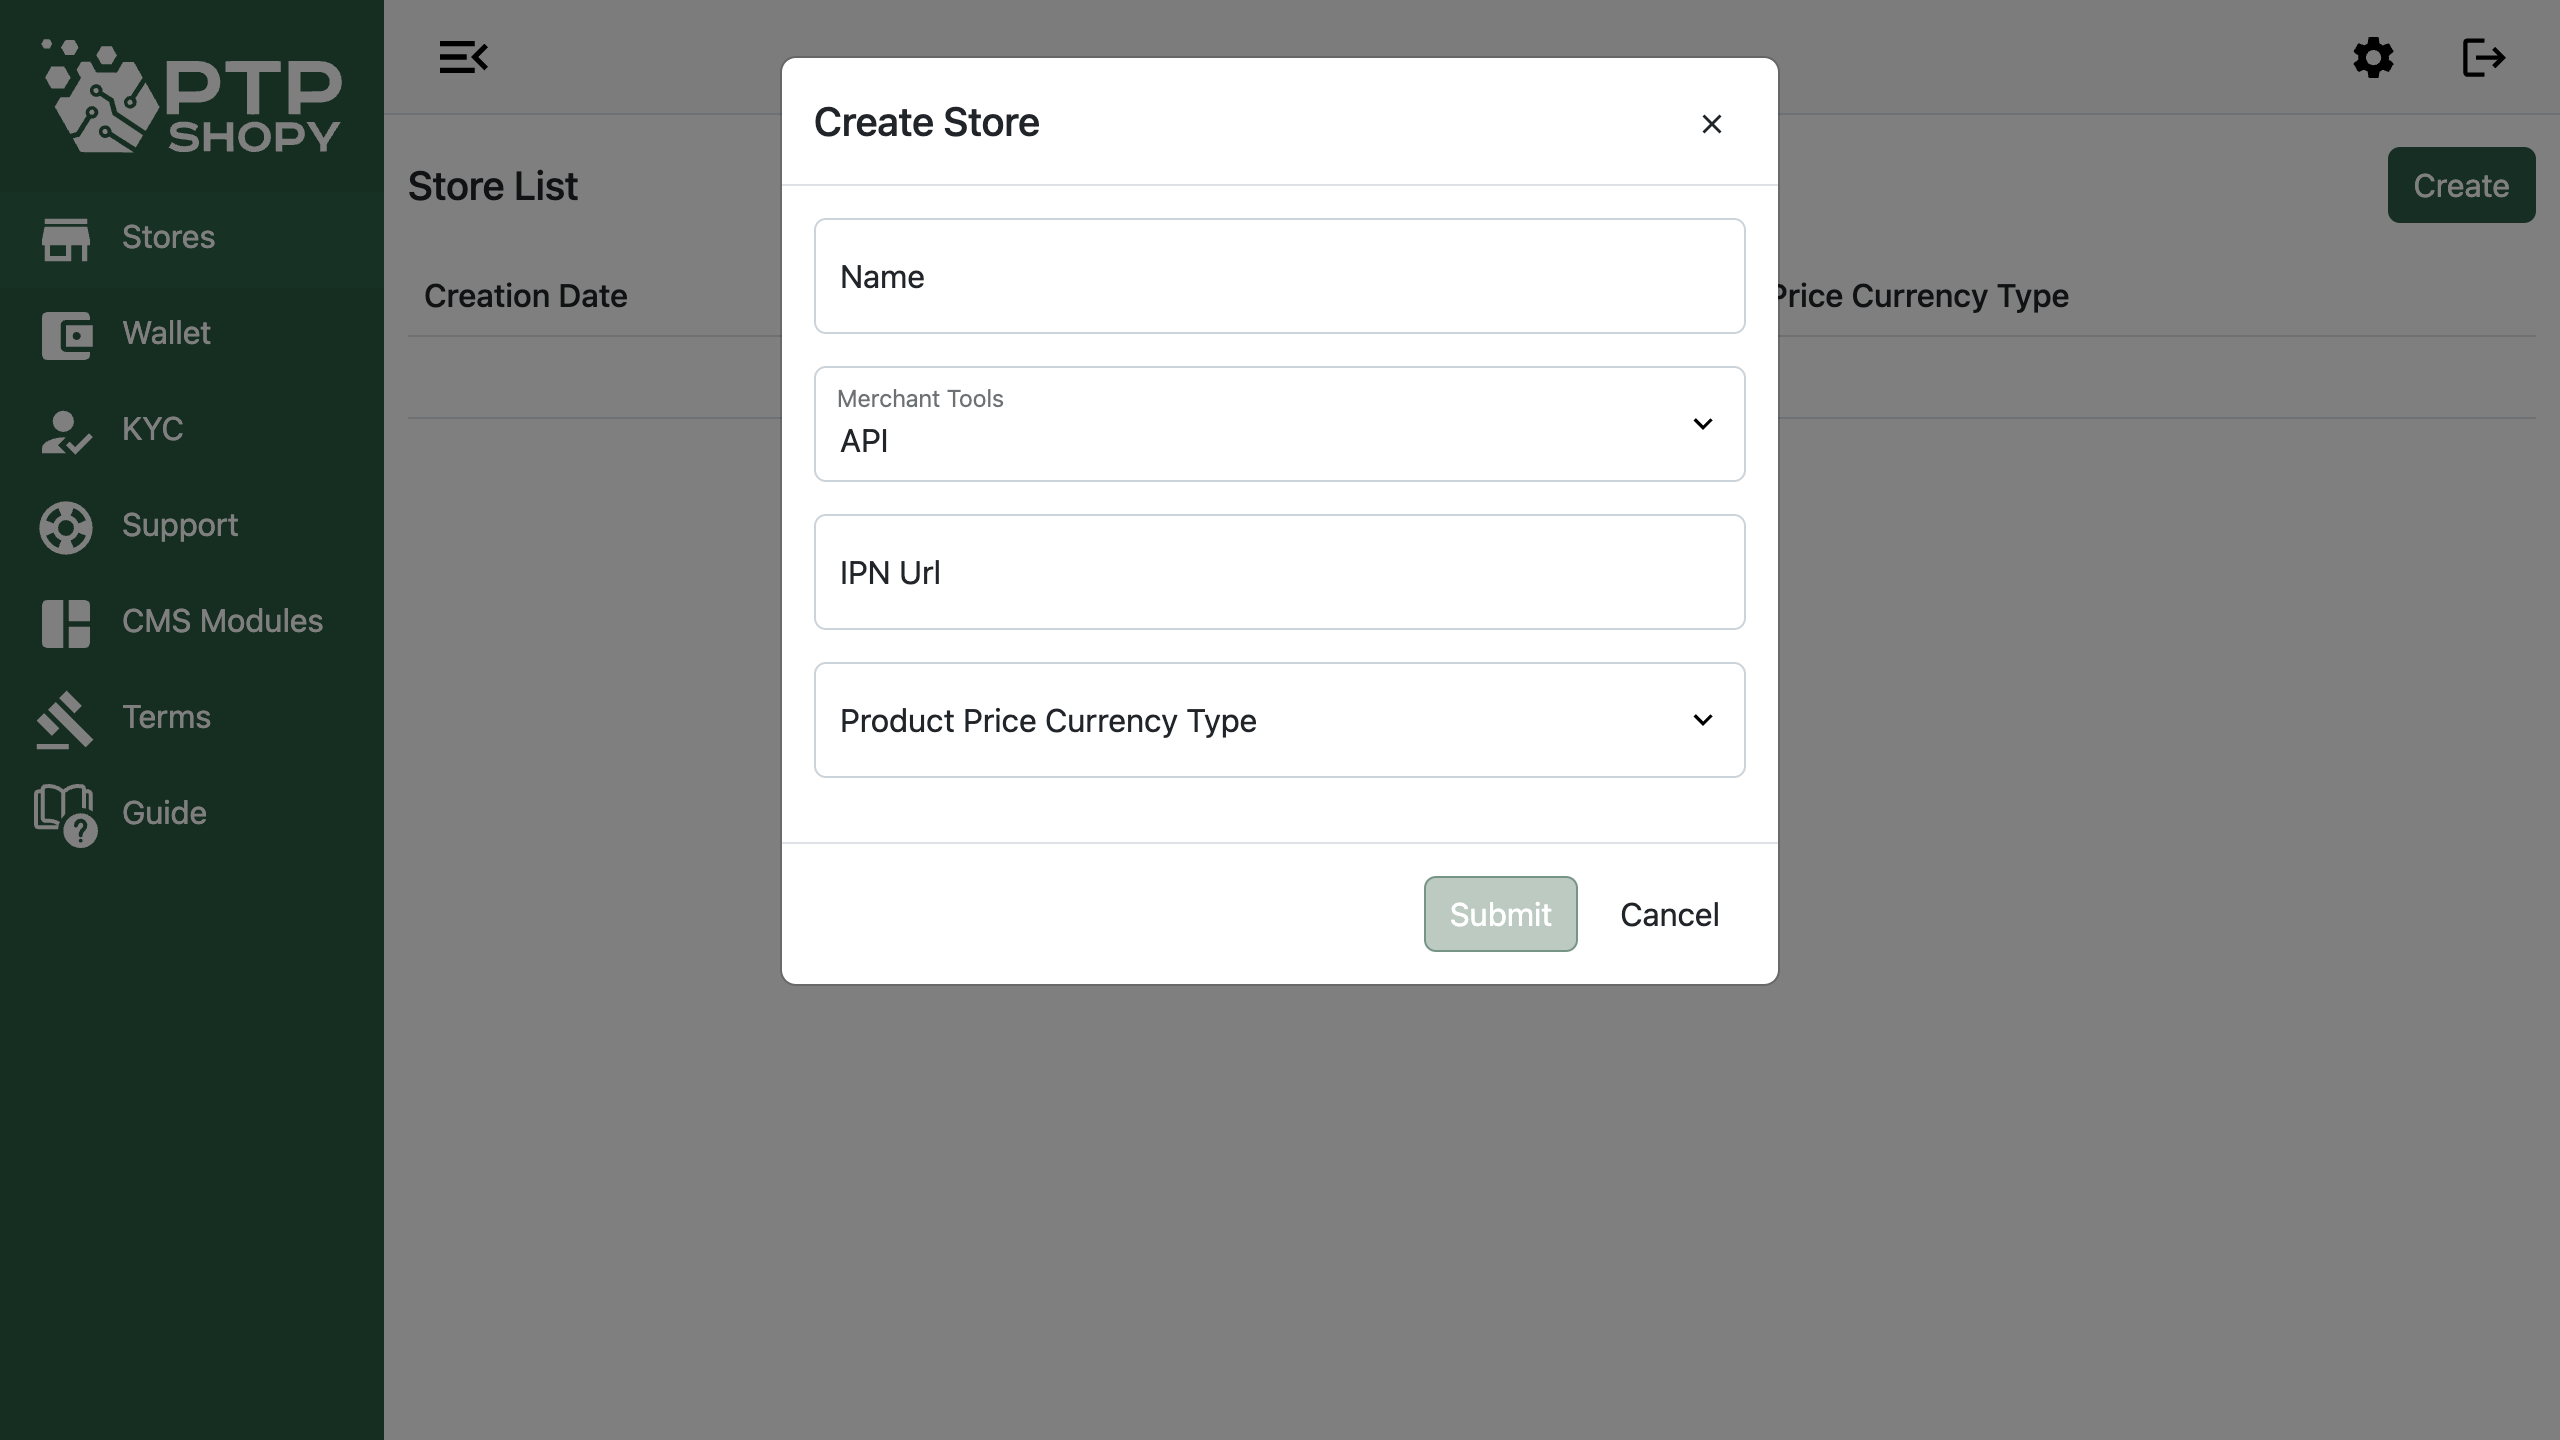
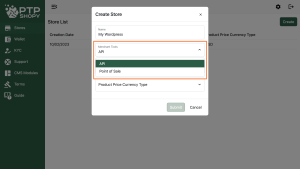
Write the store name and select the merchant tools – Point of Sale
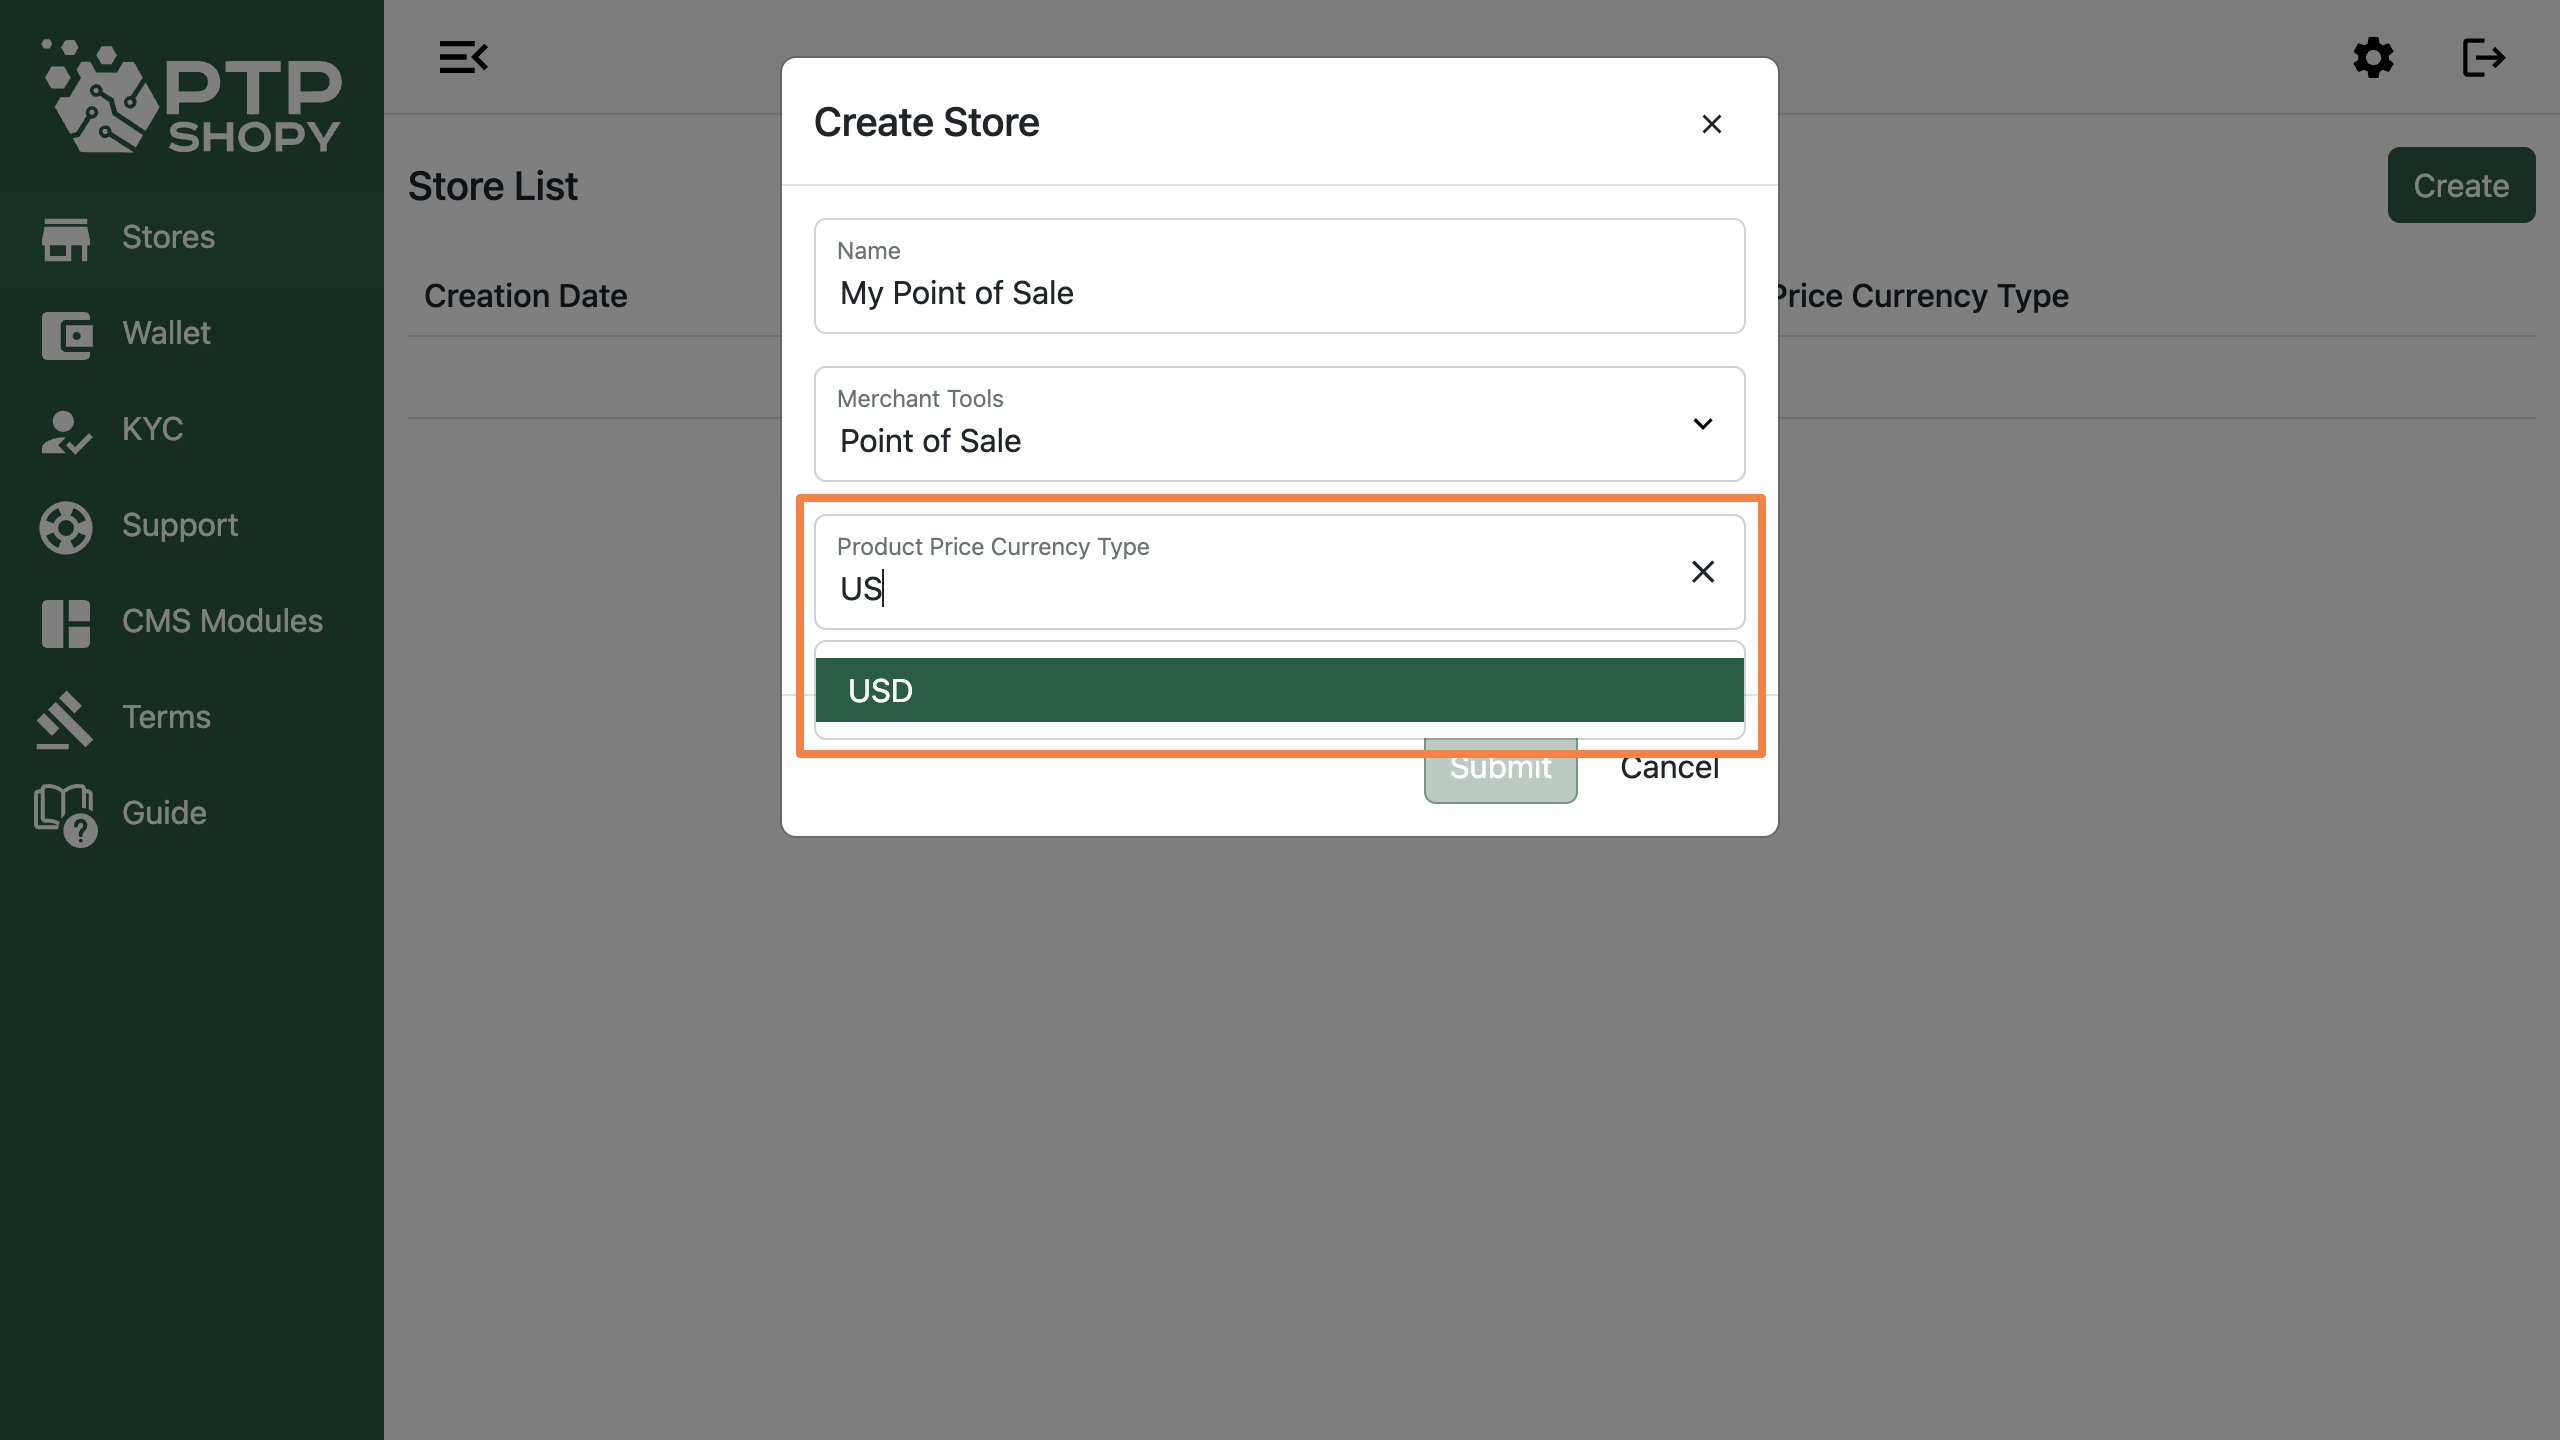
Select your preferred default currency
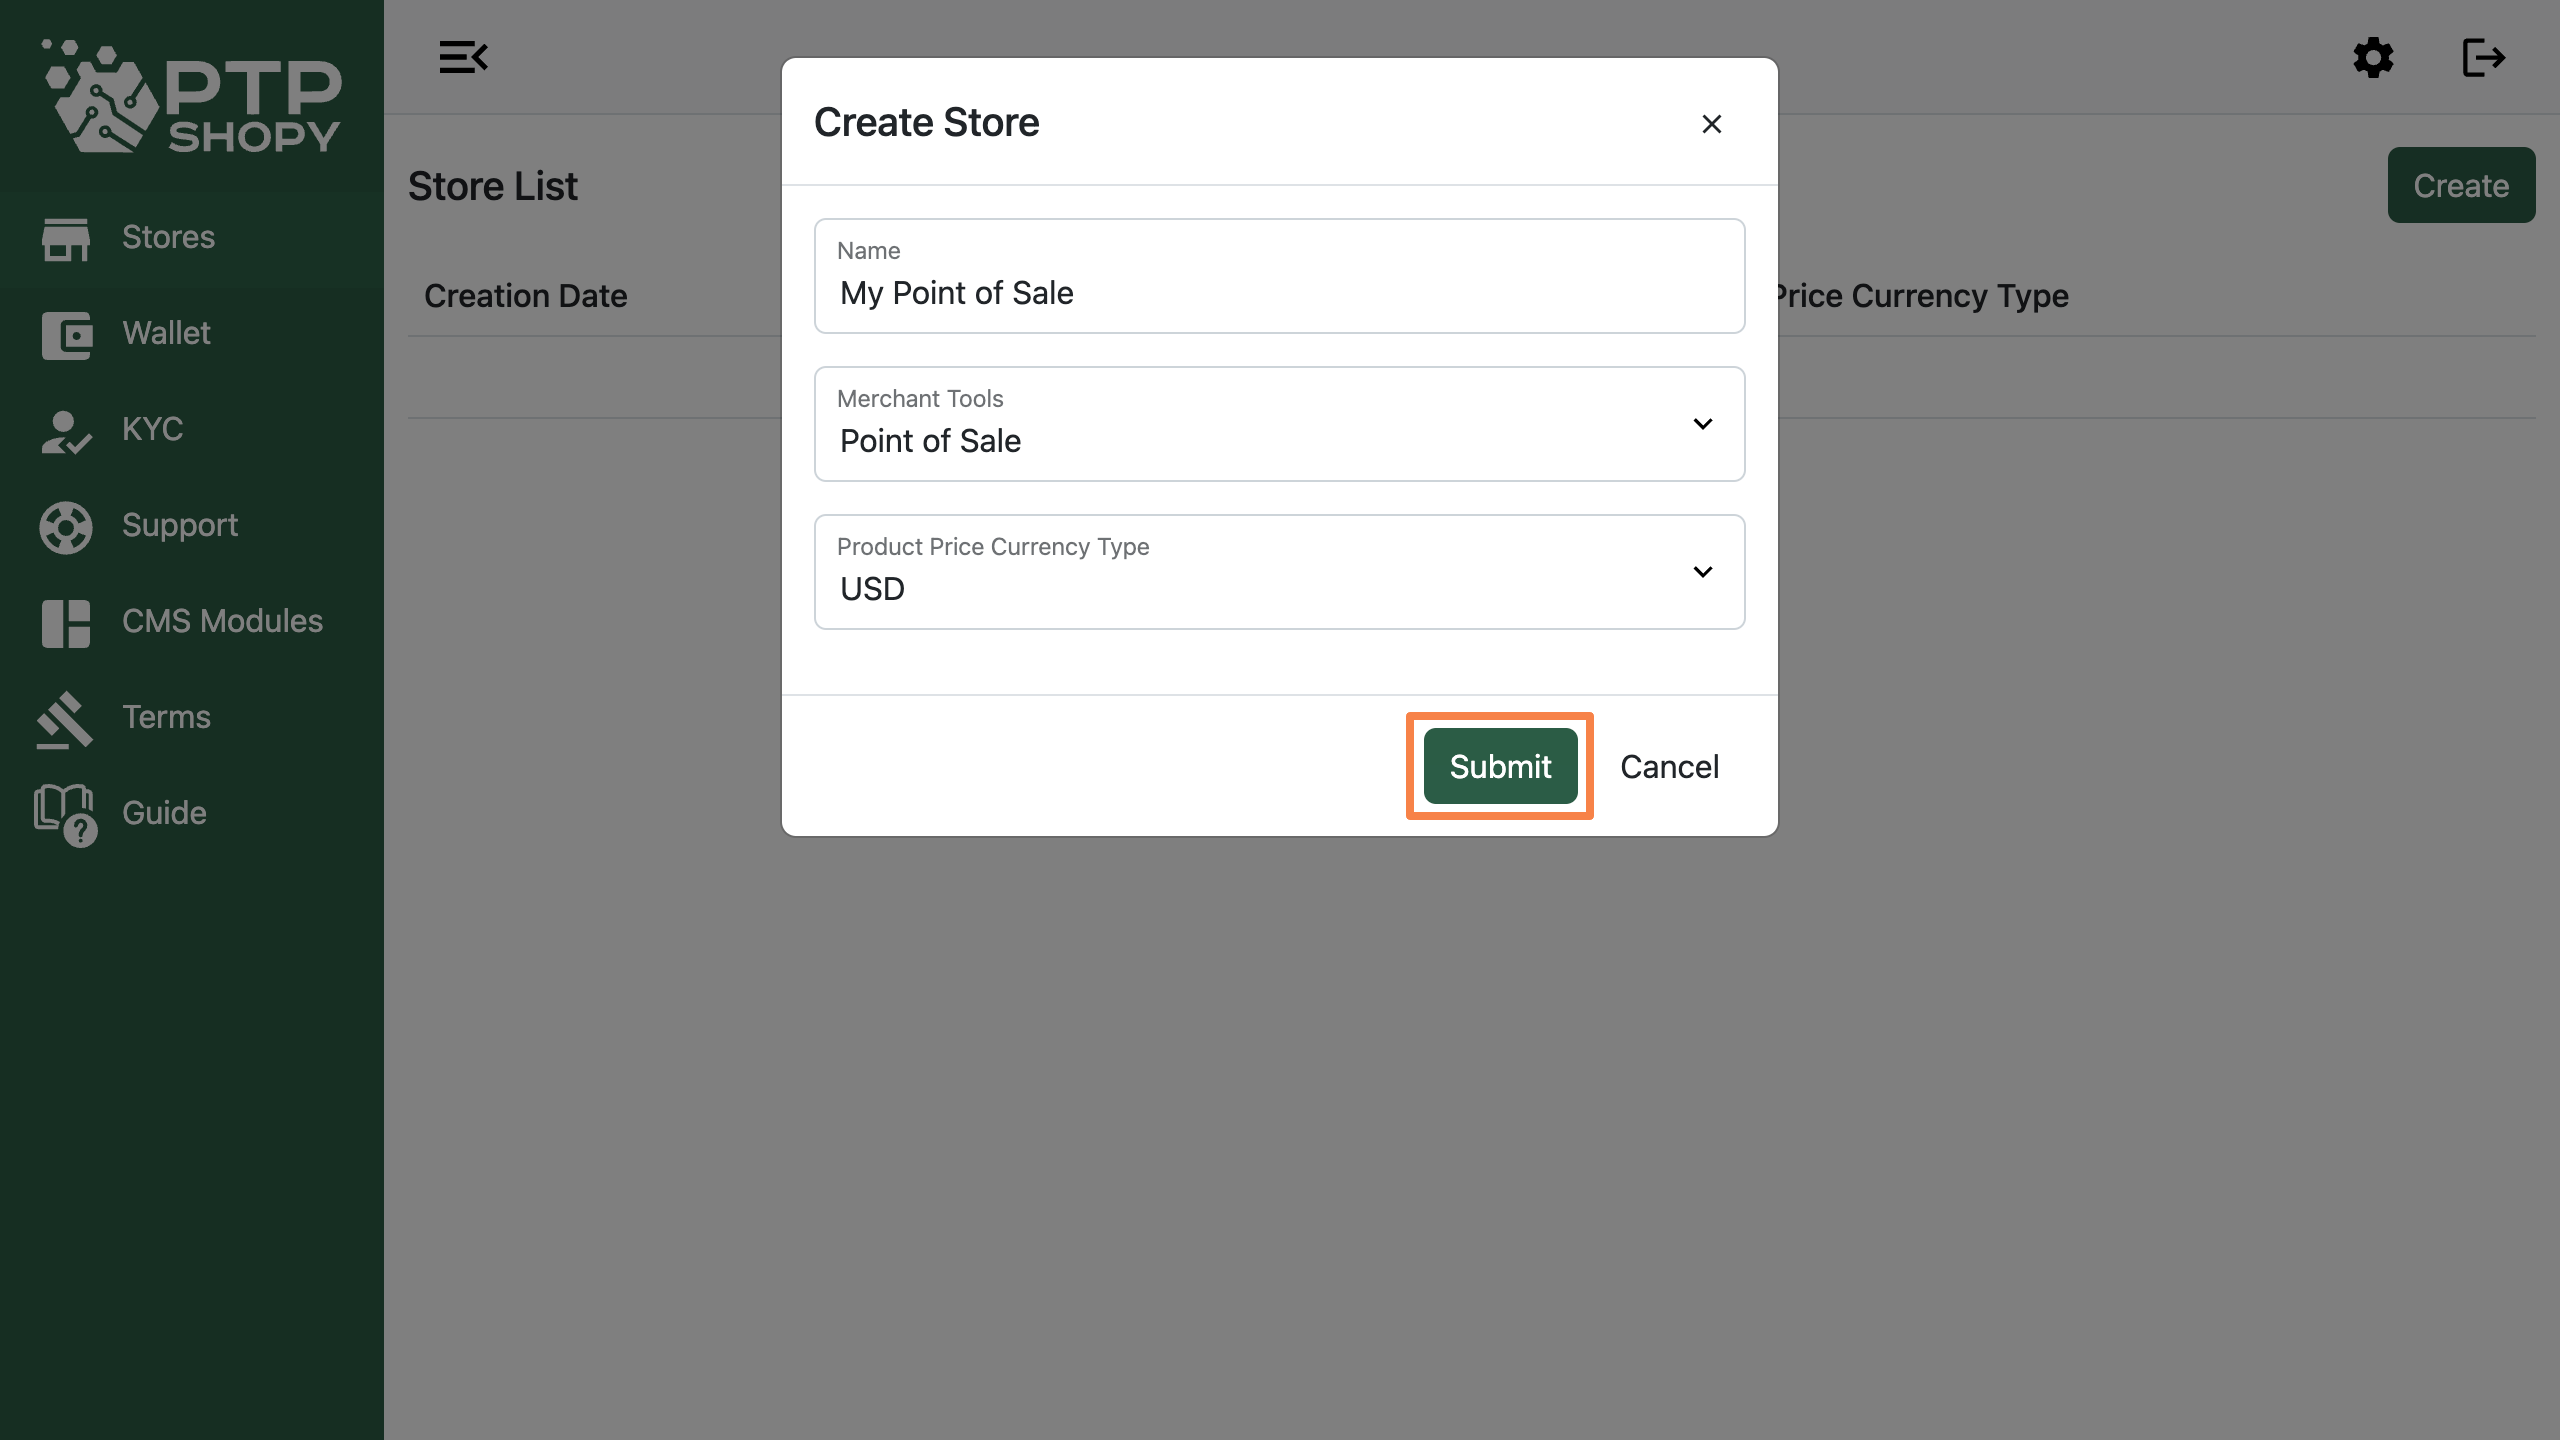
Click the ‘Submit’ button
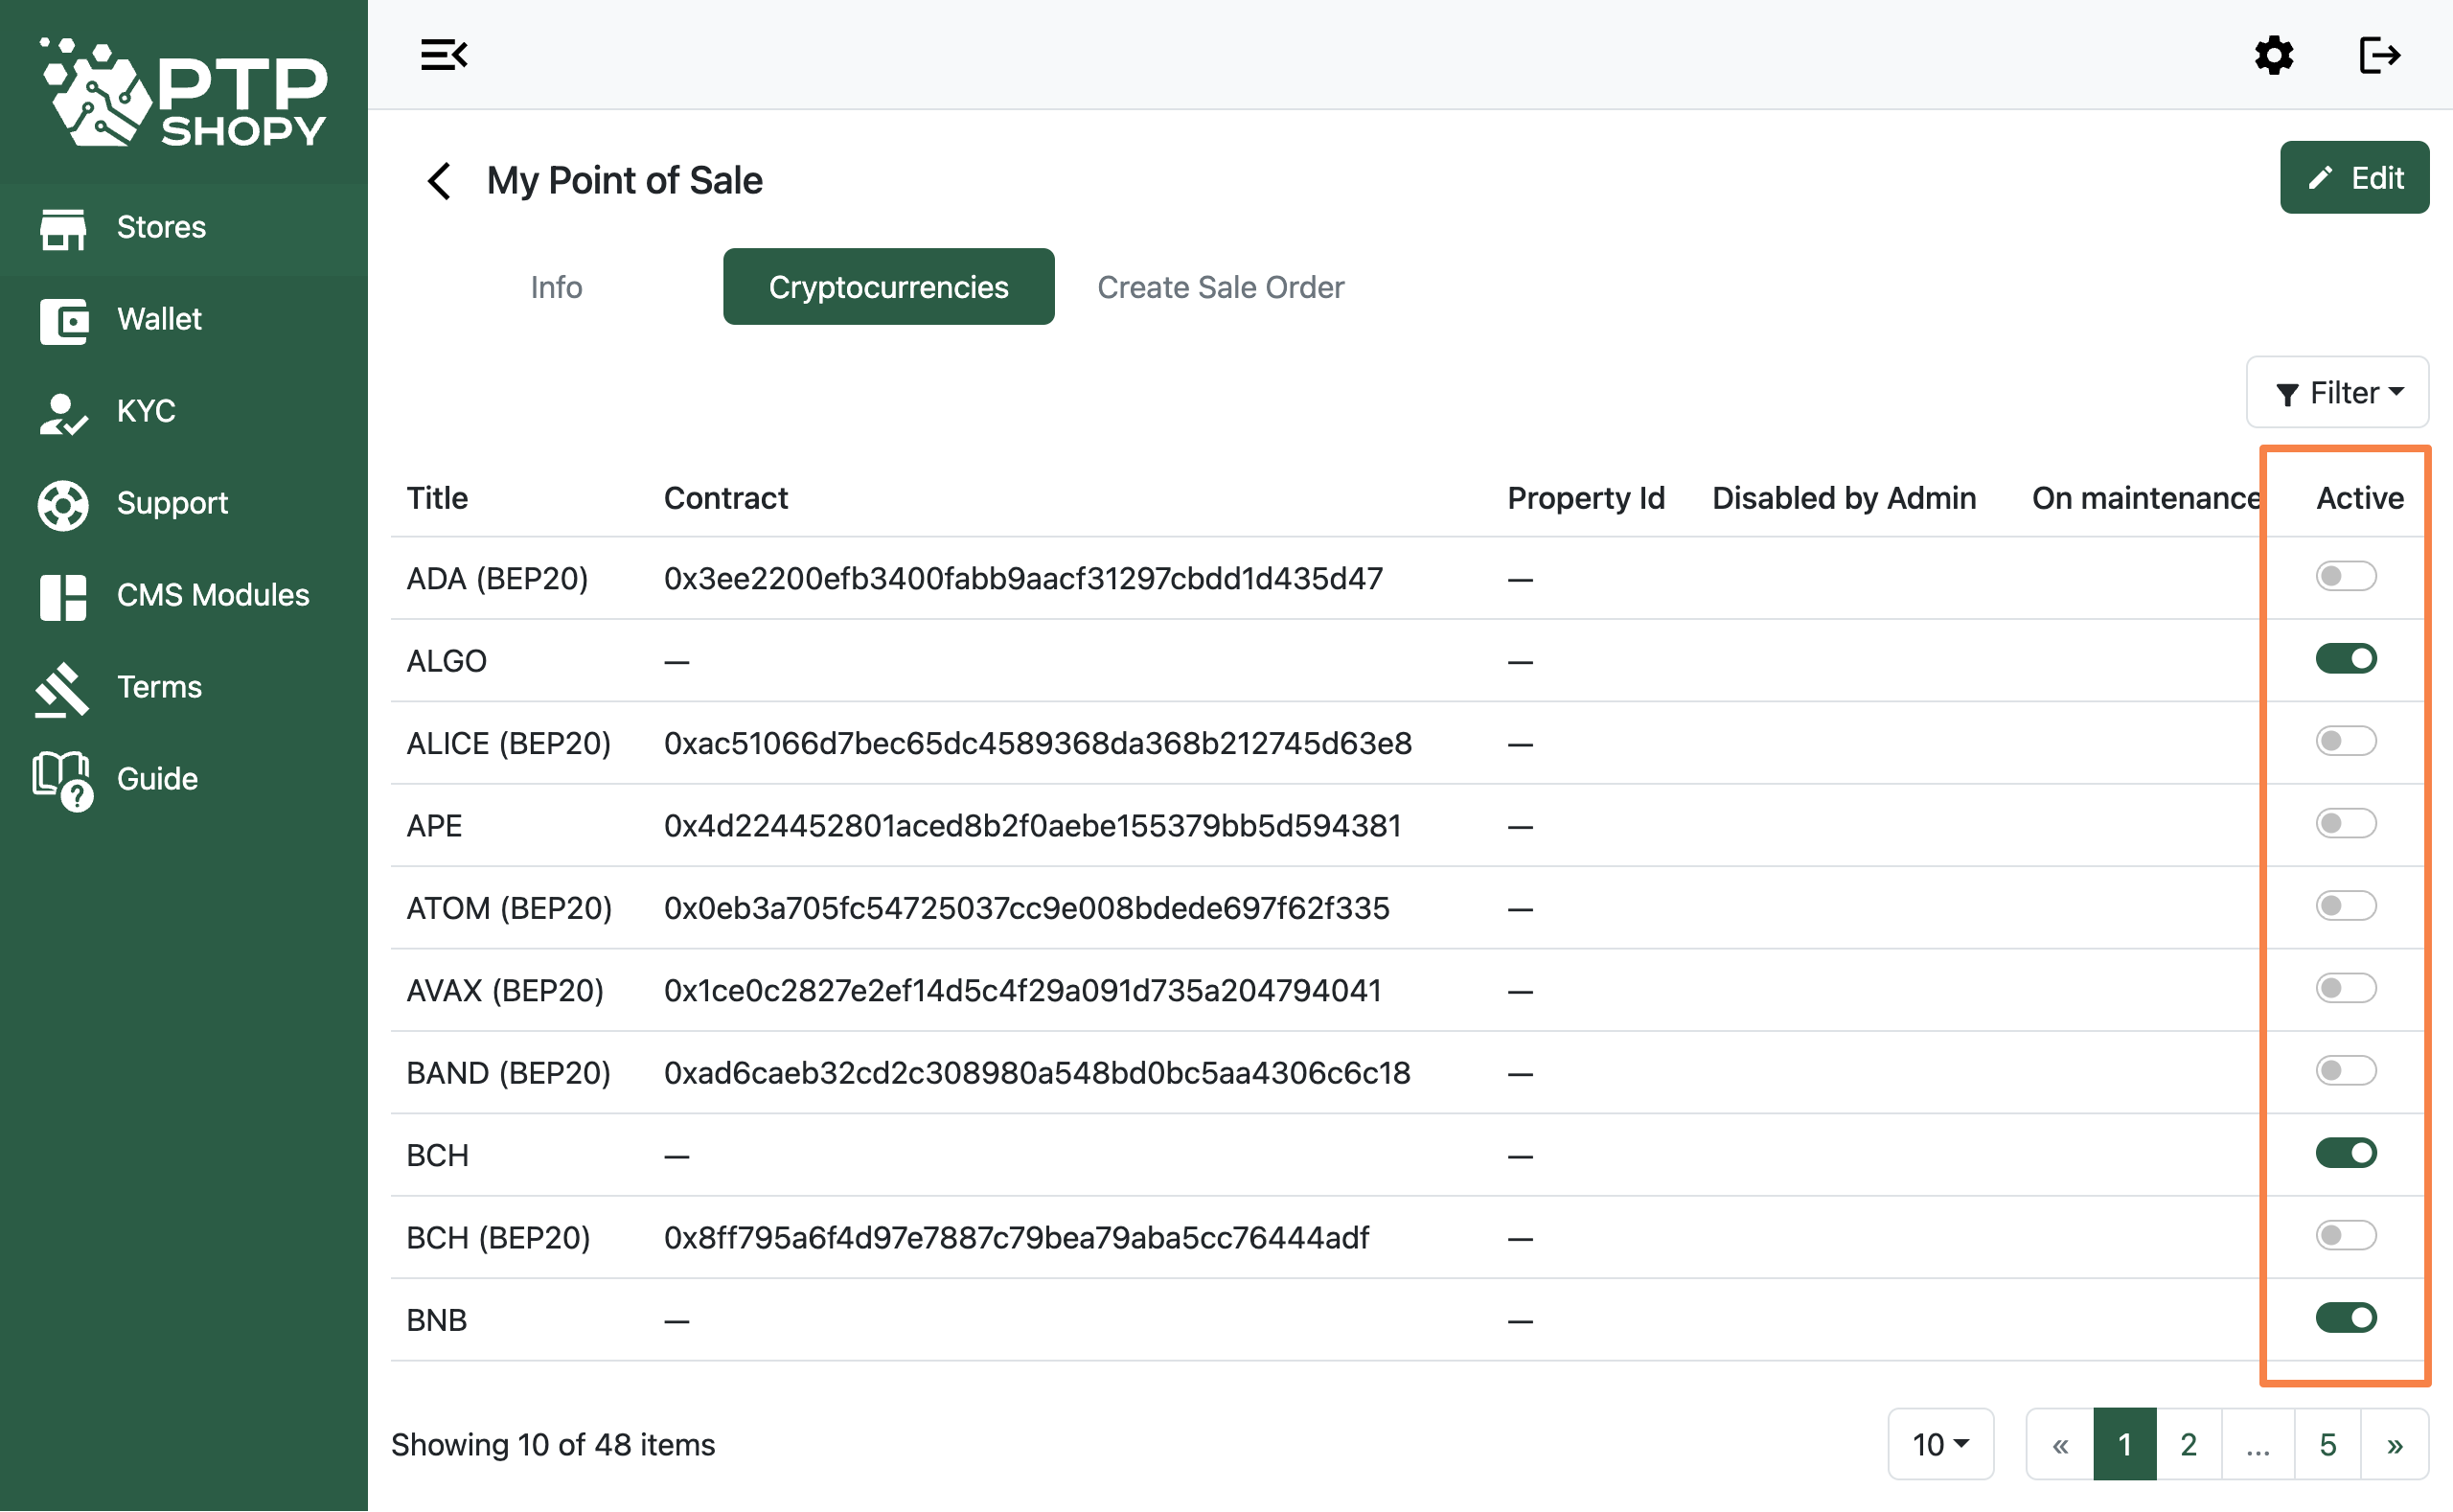
Select ‘Cryptocurrencies’ at the top sub-menu
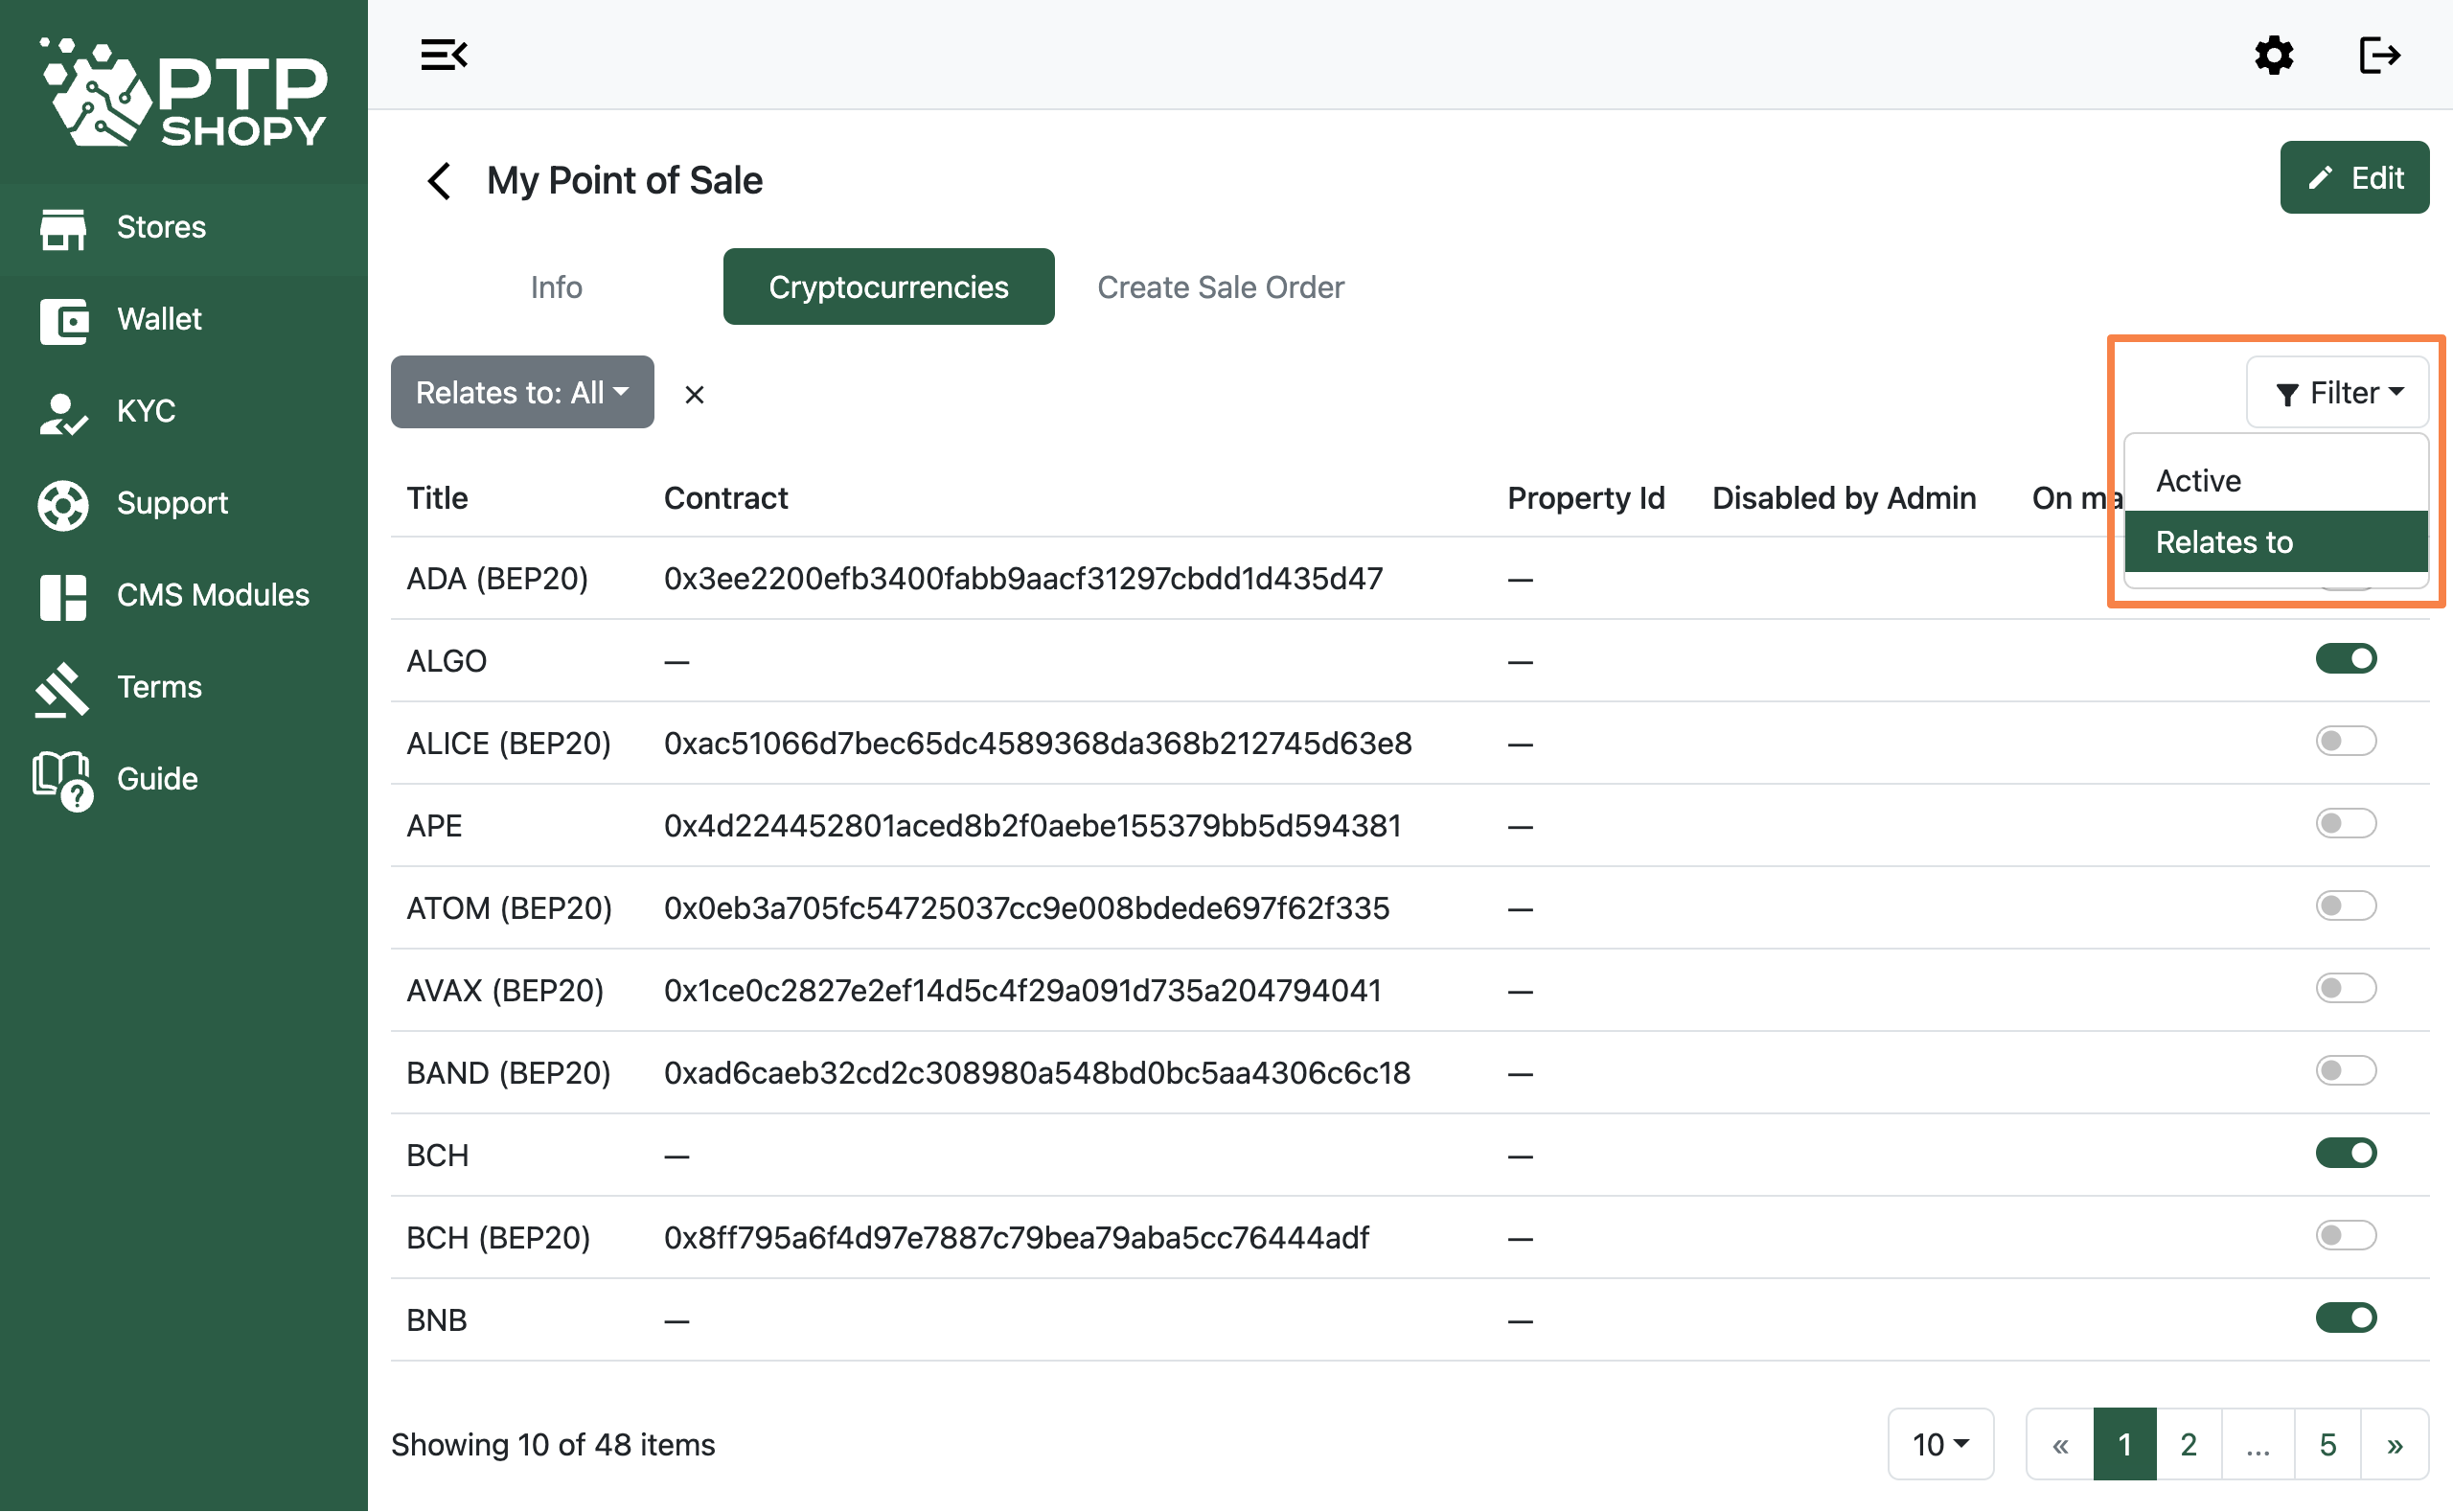

Use the filters to select your currency
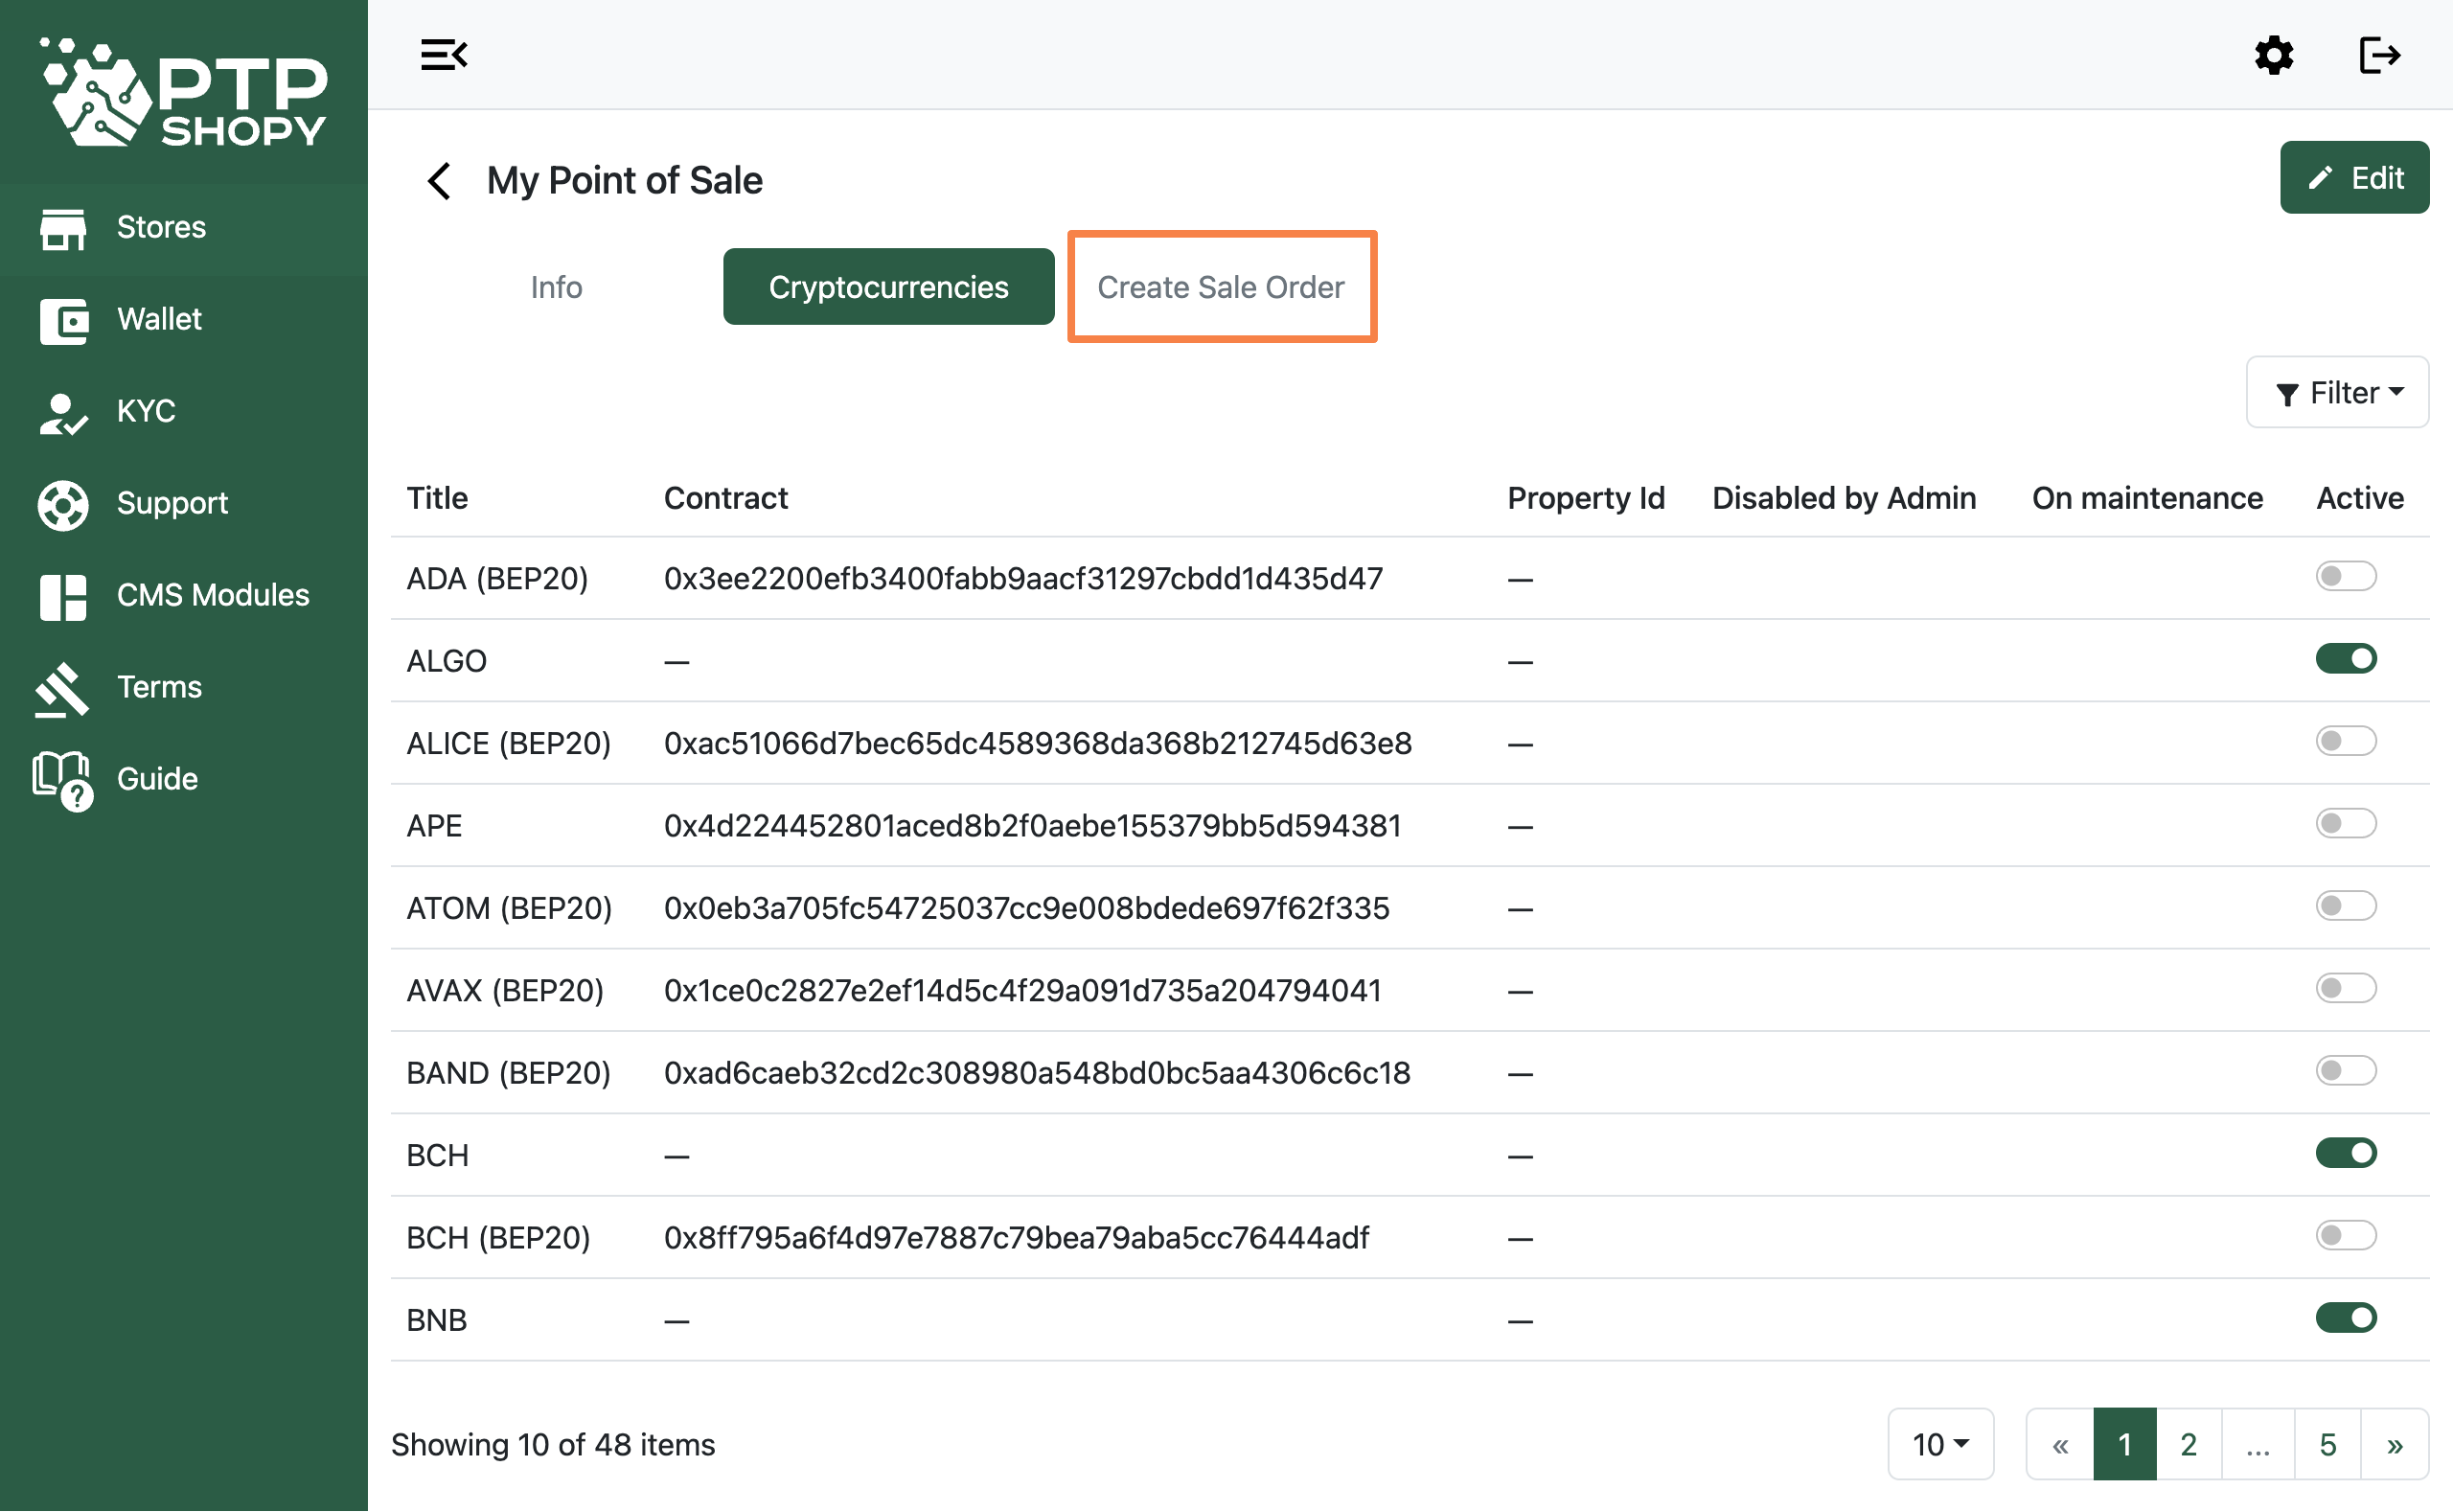
Click ‘Create Sale Order’ in the sub-menu to be redirected to the invoices section
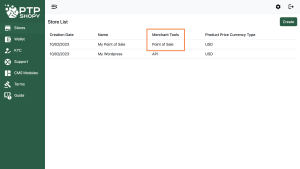
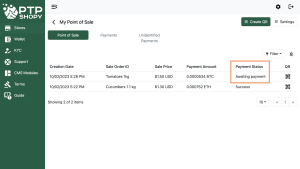
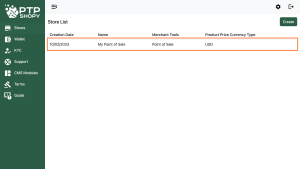
Go to ‘Stores’ https://merchant.ptpshopy.com/stores and select the store with the ‘Merchant Tools’ – Point of Sale
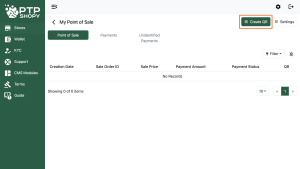
Click the ‘Create QR’ button
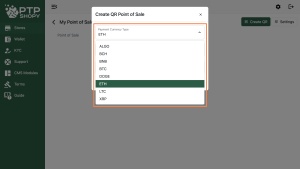
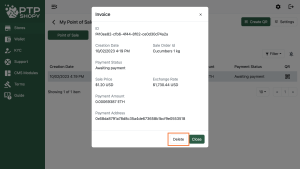
Select your payment currency
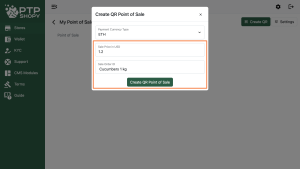
Input the amount, order id (your short description for this order) and click the ‘Create QR Point of Sale’ button
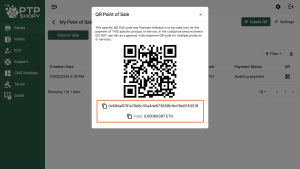
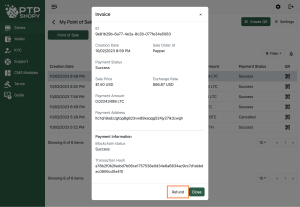
Show the QR Code to the buyer, or send the receive address with the total
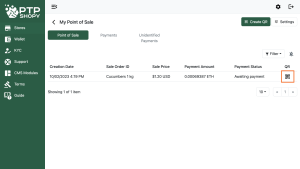
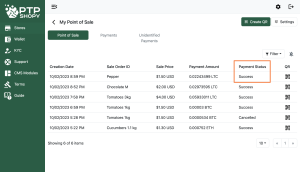
You can open the QR Code from the invoices list
Go to https://merchant.ptpshopy.com/stores and click the ‘Create’ button

Or you can open this url: https://merchant.ptpshopy.com/stores/create
Write the store name and select the merchant tools – API
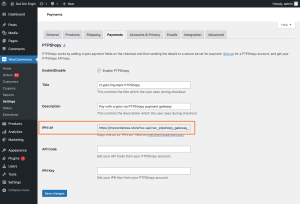
Copy the IPN Url from your site
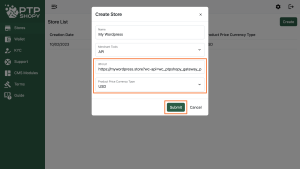
Paste the IPN url into the shown field, select the accepted currency and click the ‘Submit’ button

Select ‘Cryptocurrencies’ in the sub-menu
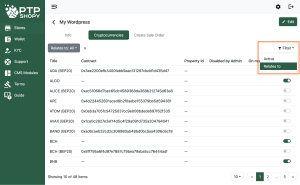

Use the filters to find your currency

Click ‘Info’
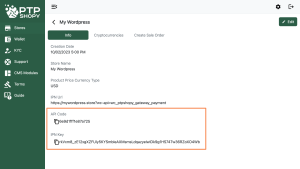
Copy the API Code and IPN Key
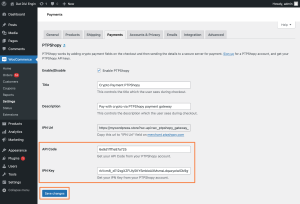
Paste to API Code and IPN Key into the website plugin section and click ‘Save’
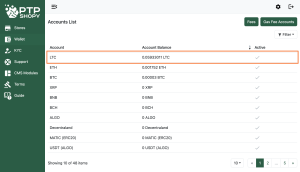
Go to the ‘Wallet’ https://merchant.ptpshopy.com/wallet and click on the currency you want to withdraw
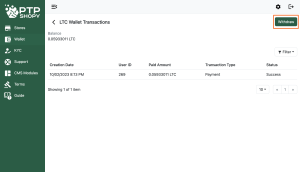
Click the ‘Withdraw’ button
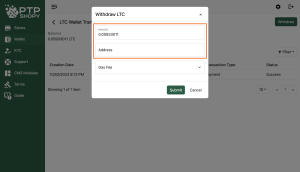
Input the amount you want to withdraw and the receive address
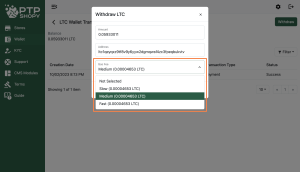
Select ‘Gas Fee’ and choose your preferred fee
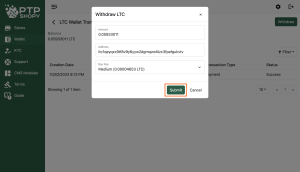
Click the ‘Submit’ button
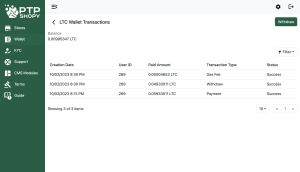
Success!
If you want to withdraw a token, then:

Go to ‘Wallet’ https://merchant.ptpshopy.com/wallet and click on ‘Gas Fee Accounts’
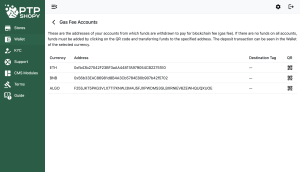
Select the base currency
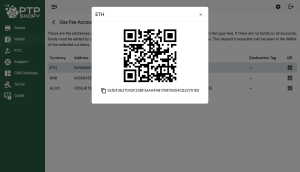
Deposit
Go to ‘Store List’ https://merchant.ptpshopy.com/stores and select your ‘Store’
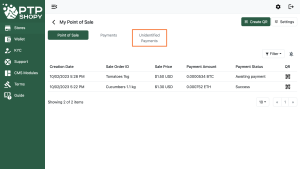
Select ‘Unidentified Payments’ in the sub-menu
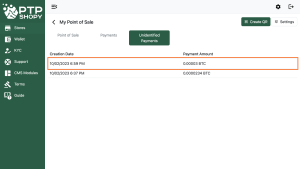
Select unidentified payment
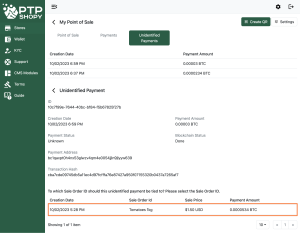
Select the invoice
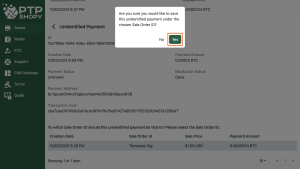
Click on ‘Confirm’